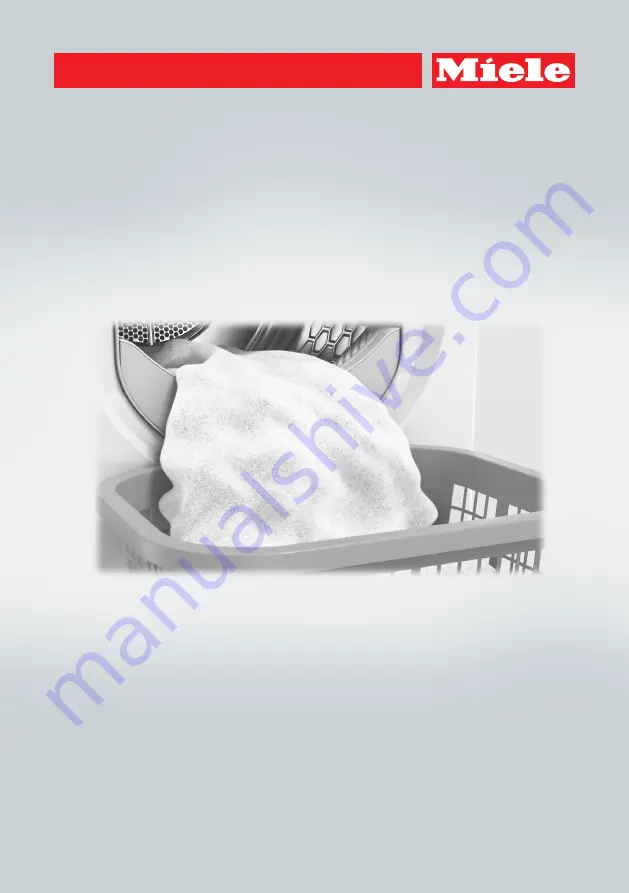
background image

Operating instructions
for heat pump dryers

To avoid the risk of accidents or damage to the appliance it is 

essential

to read these instructions before it is installed and used for the first time.

en-GB

M.-Nr. 10 209 680


Summary of Contents for tmr640wp

Page 1: ...g instructions for heat pump dryers To avoid the risk of accidents or damage to the appliance it is essential to read these instructions before it is installed and used for the first time en GB M Nr 10 209 680 ...

Page 2: ...not therefore dispose of it with your household waste Please dispose of it at your local community waste collection recycling centre Ensure that it presents no danger to children while being stored for disposal Energy saving tips To avoid unnecessarily long drying times and high consumption of energy Make sure that your laundry is thoroughly spun before drying The higher the spin the greater the s...

Page 3: ...4 Garment care label symbols 25 Laundry care when drying in a tumble dryer 25 2 Load the tumble dryer 26 3 Select a programme and start it 27 Select a programme 27 Select any options or delay start if required 30 Start the programme 30 4 Remove the laundry 31 End of programme Anti crease 31 Remove the laundry 31 Options 32 Gentle tumble 32 Freshen up 32 Auto load control 32 Anti crease 32 Buzzer 3...

Page 4: ...nce flacon 56 Problem solving guide 58 Messages in the display 58 Unsatisfactory drying results 61 Other problems 62 Bottom right grille 64 Fluff filter in the condensed water container 65 Steam smoothing spray jet 66 After sales service 67 Repairs 67 Optional accessories 67 Guarantee U K 67 Guarantee Other countries 67 Installation and connection 68 Front view 68 Rear view 69 Transporting the dry...

Page 5: ...3 Technical data 85 Settings menu 86 Calling up settings 86 Language 86 Time of day 87 Drying levels 87 Extended cool down 87 Airways indicator 87 Buzzer volume 88 Keypad tone 88 Conductivity 88 Total consumption 88 Code 89 Display brightness 89 Display switch off 89 Appliance switch off 90 Memory 90 Anti crease 90 Delay start 90 ...

Page 6: ... that new users are familiar with the content Pass them on to any future owner Correct application This tumble dryer is intended for use in domestic households and similar working and residential environments This tumble dryer is not intended for outdoor use It must be used only as a domestic appliance to dry items which have been washed in a water solution and which are marked on the manufacturer...

Page 7: ... shown how to use it safely and recognise and understand the consequences of incorrect operation Children must not be allowed to clean or maintain the tumble dryer unsupervised Please supervise children in the vicinity of the tumble dryer and do not let them play with it Technical safety Before setting up the tumble dryer check it for any externally visible damage Do not install or use a damaged t...

Page 8: ...are a fire hazard If the electrical connection cable is faulty it must only be replaced by a Miele authorised service technician to protect the user from danger Unauthorised repairs could result in unforeseen dangers for the user for which Miele cannot accept liability Repairs should only be undertaken by a Miele approved service technician otherwise any subsequent damage will not be covered by th...

Page 9: ...kes place The humming noises caused by the heat pump are normal and do not impair the efficient functioning of the dryer The refrigerant is not flammable or explosive In general it is not necessary to leave the dryer standing for any length of time before it is connected to the mains provided it has been transported and installed correctly see Installation and connection If it has not been transpo...

Page 10: ...his would hinder a sufficient flow of air to the dryer Make sure the dryer door can be opened without hindrance after installation Correct use The maximum load for this tumble dryer is 9 0 kg dry weight The maximum recommended loads for individual programmes are given in the Programme chart To prevent the risk of fire do not connect the tumble dryer via a controllable socket e g a timer or a peak ...

Page 11: ...se might ignite when heated even after they have been removed from the dryer at the end of the programme Items e g mops and floor cloths which have been treated with inflammable cleaning agents or which contain residues of acetone alcohol benzene petrol kerosene stain remover turpentine wax and wax remover or other chemicals Items which have been splashed with hair lacquer hair spray nail varnish ...

Page 12: ...vent the risk of fire the following textiles must not be dried in this tumble dryer Items which have been cleaned using chemicals e g professional dry cleaning agents Items which contain a large proportion of rubber foam rubber or rubber like materials For example products made from latex foam rubber shower caps waterproof textiles rubberised articles and items of clothing and pillows with foam ru...

Page 13: ...he dryer or hiding things in it Pets or other small animals climbing into it The tumble dryer must not be used without fluff filters or with damaged fluff filters or with a damaged plinth filter This would cause an excessive build up of fluff which in turn would cause a fault The fluff filters must be cleaned after every drying cycle The fluff filters and the plinth filter must be thoroughly dried...

Page 14: ...ached if you hang it in a sink or basin to avoid the hose slipping and the water causing damage Condensed water is not drinking water It can cause health problems in both people and animals if consumed Always keep the area around the tumble dryer free of dust and fluff Dust drawn into the tumble dryer can cause blockages in the heat exchanger over time The tumble dryer must not be hosed down ...

Page 15: ...ntact with the skin wash the skin thoroughly with soap and water comes in contact with the eyes rinse the eyes with clean water for at least 15 minutes is swallowed rinse out the mouth thoroughly with clean water Seek medical advice in the case of contact with the eyes or if fragrance has been swallowed If fragrance which has leaked out of a flacon comes in contact with clothing change the clothin...

Page 16: ...e dryer can be combined with a Miele washing machine in a washer dryer stack The appropriate WTV stacking kit available to order to match your tumble dryer and washing machine is required If you order a plinth for this tumble dryer available from Miele as an optional accessory depending on country make sure it is the correct one Miele cannot be held liable for damage caused by non compliance with ...

Page 17: ...n button For selecting the duration for timed drying programmes e Delay start button For selecting delay start f Option buttons Various options can be added to the programmes g Programme selector For selecting the programme h Optical interface For service technicians i button For switching the tumble dryer on and off To save energy the tumble dryer will switch off automatically 15 minutes after th...

Page 18: ... also go out if a selection is not confirmed with OK EcoFeedback sensor See EcoFeedback for more information Settings The Settings menu is opened by touching the and sensors at the same time Settings can be changed to alter the dryer s electronics to suit different requirements Please refer to Settings menu at the end of this booklet for more information The following programmes are selected using...

Page 19: ...rogramme will remain dark with the following programmes Woollens handcare Silks handcare Cool air Warm air Basket programme Estimated time remaining After the programme has started the estimated programme duration will appear in the display in hours and minutes The programme duration displayed for programmes with a selectable drying level may vary or jump The following factors among others affect ...

Page 20: ... to show you which option you have reached Identifying options selected There will always be one value selected This will have a tick beside it The other values are deselected automatically Drying level Normal Slightly dry Hand iron The sensor highlights the next value and the sensor highlights the previous value The OK sensor is used to confirm selection of the highlighted value If no selection i...

Page 21: ... transported as described in Installation and connection then it must be left to stand for at least 1 hour before it is connected to the electricity supply When the tumble dryer is switched on the welcome display Miele Willkommen will appear briefly Setting the language You will be asked to select the language you want for the display It is possible to change the language at any time via Settings ...

Page 22: ...ime of day will then appear at the top right hand side of the display each time you select a programme Completing the procedure for using for the first time outlined in these instructions Follow the instructions in the operating instruction booklet for setting the machine up for the first time Information Confirm by touching the OK sensor Read 1 Notes on correct laundry care and 2 Load the tumble ...

Page 23: ...tion to increase which in turn will increase energy consumption 1 Estimate After selecting a programme touch the EcoFeedback sensor For a few seconds bars which indicate the estimated consumption will appear Energy The more bars visible the higher the energy consumption The estimate will vary depending on the programme and any options selected 2 Actual consumption Touch the EcoFeedback sensor You ...

Page 24: ... before drying Make sure that any objects e g detergent dosing balls lighters etc have been removed from the laundry They could melt or explode and cause damage to the dryer or the laundry See Warning and Safety instructions for further information Loading or using the tumble dryer incorrectly could cause a fire Sort the laundry according to the type of fibre and weave size garment care label symb...

Page 25: ...iron if the laundry e g table linen requires further processing after drying Down filled garments have linings which have a tendency to shrink depending on the quality of the item They can be partially dried using the Gentle smoothing programme Pure linen should only be machine dried if specified as suitable by the manufacturer on the care label as the surface of the fabric may otherwise become ro...

Page 26: ...e door Pull the door open at the side with the orange marker Unfold the laundry and load loosely into the drum Do not overload the drum Overloading can cause unnecessary wear and tear to the laundry give a disappointing drying result and cause more creasing When closing the door make sure that laundry does not get trapped in the door opening This could damage the laundry If you are not using a fra...

Page 27: ...When a programme is selected the maximum load weight of dry laundry possible for the programme will appear in the display for a few seconds You can confirm with OK or wait until the pre set drying level or programme duration lights up If you think you have loaded too much laundry remove a few items Further programmes The further programmes can be selected via the display Further programmes Automat...

Page 28: ...Duration 2 57 h Press the Drying level button The currently selected drying level will appear marked with a in the display Drying level Normal Slightly dry Hand iron Select a drying level by touching the or sensor Any drying level can be selected for the Cottons and Express programmes A more limited range is available when using the other programmes Confirm by touching the OK sensor Important When...

Page 29: ... 40h Press the Duration button Duration 0 40 2 30 40 h 0 h Increase decrease the hour s by touching the or sensor Confirm by touching the OK sensor Alter the minutes in the same way Favourites You can customise up to 10 programmes and save these under names of your choice These programmes can then be selected from a list See Favourites Tip You can also save a programme after it has started as a fa...

Page 30: ...rt Please see Delay start for more information Start the programme Press the flashing Start Stop button The Start Stop button will now light up constantly Drying and the programme duration will light up in the display The drying level reached will light up instead of Drying later on during programmes with a selectable drying level The Perfect Dry indicator will only flash light up with programmes ...

Page 31: ...oved from the drum If items are left in the dryer they could be damaged by overdrying when the dryer is next used If the dryer is switched on at the mains and the door is opened the drum lighting will come on It will go out a few minutes later to save energy If the dryer is still switched on switch it off with the button A buzzer will sound Remove the fluff from the 2 fluff filters in the door ope...

Page 32: ...n the garments a little beforehand use a fragrance flacon and reduce the load Please note that odours will not be removed as effectively from parts of garments made of synthetic fibres Auto load control This option should be used if you only want to dry half the load given in the display and quoted in the Programme chart In this case by pressing this button you can both shorten and optimise the dr...

Page 33: ...handcare X Denim X X X X Shirts X X X X Express X X Gentle smoothing O X X Steam smoothing X X Automatic plus O X X Delicates O X X Silks handcare X X Sportswear O X X Standard pillows X X Outerwear O X X Proofing X X Warm air X X X Cool air X X Basket programme X Cottons hygiene X X 1 These options cannot be combined with one another X Can be selected O Cannot be changed always active Cannot be s...

Page 34: ...without Extras Choose Select Extras or Continue without Extras Selecting extra options Extras Gentle tumble Freshen up Auto load control Select and confirm the one you want Extras Gentle tumble Freshen up Auto load control A will appear next to the extra option and the following will light up in the display Extras Change add to selection Finish selection Display selection Change add to selection C...

Page 35: ...ch the or sensor to highlight the symbol Confirm by touching the OK sensor The programme will be saved as a favourite Changing a favourite programme Favourite programmes Change Delete Dry Plus Select Change Select the favourite programme you want to change Change the favourite programme and save it under the same name or change the name The altered parameters will be active the next time the favou...

Page 36: ...viously Select more items if required Confirming a previously selected item will deselect it and the tick will go out Displaying the items selected You can view the items selected again Clearing a selection You can delete all the items Back This returns you to Select items Finish selection saving Once you have made your selection and are ready to start drying confirm with the OK sensor The dryer h...

Page 37: ...ange the time and change it To delete delay start if necessary Press the Delay start button Select Cancel the time and confirm this with OK To begin delay start Press the Start Stop button The time at which the programme will start automatically will appear in the display The drum will turn briefly every hour until the start of the programme to reduce creasing To change delay start after it has st...

Page 38: ...aby clothes Notes Select Extra dry for multi layered and very thick fabric Do not use Extra dry for jersey fabric e g T shirts underwear as they have a tendency to shrink Hand iron Hand iron Machine iron Use for Cotton or linen fabric requiring further processing e g table linen bed linen starched laundry Note To prevent laundry from drying out it should be rolled up until you are ready for ironin...

Page 39: ...r Woollen garments and fabric containing wool blends e g pullovers jackets and socks Note Wool and wool blend items are only fluffed up they are not dried completely Remove garments as soon as the programme has finished Denim Max load 3 0 kg Normal plus Normal Slightly dry Hand iron Hand iron Use for Denim garments e g jeans jackets skirts shirts Shirts Max load 2 0 kg Normal plus Normal Slightly ...

Page 40: ...tle smoothing Max load 1 0 kg Normal Hand iron Use for Cotton and linen fabric Minimum iron items made of cotton synthetic or mixed fibre e g trousers jackets shirts Notes Suitable for dry and damp laundry Select Hand iron if the items are to be ironed after drying Smooths out creasing caused during the spin cycle in the washing machine Remove garments as soon as the programme has finished Weight ...

Page 41: ...ng Water will be taken from the condensed water container during this programme This water will then be sprayed into the drum from a jet in the door opening The condensed water container must therefore be filled with water up to at least the min marker You will be aware of more operating noise because the condensed water pump is running Automatic plus Max load 5 0 kg Normal plus Normal Slightly dr...

Page 42: ...Note This programme reduces creasing Items are not dried completely by this programme Remove garments as soon as the programme has finished Sportswear Max load 3 0 kg Normal plus Normal Slightly dry Hand iron Hand iron Use for Sportswear which is suitable for drying in a tumble dryer Pillows 1 2 pillows up to 80x40 cm 1 pillow up to 80x80 cm Normal Use for Pillows suitable for drying in a tumble d...

Page 43: ...gents containing fluorochemical compounds which are stated by the manufacturer as being suitable for use on membrane textiles Do not dry items which have been treated with proofing agents containing paraffin Fire hazard Warm air Max load 8 0 kg Use for Multi layered fabric whose layers have different drying characteristics e g jackets pillows sleeping bags and other voluminous items Drying individ...

Page 44: ...ying basket Use for See the operating instructions supplied with the drying basket Cottons hygiene Max load 4 0 kg Normal Use for Cotton and linen fabric which will be in direct contact with the skin e g underwear baby clothes bed linen towelling Important The temperature is held constant for a longer period of time longer temperature holding time to deactivate micro organisms e g bacteria or hous...

Page 45: ...ess the button to switch the dryer on Select and start a new programme straight away saving the programme as a favourite Press the Start Stop button Select and confirm Save programme You can save this programme under Favourites See Favourites 2 Entering a name Adding or removing laundry after a programme has started Press the Start Stop button Select Cancel programme Confirm by touching the OK sen...

Page 46: ...condensed water container when pulling the container out of the dryer always close the door completely This does not apply to right hand hinged models Pull out the condensed water container To prevent water running out hold it at the front and towards the back and keep it in a horizontal position when carrying it Empty the container Replace the container in the dryer Condensed water should not be ...

Page 47: ...nsed water container with commercially available condensed water ironing water You should only use tap water in exceptional circumstances If tap water is used frequently the Steam smoothing spray jet in the door opening can become calcified 1 spout 2 rubber seal Pour the water in through the rings of the spout 1 Only use clean water The water must not contain any fragrance detergent or other subst...

Page 48: ...cleaner so that you can remove the fluff without touching it Open the door You must remove the fragrance flacon if present beforehand See Fragrance flacon Pull the upper fluff filter forwards to remove it Remove the fluff see arrows from the surfaces of all the fluff filters from the perforated laundry deflector Push the upper fluff filter back into position until it clicks Close the door If there...

Page 49: ...direction of the arrow until you hear it click Hold the dial and pull the fluff filter forwards to remove it Use a vacuum cleaner with a long crevice nozzle attached to remove any visible fluff from the upper air flow openings Cleaning the fluff filters with water Flush the fluff filters through with hot running water Shake the fluff filters thoroughly and then dry them carefully Ensure the filter...

Page 50: ...filter out by the handle Removing the plinth filter will cause the right hand guide pin in the dryer to come out This pin ensures that the heat exchanger access panel can only be closed if the plinth filter is inserted the right way round Cleaning the plinth filter Pull the handle out of the plinth filter Clean the filter thoroughly under running water Squeeze the plinth filter thoroughly The plin...

Page 51: ...condenser unit Danger of injury Do not touch the cooling fins You could cut yourself Look to see if fluff has accumulated If there is visible soiling Clean using a vacuum cleaner with a dusting brush attached Carefully pass the vacuum cleaner brush over the heat exchanger cooling fins without applying any pressure Otherwise the cooling fins could be bent out of shape or become damaged Carefully va...

Page 52: ...e pins The word Miele on the handle must be the correct way up Push the plinth filter in completely The act of pushing in the plinth filter will also push in the right hand guide pin Close the heat exchanger access panel The dryer can only be operated with the plinth filter fitted correctly and the heat exchanger access panel closed The access panel must be closed correctly to ensure that water ca...

Page 53: ...urfaces and other parts Clean the tumble dryer with a slightly damp cloth and a mild non abrasive cleaning agent or a solution of washing up liquid and water Clean the seal around the inside of the door with a damp cloth Dry all parts with a soft cloth The drum and other stainless steel parts can be cleaned with a suitable proprietary stainless steel cleaner following the manufacturer s instructio...

Page 54: ...p it as the fragrance will leak out of the flacon Hold the flacon securely to prevent opening it by mistake Pull off the protective seal Open the door of the tumble dryer The fragrance flacon is inserted in the upper fluff filter in the opening on the right hand side beside the grip If you are not using a fragrance flacon the cover must always remain closed push the cover down completely with the ...

Page 55: ...ittle You will feel a slight resistance and hear a soft click Marker must be in position this is the position at which you can feel a resistance Before drying You can select the intensity of the fragrance Turn the outer ring clockwise the further you open the flacon the more intense the fragrance ...

Page 56: ...he outer ring anti clockwise until marker b is in position _ You will feel a slight resistance If you want to dry laundry without adding fragrance occasionally remove the fragrance flacon and store it in its original packaging until you want to use it again See the following section Replacing the fragrance flacon When the fragrance is no longer sufficiently intense Turn the outer ring anti clockwi...

Page 57: ... down store in a cool dry place store away from direct sunlight when purchasing new fragrance flacons only remove the protective seal just before use Cleaning the fluff filters The intensity of the fragrance will be diminished if the fluff filters and the plinth filter are not cleaned The fragrance filter must be removed before cleaning the fluff filter To prevent any fragrance leaking out of the ...

Page 58: ...e 000 flashes lights up after switching on Access via a code has been activated See Settings menu Code Adjust the load The drum is empty or the laundry is too dry lights up after a programme is cancelled This is not a fault In some programmes if the drum has been underloaded or is empty the programme will be cancelled This can also happen if the items are already dry Open and close the door to res...

Page 59: ...dryer off and back on again Empty the container Empty the container or check the drain hose lights up after a programme is cancelled The condensed water container is full or there is kink in the drain hose Empty the container Check the drain hose To switch off the message Open and close the door while the dryer is switched on or switch the dryer off and back on again Information Fill condensate co...

Page 60: ...lem Cause and remedy Comfort cooling The programme has finished but the laundry has not yet cooled down Either remove the laundry and spread it out to cool down or leave it in the tumble dryer to cool down during the cooling phase ...

Page 61: ...ry use sufficient detergent next time Pillows take out of the tumble dryer and air them Use a fragrance flacon available as an optional accessory for your favourite fragrance Items made of synthetic fibres are charged with static electricity after drying Synthetic fibres tend to attract static charge Static charge can be reduced by adding a fabric conditioner to the final rinse in the washing prog...

Page 62: ...e end of this section The cool air intake bottom right grille is blocked Move any objects such as a laundry basket away from the dryer The fluff filters and the plinth filter were wet when replaced The fluff filters and the plinth filter must be dry The laundry is too damp Spin using a higher spin speed in the washing machine The tumble dryer has been overloaded Do not exceed the maximum load for ...

Page 63: ...s not indicate a fault The drum will turn at intervals in the anti crease phase See Settings menu Display switch off The dryer is switched off at the end of the programme The dryer switched off automatically This is quite normal and does not indicate a fault See Settings menu Appliance switch off The interior drum lighting does not come on The drum lighting will switch off automatically when the d...

Page 64: ... handle behind the grille in the middle Press the spoon handle against the catch and lever the grille open Remove the grille Danger of injury Do not touch the cooling fins You could cut yourself Use a vacuum cleaner with a dusting brush attached to clean the cooling fins Only pass the vacuum cleaner brush over them lightly without applying any pressure Take care not to bend the cooling fins out of...

Page 65: ...side lug and pulling upwards To avoid detaching the hose be careful not to tug on it Guide the end of the hose through the opening and hold it securely with one hand Use your other hand to pull the fluff filter off the hose Rinse the fluff filter with a jet of water until all the fluff has been removed Refit the cleaned fluff filter onto the hose Now feed the hose with its fluff filter attached in...

Page 66: ...he new spray jet Do not use any other tool as this would damage the spray jet or the dryer Steam smoothing must never be used without the spray jet fitted and screwed in correctly Open the door of the tumble dryer The spray jet is located in the top left of the door opening Attach the tool to the spray jet Turn the tool anti clockwise to unscrew the spray jet Insert the new spray jet in the tool T...

Page 67: ...urposes Optional accessories Optional accessories for this tumble dryer are available from Miele your Miele dealer or via the internet at Dryer basket The dryer basket is suspended in the drum and does not rotate with the drum This enables items which must not be subjected to mechanical action to be dried or aired Fragrance flacon A fragrance flacon can be used in your tumble dryer to add a pleasa...

Page 68: ...ater container empty after every drying cycle d Door do not open during drying e Heat exchanger access panel do not open during drying f Four height adjustable screw feet g Cool air intake grille do not obstruct with a laundry basket or other objects h Hose for external drainage of condensed water ...

Page 69: ... To manoeuvre the dryer out of its packing case to its installation site hold it by the front feet and the lid where it protrudes at the back of the appliance Only transport the dryer as shown in the following illustrations If transporting the dryer at an angle only tip towards the left side If the tumble dryer has not been transported as described then it must be left to stand for at least 1 hour...

Page 70: ...tc This would hinder a sufficient flow of air to the dryer Air which is taken in to cool the heat exchanger is then blown back out of the dryer and warms up the air in the room It is therefore very important to ensure adequate ventilation e g by opening a window Otherwise drying durations may be longer increased energy requirement Before moving the tumble dryer again e g when moving house After ea...

Page 71: ...not dissipate could cause a fault The appliance lid cannot be removed The electrical socket must be located in an accessible position near the appliance Drying durations may increase slightly Optional accessories Washer dryer stack The tumble dryer can be combined with a Miele washing machine in a washer dryer stack The appropriate Miele washer dryer stacking kit is required Plinth The tumble drye...

Page 72: ... hose Installation conditions requiring a non return valve There is a risk of back flow into the dryer if a non return valve is not fitted Back flow could damage the dryer and also the room in which it is located Certain installation conditions such as those described below require the fitting of a non return valve Maximum delivery head with non return valve fitted 1 00 m Installation conditions r...

Page 73: ...n the drain hose Have a container ready to collect this Pull the drain hose off its connection Unwind the hose and pull it carefully out of the holders Allow any residual water to run into the container Guide the hose to the right or left side of the dryer as required If you are guiding it to the right you can fit the hose into the groove Leave the hose in the lower holder to prevent it from being...

Page 74: ...will need to secure the hose carefully e g by tying it to a tap to make sure it cannot slip during use see the drawing under Installation and connection Front view Overflowing water can cause damage The non return valve can be fitted in the end of the hose You can refit the hose holder at a later stage if you decide that you no longer want to drain the condensed water externally Direct connection ...

Page 75: ...g nut 2 The nut is usually fitted with a washer which must be removed Attach the end of the hose 4 to adapter 1 Use the hose holder Use a screwdriver to tighten hose clip 3 up close to the nut Fit non return valve 5 to tumble dryer drain hose 6 Non return valve 5 has to be fitted so that the arrow points in the direction of flow i e towards the sink Secure the non return valve using hose clips ...

Page 76: ...e door from the dryer Open the door Use a T30 Torx screwdriver to unscrew the two screws on the base plate of the door hinge The door cannot fall off as it is held in place by 2 pins Hold the door securely and pull it forwards to remove the door you will need to pull the base plate of the hinge with its 2 pins out of the dryer To avoid scratching the door place it outer side downwards on a soft su...

Page 77: ...of the door lock so that the screw holes line up with those in the front panel of the dryer Secure the door lock with the two Torx screws 3 Remove the lock catch from the door First take the rubber seal off the door and place this to one side Use a T20 Torx screwdriver to remove screw on the lock catch Pull off the lock catch together with lock catch cover ...

Page 78: ... cover supplied with the dryer Place this new cover to one side for now 4 Dismantle the door hinge from the door The door hinge cover must be unclipped from position and then removed Use a screwdriver to press down gently on position on the door hinge cover Using a little force pull out door hinge cover This door hinge cover is no longer needed however please keep it in a safe place ...

Page 79: ...other rod Use the screwdriver to guide first one then the other rod to the middle until each can be removed Tip In some circumstances the rods can be difficult to dislodge Moving the screwdriver with a levering action while pulling at the same time may help to work the rods free Remove the door hinge and turn it through 180 Refit the door hinge on the opposite side of the door Secure the door hing...

Page 80: ...th the dryer Fit new door hinge cover and clip it into position 6 Change the lock catch on the door You now need the new lock catch cover supplied with the dryer which you have already fitted with the lock catch Push lock catch cover with its lock catch into position Tighten screw ...

Page 81: ...door cannot fall off in this position Screw the door securely to the dryer at the base of door hinge Now that you have changed the door hinging the door will open from the opposite side Push the orange marker round to the other side so that you will see at which side to pull the door open Important Please keep the lock catch and door hinge covers which were no longer needed in a safe place These w...

Page 82: ... it is advisable to protect the appliance with a suitable residual current device RCD Contact a qualified electrician for advice Do not connect via an extension lead Extension leads do not guarantee the required safety of the appliance e g danger of overheating Non rewireable plugs BS 1363 The fuse cover must be refitted when changing the fuse and if the fuse cover is lost the plug must not be use...

Page 83: ...terwear Normal 2 5 800 50 0 70 65 Denim Normal 3 0 900 60 1 15 100 Express Normal 4 0 1000 60 0 90 75 1 Weight of dry laundry 2 Test programme in accordance with Regulation 392 2012 EU for energy labelling measured in accordance with EN 61121 All data was calculated using EN 61121 unless otherwise stated Power consumption when switched off Power consumption when not switched off 0 10 W 2 50 W Note...

Page 84: ...n vary from the consumption data quoted here The variations arise from the way the data is measured in the dryer For example the programme duration may vary depending on the residual moisture present in the laundry and the type of fabric which will affect the energy requirement ...

Page 85: ...ume 120 litres Load size 9 0 kg weight of dry laundry Capacity of condensed water container 4 8 l Hose length 1 60 m Maximum delivery head 1 50 m Maximum drain hose length 4 00 m Length of connection cable 2 00 m Voltage See data plate Connected load See data plate Fuse rating See data plate Test certificates awarded See data plate Energy consumption See Consumption data LEDs Class 1 ...

Page 86: ...until the setting you want appears in the display The sensor scrolls down the list The sensor scrolls up the list Confirm by touching the OK sensor Changing a setting Touching the or sensor will call up the different options for the setting For example you can select a value If the option is marked with a it is active change a bar chart change numbers Confirm by touching the OK sensor Closing the ...

Page 87: ...d Extended cool down The automatic cooling down phase which takes place before the end of a programme can be extended for all programmes with selectable drying levels in 2 minute increments up to 18 minutes This makes the garments easier to handle Options 00 minutes factory default 02 04 06 18 minutes Airways indicator Fluff should be removed after drying The Clean out airways message will remind ...

Page 88: ...esidual moisture reading in your laundry is incorrect due to extremely soft water Options Normal factory default Low Conditions The Low option should only be set if the water used for washing the laundry is extremely soft with a conductivity reading electrical conductivity of less than 150 μS Contact your local water authority for the conductivity level of your mains water supply Only activate the...

Page 89: ...f the display can be altered The setting selected is shown in a bar chart Factory default a medium setting Darker Brighter You will see the brightness change as the setting is selected Display switch off To save energy the display and buttons will go out after 10 minutes and the Start Stop button will flash slowly You can alter this setting Options On factory default The display will go out after ...

Page 90: ... will also be stored in memory These settings will then appear the next time the programme is chosen Options Off factory default On Exception The Cottons programme will remain unchanged Anti crease If you have pressed the Anti crease button the drum will continue to rotate in a special anti crease rhythm for a maximum of 2 hours after the end of the drying process This helps prevent creasing if la...

Page 91: ...venue Citywest Business Campus Dublin 24 Tel 01 461 07 10 Fax 01 461 07 97 E Mail info miele ie Internet www miele ie Ireland Malaysia Miele Sdn Bhd Suite 12 2 Level 12 Menara Sapura Kencana Petroleum Solaris Dutamas No 1 Jalan Dutamas 1 50480 Kuala Lumpur Malaysia Phone 603 6209 0288 Fax 603 6205 3768 Miele New Zealand Limited IRD 98 463 631 Level 2 10 College Hill Freemans Bay Auckland 1011 NZ T...

Page 92: ...M Nr 10 209 680 00 en GB TMR 640 WP ...

Reviews: