background image

Detergent

All modern detergents produced for
automatic washing machines are
suitable, including liquid, compact
(concentrated), tablets and special
application detergents.

Woollens and knitwear containing wool
mixtures and hand-washable garments
should be washed using a detergent
specifically designed for washing
woollens.

Instructions for use and recommended
amounts for a full load are given on the
detergent packaging.

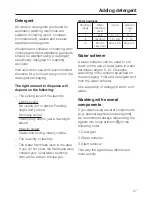
The right amount to dispense will
depend on the following:

– The soiling level of the laundry.

Lightly soiled
No visible dirt or stains. Possibly
slight body odour.

Normally soiled
Visibly dirty and/or just a few slight
stains.

Heavily soiled
Stains and soiling clearly visible.

– The quantity of laundry

– The water hardness level in the area

If you do not know the hardness level
contact your local water authority
who will be able to advise you.

Water hardness

Hardness

range

Water

hardness

level

mmol/l

German

scale

°d

I

soft

0 - 1.3

0 - 7

II

medium

1.3 - 2.5

7 - 14

III

hard to

very hard

above 2.5

above 14

Water softener

A water softener can be used to cut
down on the use of detergents in water
hardness ranges II - III. Dispense
according to the amount specified on
the packaging. First add detergent and
then the water softener.

Use a quantity of detergent as for soft
water.

Washing with several
components

If you wash using several components
(e.g. special application detergents),
we recommend always dispensing the
agents into compartment

j

in the

following order:

1. Detergent

2. Water softener

3. Stain remover

This way the agents are distributed
more evenly.

Adding detergent

27

Summary of Contents for WT 945 S WPS

Page 1: ...ng instructions Washer dryer WT 945 S WPS To avoid the risk of accidents or damage to the machine it is essential to read these instructions before it is installed or used for the first time G M Nr 05 876 080 ...

Page 2: ... Important control panel features 11 Programme selector 11 Additional option buttons 11 Spin button with indicator lamps 11 Washing and drying environmentally 12 Before using for the first time 13 WASHING 14 Programme overview 14 How to wash correctly 17 Care symbols washing 17 Separate washing 19 Before washing 19 Select a programme 20 Selecting additional options for the wash programme 21 Delay ...

Page 3: ...iquid starch separately 28 Separate starching 28 DRYING 29 Tips on drying 29 Programme overview 30 Separate drying 32 Before drying 32 Programme selection 33 Additional options for the drying programmes 33 Delay start 34 At the end of a programme 34 WASHING AND DRYING 35 Washing and drying in a continuous sequence 35 After each washing or drying programme 36 Changing a programme sequence 38 Safety...

Page 4: ...ales service 55 Installation and connection 56 Front view 56 Installation surface 57 Installation 57 Removing the transit fitting 58 Levelling the machine 59 Screwing out and adjusting the feet 59 Building under a continous worktop in a row of kitchen units 60 The Miele Waterproof system 61 Connection to the water supply 62 Connection to the drainage system 65 Electrical connection U K 66 Consumpt...

Page 5: ...if handled or disposed of incorrectly could be potentially hazardous to human health and to the environment They are however essential for the correct functioning of your appliance or machine Please do not therefore dispose of your old machine or appliance with your household waste Please dispose of it at your local community waste collection recycling centre and ensure that it presents no danger ...

Page 6: ... connecting the machine ensure that the connection data on the data plate fusing voltage and frequency matches the mains electricity supply If in any doubt consult a qualified electrician The electrical safety of this machine can only be guaranteed when continuity is complete between the machine and an effective earthing system which complies with local and national safety regulations It is most i...

Page 7: ...he metal cap is hot after drying Open the door wide after the drying cycle Do not touch the metal cap located on the inside of the door glass It will still be hot and could cause a burn Do not install your machine in rooms where temperatures below freezing may occur Frozen hoses may burst under pressure The reliability of the electronic control unit may be impaired at temperatures below freezing p...

Page 8: ...rrosion Do not use these products in this machine Always make sure the drum is stationary before reaching in to remove laundry Reaching into a moving drum is extremely dangerous There is a danger of fire during drying with fabrics which contain rubber foam rubber or rubber like materials have been treated with inflammable cleaning agents have been splashed with hair lacquer hair spray nail varnish...

Page 9: ...tart Delay start allows you to delay the start of a programme from 1 hour up to a maximum of 9 hours Programme lock Electronic programme locking prevents the door from being opened or the programme cancelled during a wash programme The electronic programme locking is automatically cancelled at the end of the programme Programmable functions The programmable functions can be used to tailor washing ...

Page 10: ...sic wash programme and temperature The programme selector can be turned clockwise or anti clockwise f Spin button for changing a spin speed or selecting Rinse hold or Without final spin gAdditional option buttons for selecting additional functions When an additional option is selected the relevant indicator lamp will come on hDRYING programme selector for selecting the drying programme and the dry...

Page 11: ...amme The indicator lamps show the setting selected Spinning at 400 1500 rpm The spin can be set within this range for the final spin during a wash programme or for Thermospin during drying see DRYING Programme selection for information on the Thermospin The final spin in a wash programme can also be deactivated Press the Spin button until you reach Rinse hold The laundry is not spun and remains su...

Page 12: ... instead of Pre wash with heavily soiled laundry If Soak is followed im mediately by a main wash the same suds are used Do not exceed the amounts of detergent which may be recommended by the manufacturer on the packaging Reduce the amount of detergent with smaller loads approx 1 3 less than the amount recommended can be used when washing a half load Load recognition can cause the duration of a pro...

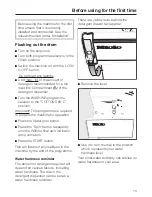
Page 13: ... required to prepare the machine for operation Press the Water plus button Press the Spin button repeatedly until the Without final spin indicator lamp comes on Press the START button This will flush out any residues in the machine by the end of the programme Water hardness reminder The amount of detergent required will depend on various factors including water hardness The dial in the detergent d...

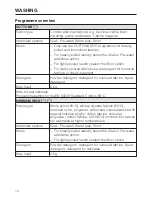
Page 14: ...ent for coloured fabrics liquid detergent Max load 5 kg Note for test institutes Programme setting for the EN 50229 Standard Cottons 60 C MINIMUM IRON e f Fabric type White nylon 60 C white polyester fabrics 50 C coloured nylon polyester cotton and viscose fabrics with special finishes acrylic cotton fabrics coloured polyester cotton fabrics 40 30 C minimun iron fabrics not washable at higher temp...

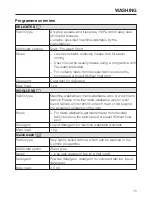
Page 15: ...d 1 kg WOOLLENS g Fabric type Machine washable or hand washable wool or wool blend fabrics Please note that hand washable wool or wool blend fabrics will not shrink stretch matt or felt beyond the accepted tolerance of the item Notes For hand washable garments made from delicate fabrics reduce the spin speed or select Without final spin Detergent Liquid detergent for machine washable woollens Max ...

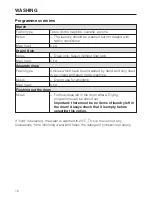
Page 16: ...d by hand and only need to be rinsed and spun in the machine Notes Do not use for woollens Max load 5 kg Flushing out the drum Notes Fluff residues left in the drum after a Drying programme can be rinsed out Important there must be no items of laundry left in the drum Always check that it is empty before selecting this option If cold is selected the water is warmed to 24 C This is to even out any ...

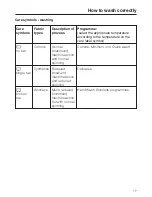
Page 17: ...on the care label symbol e no bar Cottons Normal maximum machine action and normal spinning Cottons Minimum iron Quick wash f single bar Synthetics Reduced medium machine action and reduced spinning Delicates g broken bar Woollens Much reduced minimum machine action but with normal spinning Hand Wash Woollens programmes How to wash correctly 17 ...

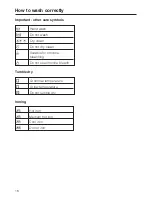
Page 18: ...f Dry clean D Do not dry clean y Suitable for chlorine bleaching z Do not use chlorine bleach Tumble dry q At normal temperature r At low temperature s Do not tumble dry Ironing I Hot iron H Medium hot iron G Cool iron J Do not iron How to wash correctly 18 ...

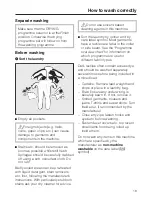
Page 19: ...agents in this machine Sort the laundry by colour and by care label symbol Most garments have a textile care label in the collar or side seam See the Programme overview chart for information on which programmes to use for different fabric types Dark textiles often contain excess dye and should be washed separately several times before being included in a mixed load Curtains Remove lead weights and...

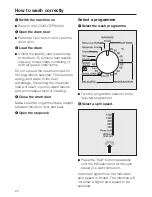
Page 20: ...dvantage Exceeding the maximum load will result in poorer wash results and an increased level of creasing EClose the drum door Make sure that no garments are caught between the drum door and seal FOpen the stopcock Select a programme GSelect the wash programme Turn the programme selector to the required programme HSelect a spin speed Press the Spin button repeatedly until the indicator lamp for th...

Page 21: ...soak process For programmes without a pre wash Add the total amount to compartment j or directly into the drum on top of the laundry For programmes with a pre wash Add 1 4 of the detergent for the soak and pre wash into compartment i and 3 4 into compartment j for the main wash Pre wash For heavily soiled and stained items Water plus The water level increases in all sections of the COTTONS MINIMUM...

Page 22: ...because an extra rinse is automatically activated A burden to the environment Add detergent for the pre wash to compartment i and to compartment j for the main wash If the capacity of compartment j is not sufficient e g in water hardness area III some of the main wash detergent can be added to compartment i Pull out the detergent drawer and place detergent in the compartments as follows i Pre wash...

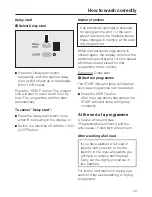
Page 23: ...lar programme is chosen again the display will show the additional option s and or spin speed which have been stored for that programme in the memory Exception Delay start LStart the programme The START indicator lamp will flash as soon as a programme can be started Press the START button After the programme has started the START indicator lamp will light up constantly At the end of a programme A ...

Page 24: ...he suds temperature is above 70 C except when the programmable function Opening the door at high temperatures has been activated Warning The water in the machine will be very hot and could cause burning or scalding the additional function Water plus has been selected because the water level will be too high the safety lock has been activated the programme has reached the Final spin stage The locke...

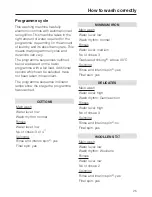
Page 25: ...how the stage the programme has reached COTTONS Main wash Water level low Wash rhythm normal Rinses Water level low No of rinses 3 or 41 Spinning Rinse and interim spin2 yes Final spin yes MINIMUM IRON Main wash Water level low Wash rhythm normal Rinses Water level medium No of rinses 3 Graduated rinsing3 above 40 C Spinning Rinse and interim spin2 yes Final spin yes DELICATES Main wash Water leve...

Page 26: ... programme with the exception of the WOOLLENS programme the anti crease action switches on for a maximum of 30 minutes 1 A fourth rinse takes place automatically when there is too much foam in the drum if a spin speed of lower than 700 rpm has been selected if Without final spin has been selected 2 Rinse and interim spin There is a spin between the rinses 3 Graduated rinsing The suds are cooled at...

Page 27: ... The quantity of laundry The water hardness level in the area If you do not know the hardness level contact your local water authority who will be able to advise you Water hardness Hardness range Water hardness level mmol l German scale d I soft 0 1 3 0 7 II medium 1 3 2 5 7 14 III hard to very hard above 2 5 above 14 Water softener A water softener can be used to cut down on the use of detergents...

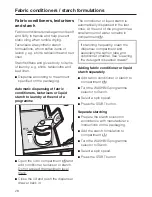
Page 28: ...e the lid and push the dispenser drawer back in The conditioner or liquid starch is automatically dispensed in the last rinse At the end of the programme a small amount of water remains in compartment p If starching frequently clean the dispenser compartment and especially the siphon tube and conditioner channel See Cleaning the detergent dispenser drawer Adding fabric conditioner or liquid starch...

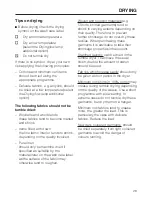
Page 29: ...f the fabric may otherwise tend to roughen Woven and loopknit materials e g T Shirts knitted garments tend to shrink to varying extents depending on their quality Therefore to prevent further shrinkage do not over dry these textiles When purchasing these garments it is advisable to take their shrinkage properties into account Starched laundry can be dried in the tumble dryer To achieve the usual f...

Page 30: ...tional options Thermospin max 1500 rpm Drying Low temp Max load 2 5 kg Note for test institutes Programme setting for the EN 50229 Standard COTTONS Normal Hand iron Fabric type Cotton or linen fabrics e g table linen bed linen starched laundry etc Additional options Thermospin max 1500 rpm Drying Low temp Max load 2 5 kg Machine iron Fabric type Cotton or linen fabrics including starched laundry f...

Page 31: ...ad 1 kg Hand iron Fabric type Minimum iron shirts table cloths etc made of mixed fibres e g cottons synthetics which are still to be hand ironed Additional options Thermospin max 900 rpm Drying Low temp Max load 1 kg TIMED DRYING 20 min 30 min 40 min 60 min Do not select the longest drying time to start with Check by experimenting how long it takes to reach the level of drying you require Fabric t...

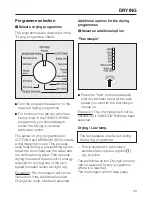
Page 32: ...n drying result BSwitch the machine on Press in the I ON 0 OFF button COpen the drum door Press the Door button and open the drum door DLoad the drum Unfold the laundry and load loosely in the drum Maximum load Cottons 2 5 kg Minimum iron 1 0 kg Timed drying 2 5 kg Make sure you have removed any detergent dispensing aids e g plastic dispenser balls before drying These dispensers can melt during th...

Page 33: ...ergy required for drying one of the spin speed indicator lamps will light up Exception The thermospin will not be carried out if the additional function Drying Low temp has been selected Additional options for the drying programmes HSelect an additional option Thermospin Press the Spin button repeatedly until the indicator lamp for the spin speed you want for the thermospin comes on Exception The ...

Page 34: ...in the memory Exception Delay start JStart the programme The START indicator lamp will flash as soon as a programme can be started Press the START button After the programme has started the START indicator lamp will light up constantly The door cannot be opened if the temperature is higher than 70 C If this is the case the locked indicator light will flash when the Door button is pressed Exception...

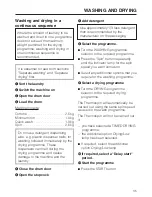
Page 35: ...EClose the drum door FOpen the stopcock GAdd detergent Use approximately 1 3 less detergent than is recommended by the manufacturer on the packaging HSelect the programme Turn the WASHING programme selector to the required programme Press the Spin button repeatedly until the indicator lamp for the spin speed you want comes on Select any additional options that you require for the washing programme...

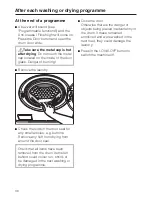
Page 36: ...the door seal for any small articles e g buttons Remove any fluff from drying from around the door seal Check that all items have been removed from the drum Items left behind could colour run shrink or be damaged in the next washing or drying programme Close the door Otherwise there is the danger of objects being placed inadvertently in the drum If these remained unnoticed and were washed in the n...

Page 37: ...f programme must not be used for rinsing items of laundry Make sure that there are no items of laundry in the drum before starting this programme Switch the machine on Turn the DRYING programme selector to the Finish position Turn the WASHING programme selector to the Rinse out fluff programme Press the START button The fluff will rinsed out in a few minutes Remove any fluff remaining from around ...

Page 38: ...h one after the other in the programme sequence display The programme has been successfully cancelled when only the On indicator lamp is on To cancel an incorrectly selected programme Turn both programme selectors to the Finish position When only the On indicator lamp is on Turn the programme selector to the required programme Switch additional options on or off as required Press the START button ...

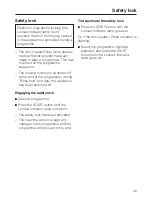
Page 39: ...Rinse hold and after the appliance has been switched off Engaging the safety lock Select a programme Press the START button until the Locked indicator lamp comes on The safety lock has been activated The machine will not accept any changes to the programme and the programme will proceed to the end To de activate the safety lock Press the START button until the Locked indicator lamp goes out Or if ...

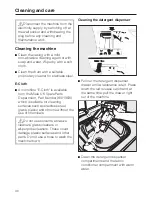
Page 40: ...rtment Part Number 98013530 which is suitable for cleaning surfaces such as stainless steel glass plastic and chrome without the use of chemicals Do not use solvents abrasive cleaners glass cleaners or all purpose cleaners These could damage plastic surfaces and other parts Do not use a hose to wash the machine down Cleaning the detergent dispenser Pull out the detergent dispenser drawer until a r...

Page 41: ... the water jets in the top of the detergent drawer housing Before replacing the detergent drawer use a bottle brush or similar to clean them out Clean the porthole glass From time to time you should also clean the door glass on the inside using a mild detergent or soap and water the metal cap inside the door glass with a suitable proprietary stainless steel cleaning agent Wipe dry using a soft clo...

Page 42: ...d union connecting the free end of the inlet hose to the stopcock Remove the rubber seal 1 from the recess Using pointed pliers take hold of the plastic filter 2 bar and remove Clean the plastic filter Put the filter and seal back in the reverse order and reconnect the hose Make sure it goes on correctly and is not cross threaded Turn on the stopcock and check that the connection is watertight If ...

Page 43: ...ly be carried out by a suitably qualified person in accordance with local and national safety regulations Repairs and other work by unqualified persons could be dangerous The manufacturer cannot be held responsible for unauthorised work The chart is divided into the following sections to help you The programme does not start The programme stops and a fault indicator lamp comes on A fault indicator...

Page 44: ...her the door is properly closed the mains plug is plugged in the mains fuse has blown If one of the following indicator lamps is flashing Soak Pre wash Washing Rinses There is a fault Start the programme again If the indicator light flashes again call the Miele Service Dept The Locked indicator lamp is on The safety lock is activated De activate the safety lock as described in the section Safety l...

Page 45: ...icator lamp is flashing There is a blockage in the water outlet Clean the fluff filter and the drain pump Has the drain hose been fitted too high Maximum delivery head 1 00 m The Waterproof system has reacted Call the Miele Service department The Final spin indicator lamp is flashing in the programme sequence display The final spin has not taken place The machine detected an imbalance Loosen the l...

Page 46: ...Water inlet drain indicator lamp is flashing There is a blockage in the water outlet Clean the fluff filter and the drain pump Has the drain hose been fitted too high Max delivery head 1 00 m The Drying overload indicator lamp is flashing towards the end of a drying programme The load was too large In future do not exceed the maximum load This way you will avoid a Creasing of delicate textiles b U...

Page 47: ...ectly closed Press hard against the left hand side of the door and press the Door button There is still water in the drum Turn the WASHING programme selector to Drain The water will be drained away Open the door The door cannot be opened and when the Door button is pressed the locked indicator lamp flashes This is not a fault The temperature locking function is activated For safety reasons the doo...

Page 48: ...YING programme selector to the Finish position Turn the DRYING programme selector imme diately to a programme the Cooling down indicator lamp will light up and the cooling down phase has been selected At the end of the cooling down phase the Anti crease Finish light comes on you can open the door If the drying programme has already finished first start a new drying programme for a few minutes Opti...

Page 49: ...enly When drying separately during the Thermospin the laundry formed a ring in the drum because the laundry was too damp or because the spin was set too high Turn the WASHING and DRYING programme selectors to the Finish position Open the door and loosen the laundry Select a lower spin speed Start the drying programme again There is still water in the drum after drying There is a blockage in the wa...

Page 50: ... the machine too slowly The filter in the water inlet hose is dirty Clean the filter Large amounts of detergent residue remain in the detergent dispenser drawer The water pressure is too low Clean the filter in the water inlet Press the Water plus button Powder detergent used in conjunction with water softeners tends to become sticky In future add washing powder into the dispenser first and then a...

Page 51: ...mpounds zeolites to aid water softening where are not soluble in water They have ended up on the textiles Try and brush out the residues after drying using a soft brush Wash dark textiles using a detergent which contains no zeolites Liquid detergents usually contain no zeolites Grey greasy particles cling to washed laundry Insufficient amounts of detergent have been used to break down the particle...

Page 52: ...ll Remember to remove the dispensing ball before drying Never put stain removers and liquid detergent together in the dispenser drawer Limescale deposits appear on the drum surface Not enough detergent was used Use a descaling agent suitable for use in washing machines to remove the limescale deposits Use the correct amount of detergent for the water hardness level The pump makes strange noises Th...

Page 53: ... machine up to 25 litres Caution If laundry has been washed at a high temperature water draining out of the machine will still be hot Danger of scalding Place a suitable container under the access flap Turn the fluff filter lid round 2 3 times Do not take it right out With large volumes of water the container will need to be emptied several times Secure the fluff filter back into position and empt...

Page 54: ...e fluff filter housing Replace the fluff filter Make sure it is securely tightened Otherwise there is a risk of water leakage during use Opening the drum door Always make sure that the drum is stationary before reaching into the machine to remove laundry Reaching into a moving drum is extremely dangerous Pull the emergency release downwards see illustration The drum door will open Problem solving ...

Page 55: ...cting the Service Department please quote the model and serial number of your appliance both of which are shown on the data plate Please note that telephone calls may be monitored and recorded to improve our service Appliance guarantee The appliance is guaranteed for a period of 1 year See the guarantee card supplied with the appliance for further details Problem solving guide 55 ...

Page 56: ...on bInlet hose with Waterproof system cDrain hose with flexible detachable swivel elbow dDetergent dispenser eControl panel fDoor gFlap for fluff filter and drain pump hFour height adjustable screw feet Installation and connection 56 ...

Page 57: ...ral joists and be bolted to the joists and not only to the floorboards Check for pipes and cables beforehand The most stable part of the floor is usually in the corner If the machine is installed on a raised plinth it has to be secured against slippage during spin using retaining clips available from the Miele Spare Parts Dept Otherwise there is the danger of the machine moving about Installation ...

Page 58: ...pport plate DPlug the holes with the plastic caps supplied The machine must not be moved without the transit fitting in place Store the transit fitting in a safe place for future use It must be re fitted if the machine is to be moved again e g when moving house Re fitting is carried out by reversing the procedure Installation and connection 58 ...

Page 59: ...xample to ensure stability Make sure the machine does not slip as this could cause injury Loosen counternut 2 with a screwdriver by turning it anti clockwise then unscrew foot 1 together with the counternut Put the machine back on all four feet Use a spirit level to check the machine is standing level Hold the foot 1 firm using a pipe wrench and using a screwdriver turn the counternut 2 to the rig...

Page 60: ...nsure electrical safety the cover plate must be fitted When installing under a 900 910 mm high worktop a spacer kit is required Connections for electricity water and drainage should be installed in such a way that they remain accessible when the machine is in place Fitting instructions are supplied with the building under kit All items marked are available to order from your Miele Dealer or from t...

Page 61: ...protective sleeve A float switches off the safety valve preventing any more water from flowing into the machine and water in the suds container is pumped away 2 Electronic unit and washing machine housing Sump Any leaking water is collected in a sump in the base of the appliance A float switches off the safety valves preventing any more water from flowing into the machine and water in the suds con...

Page 62: ...ons The machine is designed to operate with a flow pressure of between 1 and 10 bar If it is higher than 10 bar it is essential to fit a reducer valve Connection to the mains water supply should incorporate a mains stopcock with 3 4 thread The stopcock should be fitted by a qualified plumber The connection point is subject to mains water pressure Turn on the stopcock slowly and check for leaks Cor...

Page 63: ...ust only be connected to its own stopcock It must not be connected to mixer taps or similar and must not be fitted in areas where there is the risk of water or other liquids reaching it Do not get wet The protective sleeve of the hose must not be damaged or kinked Installation and connection 63 ...

Page 64: ...nly use a Miele Waterproof system hose should you need a replacement In order to protect the water inlet valves the dirt filter in the water inlet safety valve connection must not be removed Extension hose A 4 5 m Miele Waterproof system extension hose is available from your Miele Dealer or the Miele Spare Parts Department as an optional extra Installation and connection 64 ...

Page 65: ...e Otherwise there is a risk of water overflowing or of some of the drained water being sucked back into the machine 2 Connected securely to a plastic drain pipe with a rubber nipple There is no need to use a non return valve 3 Connected securely to a standpipe 4 Connected securely to a floor gully If required the drain hose can be extended to a length of 5 metres The accessories required can be pu...

Page 66: ...nstall a residual current device RCD with a trip current of 30 mA in accordance with DIN VDE 0664 VDE 0100 Section 739 Do not connect via an extension lead Extension leads do not guarantee the required safety of the appliance e g danger of overheating Non rewireable plugs BS 1363 The fuse cover must be refitted when changing the fuse and if the fuse cover is lost the plug must not be used until a ...

Page 67: ... 57 1 20 DELICATES 30 C 1 0 0 40 75 1 00 WOOLLENS 30 C 1 0 0 15 25 0 38 DRYING COTTONS Normal 2 2 5 1 45 9 1 03 1 EN 60456 test programme 2 EN 61121 test programme Consumption data can vary from the nominal values given depending on water pressure water hardness water inlet temperature room temperature type and volume of load fluctuations in the electricity supply and any additional options select...

Page 68: ... max 5 0 kg dry laundry max 2 5 kg Cottons Voltage see data plate Rated load see data plate Fuse rating see data plate Consumption data see Consumption data section Minimum water flow pressure 1 bar 100 kPa Maximum water flow pressure 10 bar 1000 kPa Maximum drain pump head 1 00 m Maximum drain pump length 5 00 m Test marks VDE radio and television suppressed Technical data 68 ...

Page 69: ...Programmable functions for changing standard settings ...

Page 70: ...sed the WASHING and DRYING programme selectors are at the Finish position APress the additional option buttons Soak and Pre wash at the same time hold pressed in and B switch the machine on with the I ON 0 OFF button CThen release these buttons The Soak Pre wash and Washing sequence indicator lamps will flash A P will appear in the left of the display DTurn the WASHING programme selector to the Ri...

Page 71: ... the Finish position APress the additional option buttons Soak and Pre wash at the same time hold pressed in and B switch the machine on with the I ON 0 OFF button CThen release these buttons The Soak Pre wash and Washing sequence indicator lamps will flash A P will appear in the left of the display DTurn the WASHING programme selector to the Separate rinse position EThe following will appear in t...

Page 72: ...tons Soak and Pre wash at the same time hold pressed in and B switch the machine on with the I ON 0 OFF button CThen release these buttons The Soak Pre wash and Washing sequence indicator lamps will flash A P will appear in the left of the display DTurn the WASHING programme selector to the COTTONS 40 C position EThe following will appear in the display 0 Programmable function off de activated or ...

Page 73: ...rogramme selectors are at the Finish position APress the additional option buttons Soak and Pre wash at the same time hold pressed in and B switch the machine on with the I ON 0 OFF button CThen release these buttons The Soak Pre wash and Washing sequence indicator lamps will flash A P will appear in the left of the display DTurn the WASHING programme selector to the DELICATES Cold position EThe f...

Page 74: ...me selectors are at the Finish position APress the additional option buttons Soak and Pre wash at the same time hold pressed in and B switch the machine on with the I ON 0 OFF button CThen release these buttons The Soak Pre wash and Washing sequence indicator lamps will flash A P will appear in the left of the display DTurn the WASHING programme selector to MINIMUM IRON 30 C EA number between 0 an...

Page 75: ...75 ...
Page 76: ...Alteration rights reserved 3404 WT 945 S This paper consists of cellulose which has been bleached without the use of chlorine M Nr 05 876 080 02 en GB ...

Reviews: