background image

ATTENTION:  THERE IS NO NEED TO DRILL HOLES INTO THE  ENCLOSURES TO MOUNT THE 
POLE-MOUNT KITS.  PLEASE SEE INSTRUCTIONS BELOW.

•  

For 

poles that are 2” in diameter up to 5”, 

our Pole-Mount Kits use two (2) rails 

    across the top and bottom of the enclosure and fit between the enclosure and the pole, 

    and four (4) pole-brackets that go around the pole (two on bottom and two on top) 

    which are tightened down for a secure fit. (

see next page for 6” to 12” poles

)

Part numbers for these kits are the BW-24PM2 (2” pole), BW-24PM3 (3” pole) 

and BW-24PM4 (4” - 5” poles)

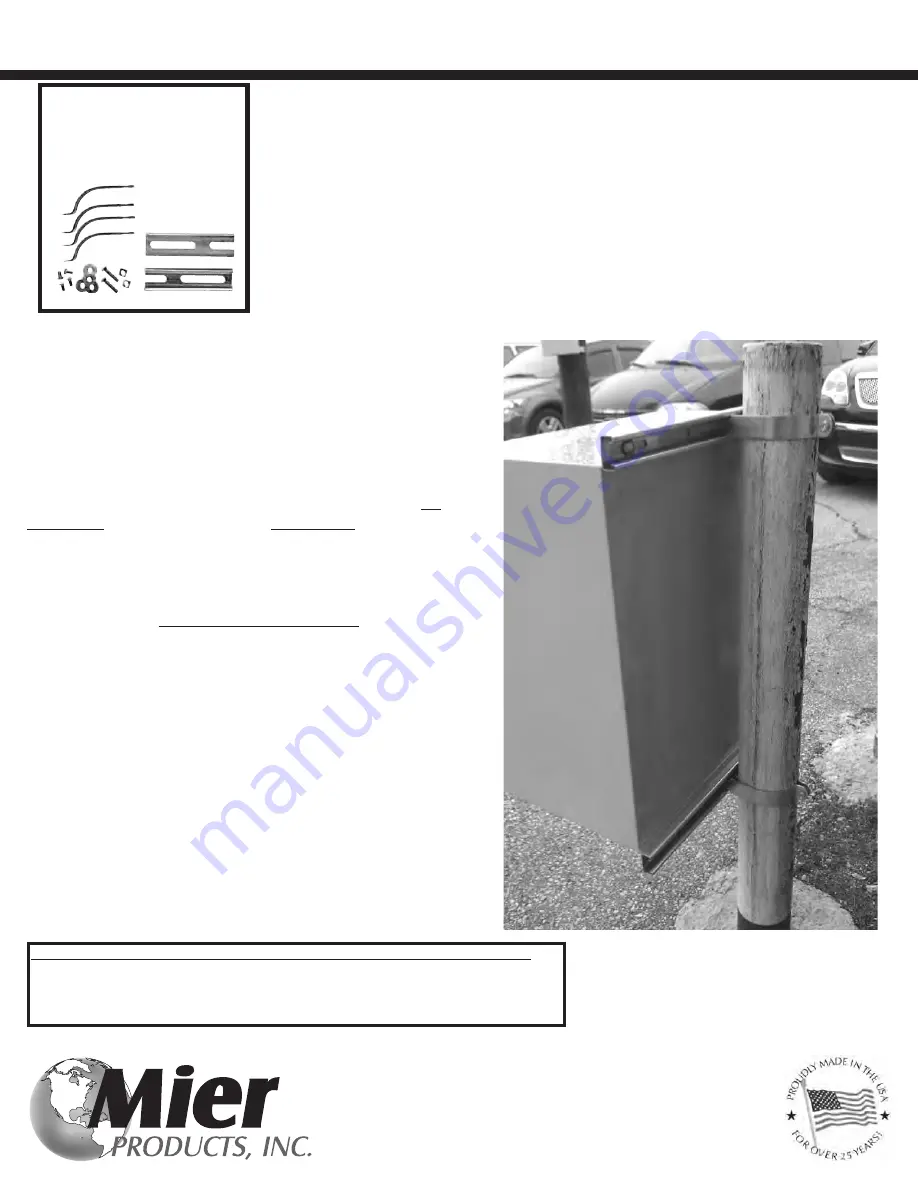
Example of a 

Pole-Mount Kits for 

2” to 5”

diameter poles

Pole-Mount Kits for 24” Wide METAL enclosures on 2”-5” Poles

1-800-473-0213  ~ www.mierproducts.com

info@mierproducts.com

Mier Recommends using at least two people to pole-mount 
heavy enclosures, and preforming steps 1-2 PRIOR to going to 
job site.

1)  Attach the two (2) rails to the enclosure by placing them flat 
against the Mounting Brackets on top and bottom of the 
enclosure, corresponding to the mounting holes.  Then place the 
3/8 x 16 Bolts through the Rails and the holes in the 
enclosure Mounting Brackets.  Secure with the 3/8” Washers 

on 

the outside 

and 3/8 x 16 Flange-Nuts 

on the inside

.

2)  Twist and insert the four (4) pole-brackets into the two rails.  
Two of these brackets go in the top rail, and two go in the 
bottom rail with the 

curved sections facing inwards

 towards 

each other to wrap around the pole (

see photo

): 

3)  Wrap the pole-brackets around the pole, insert the 
attachment bolts, secure and tighten with the lock-nuts.

1

2

2

1

3

3

These pole-mount kits are used with the following Mier Products Enclosures:

BW-1248BP, BW-1248FC, BW-1248ACE, BW-1248ACHT, BW-124BP, BW-124FC, 
BW-124ACE, BW-124ACHT, BW-136BP, BW-136FC, BW-136ACE, BW-136ACHT,  
BW-RACKACE and BW-RACKACHT

Summary of Contents for ACHT Series

Page 1: ...k you would need at least a NEMA 4 or NEMA 4X unit Mier commonly recommends the highest NEMA rated and most effective Temperature Controlled units which are the ACHT series enclosures NOTE To keep NEMA Rating installers must strictly follow OEM installation instructions and must use water tight fittings on all openings BW 124 8 ACHT 24 W x 24 H x 8 D with an 800 BTU AC unit and 150W heater BW 136A...

Page 2: ...ust also remain in place and never be removed The tamper switch should be mounted on the studs at the top of the enclosure If you have ANY questions regarding the installation of these products call Mier Products at 1 800 473 0213 Mier Products Temperature Controlled Enclosures Installation and Warranty Information Power Once installed correctly the power cords for the AC unit and the heater are w...

Page 3: ...ures and preforming steps 1 2 PRIOR to going to job site 1 Attach the two 2 rails to the enclosure by placing them flat against the Mounting Brackets on top and bottom of the enclosure corresponding to the mounting holes Then place the 3 8 x 16 Bolts through the Rails and the holes in the enclosure Mounting Brackets Secure with the 3 8 Washers on the outside and 3 8 x 16 Flange Nuts on the inside ...

Page 4: ...s through the Mounting Rails and Adjustable Band Guides and secure with the 1 4 x 20 locknuts on the inside C and B 4 Insert the two 2 Heavy Duty Adjustable Bands into the two 2 Adjustable Band Guides inside the Mounting Rails The bands should curve outwards away from the inside of the Mounting Rails One 1 of these Heavy Duty Adjustable Bands goes in each of the Adjustable Band Guides assembled in...

Page 5: ...tches and one Tubular Lock with a set of two keys Dimensions and Weight Outside dimensions without AC attached 24 8 W x 38 5 H x 12 8 D Outside dimensions with AC unit attached are 32 75 W x 38 5 H x 12 8 D Inside dimensions are 23 9 W x 35 9 H x 11 9 D Internal back panel dimensions 22 x34 Enclosure with back panel weighs 70 lbs AC unit weighs 60 lbs Shipping skid weighs 45 lbs External 0 580 mou...

Reviews: