background image

www.mikado-heli.de

© Mikado Modellhubschrauber, V1.0

LOGO 500 DX  •  LOGO 500 3D
LOGO 600 DX  •  LOGO 600 3D

Manual

Mikado  Modellhubschrauber  •  Friedrich-Klausing-Straße  2  •  14469  Potsdam  •  Germany
phone  +49  (0)331  23749-0  •  fax  +49  (0)331  23749-11  •  www.mikado-heli.de

Summary of Contents for LOGO 500 3D

Page 1: ...kado Modellhubschrauber V1 0 LOGO 500 DX LOGO 500 3D LOGO 600 DX LOGO 600 3D Manual Mikado Modellhubschrauber Friedrich Klausing Straße 2 14469 Potsdam Germany phone 49 0 331 23749 0 fax 49 0 331 23749 11 www mikado heli de ...

Page 2: ...l necessary maintenance PRIORTO ADJUSTING AND OPERATINGYOUR MO DEL OBSERVE THE FOLLOWING Warning Operate the helicopter only outdoors and out of people s reach as the main rotor operates at high rpm Warning While adjusting stand at least 10 meters yards away from the helicopter Novice R C helicopter pilots should always seek advice from experienced pilots to obtain hints with assembly and for pre ...

Page 3: ...ll 14 nylon nuts in the right side frame Before you combine the two sides of the main frame attach the two belt tensioners 4089 bag 6 You may install the four servos into the main frame either now or later If you wish to install the servos now please go to page 10 before you continue here 1 Mainframe Bag 1 Bag 6 Bag 10 Bag 12 Bag 1 Bag 6 Bag 10 Bag 12 All parts shown in the boxes are displayed in ...

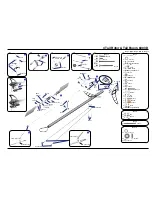
Page 4: ... 4x M2 5x30 2x Kugel ball Ø4 8x3 2x Kugel ball Ø4 8x2 5 2x M3 2x 6x10x2 5 2x 5x10x4 4x 3x8x3 M3x3 7 M3x14 M2x8 3x4x10 6x10x2 5 2x8 5x10x0 1 2x7 M3x3 M3x16 M3x12 M3 Stopp 3x8x3 3x5x2 M3x30 M3 Stopp M3x20 M3x25 M3 Stopp 5x10x4 LOGO 500DX 1x LOGO 600 DX 2x 4x M3x30 5 Min Epoxy 2 Tail Rotor Tail Boom 500 600 DX Bag 5 Bag 6 Bag 9 Bag 10 Bag 11 Bag 9 LOGO 500 DX Bag 9 LOGO 600 DX Bag 6 Bag 5 Bag 10 Bag ...

Page 5: ...12 6x M2 5x30 2x Ø4 8x3 2x Ø4 8x2 5 2x M3 1x M2x6 1x M2 2x 6x10x2 5 2x 5x10x4 4x 3x6x2 5 7 2x8 5x10x0 1 2x7 M3x3 M3x14 M2x8 3x6x2 5 3x5x0 5 M3x30 M3 Stopp M3 Stopp M3x20 M3x25 5x10x4 M3x3 M3x16 4x8x3 4x8x2 5x8x0 5 M2 5x6 3x6x2 5 3x12 M3 Stopp 3x5x5 2 5x6x0 5 6x10x2 5 M2x6 M2 8 5 Min Epoxy Countersunk screw M2x8 Bag 12 Bag 5 Bag 6 Bag 9 Bag 10 3 Tail Rotor Tail Boom 500 3D Bag 5 Bag 6 Bag 9 Bag 10 ...

Page 6: ...M2 5x30 2x M3 1x M2x6 1x M2 2x 6x10x2 5 2x 5x13x4 4x 3x6x2 5 1x M3x14 2x M3x8 2x M3x40 5x M3x35 2x7 7 M3x14 M2x8 3x6x2 5 3x5x0 5 3x5x5 2x8 5x10x0 1 M3x40 M3 Stopp 5x 5x6x2 3x6x2 5 5x13x4 M2 5x6 M3x35 5x M3x8 3x5x10 6x10x2 5 5 Min Epoxy M2x6 M2 M3x3 M3x16 4x8x3 4x8x2 5x8x0 5 M2 5x6 M3 Stopp 2 5x6x0 5 8 M2 5x30 6x 5 Min Epoxy 2x Countersunk screw M2x8 Ball Ø6 mm 4 Tail Rotor Tail Boom 600 3D Bag 5 B...

Page 7: ...OGO 500 3D 4x M3x10 2x M2 5x20 10x16x0 5 10x16x0 5 LOGO 500 DX 3D 2x LOGO 600 3D 1x 10x16x0 5 M3x8 4x M3x10 M3x10 M3 Stopp 4 M2 5x20 M3x20 LOGO 600 3D LOGO 500 3D LOGO 500 DX use super glue to fix position Tighten tooth belt Pull tail boom backwards and tighten srews Grease autorotation hub 5 Main Gear Tail Rotor Assembly Bag 2 Bag 8 Bag 12 Bag 2 Bag 8 Bag 12 ...

Page 8: ...bschrauber Page 2x 2x8 2x 3x5x2 1 2x M3x14 2x 3x5x0 5 2x M2x8 2x Kugel ball 4x 3x7x3 2x M2x8 2x Kugel ball 4 8 2x 3 mm 4x 3 mm 2x 3x11 4x M2x10 4x Kugel ball Ø4 8x7 2x 500 600 DX 500 600 3D 2x 7x 4x 6 Swashplate Bag 3 Bag 10 Bag 3 Bag 10 Bag 3 ...

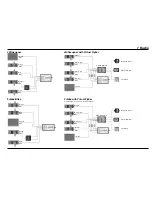
Page 9: ...Bar Mainboard Air Speed Sensor Bluetooth Modul 3 axis Gyro CH3 CH2 CH1 CH2 CH1 CH6 CH4 Air Speed Sensor Bluetooth Modul 3 axis Gyro CH3 CH2 CH1 CH4 JR Graupner with Virtual Flybar CH3 CH2 CH1 Rudder Aileron right Aileron left Elevator Throttle V Bar Mainboard Futaba Hitec JR Graupner CH2 CH3 CH4 CH5 CH1 CH3 CH1 CH2 CH4 CH5 Throttle Throttle Rudder Rudder Aileron Nick Pitch Nick Aileron Pitch ...

Page 10: ...x13 4x M2 5x10 4x 2 3 4 5 6 7 9 8 Servo Installation Bag 1 Bag 9 Bag 12 Bag 9 Bag 1 Bag 12 LOGO Rotor Head with flybar Apply a small amount of oil to the rotor shaft If you are installing Futaba servos add the distance plate for the two aileron servos Aileron left Aileron right Elevator Rudder LOGO Rotor Head V Stabi flybarless head Bag 1 LOGO 500 DX 3D Bag 1 LOGO 600 3D Use M2x14 16 mm 16 mm 16 m...

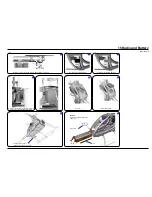
Page 11: ...x 4x13x5 2x 4x10x4 LOGO 500 3D 2x 6x14x5 2x M3x25 2x M4x25 500 DX 500 3D 3x5x12 3x7x3 M2x8 M3x25 3x5x16 M2x8 M3x25 M4x25 M4 M4x12 4x12x1 10x14x0 5 2x30 3x7 8x11x1 8x14x4 500 DX 500 3D M2x3 4x13x5 M2x8 M2x10 2x4 5x0 5 M2x12 B A A B A B A B 0 0 M3x3 3x7x0 5 5 LOGO 500 3D M3x3 Large inner diameter Small inner diamenter Apply grease to bearing Less agility More agility 9 Rotor Head 500 DX 3D Bag 7 Bag...

Page 12: ...Manual The New Generation Mikado Modellhubschrauber Page 12 10 Rotor Head 600 DX 3D Bag 7 Bag 10 Bag 12 Bag 7 Bag 10 Bag 12 ...

Page 13: ...x 8x14x4 2x 6x14x5 2x 10x14x1 1x M3x10 2x M3x14 1x M3x20 2x M3x22 2x M4x12 2x M4x25 2x 4x12x1 1x M3 2x M4 2x Ø4 8x3 8 9 M3x8 M3 Stopp M3x20 M3x22 M4x12 4x12x1 10x14x1 5x 41 mm 8x14x4 Bag 7 11 V Bar Rotor Head 500 3D Bag 7 Large inner diameter Small inner diameter Apply grease to bearing ...

Page 14: ...x 11x16x1 1x M3x10 2x M3x14 1x M3x20 2x M4x25 3x M3 2x M4 2x Ø4 8x3 2x M3x35 2x M5x12 2x 5x15x1 M3 Stopp M3x20 M3x10 M3x14 M3 Stopp M3x20 M3x8 5x 8x11x0 5 3x8 M5x12 11x16x1 41 mm 8x16x5 Large inner diameter Small inner diameter Apply grease to bearing Apply grease to bearing 12 V Bar Rotor Head 600 3D Bag 7 Bag 7 ...

Page 15: ...the mainframe and tighten the set screw Gear Backlash Move the motor with the pinion until it is limited by the gear Tighten one of the M3x14 screws slightly You must still be able to swivel the motor around its own axis In this way you can easily determine the correct distance between the main gear and the pinion There should be no gear backlash At the same time the motor should not exert any pre...

Page 16: ...th O rings and Velcro Position of servo arms for the tail rotor when sticks are centered Position of servo arms for the aileron servos when sticks are centered 0 deg Pitch Velcro Rings 2x V Bar Main board Receiver Position for mounting tail gyro Position for mounting V Bar gyro Position of LiPo battery for the power supply of receiver ...

Page 17: ...following way Prepare a bowl of water with a small amount of dish washing detergent Apply some of this water to a cloth or fill up a squirt bottle with it Using the cloth or squirt bottle wet the surface of the canopy and the sticking surface of the decal element Place the decal onto the canopy You can still move the decal at this point When you have found the correct position use a hair dryer to ...

Page 18: ...nly a few general guidelines which apply to most systems Servo Centering with Sub Trim Function As indicated in the above sections on mounting the servos it is important that the servo arms are exactly centered You should use the servo sub trim function of your R C system for this purpose Activating 120 CCPM Likely the 120 CCPM function is initially disabled in your R C transmitter software and ne...

Page 19: ...rs and for pilots who will do some aerobatic flight without extended periods of inverted flight The final pitch values must be tested during test flying Once set the values will work with the rotor blades you used In case you change over to a different set of rotor blades the pitch values will have to be adjusted to the properties size profile etc of the new set 17 RC Programming If you are an exp...

Page 20: ...ll parts serving the tail rotor move ments must move smoothly When there is too much resistance the tail rotor will not react to subtle input and the gyro s maximum sensitivity cannot be fully exploited 17 RC Programming 2 Using a gyro in Heading Hold mode The Heading Hold gyro mode compensates automatically the deviation caused by the motor torque Therefore if Heading Hold mode is used revo mix s...

Page 21: ...he tip of one of the rotor blades Apply tape of a different color to the tip of the other rotor blade When you are ready for your first flight increase the rotor speed to just before lift off From a safe distance check the rotor disk at eye level Very likely one rotor blade will move below the other Make a note of the color of the low mo ving blade Then turn off the motor and wait until the rotor ...

Page 22: ... mode is used by other local pilots Use the same one so fellow pilots can assist you on the field Important Flying a model helicopter requires many hours of training During your first attempts while familiarizing yourself with the different control move ments keep the heli copter low above the ground just a few centimeters a couple of inches Rudder 20 Operation During Flight Elevator Aileron ...

Page 23: ...3D 2781 LOGO 600 DX 2494 Clamp ring 2385 Dumper rubber set extra hard 3092 Alu motor plate 4088 Tail rotor hub with trust bearing 4069 Rotor disk 932 Heavy flybar paddles 2358 Tail servo holder 828 Light flybar paddles 2359 Washout fully ball raced 970 Washout fully ball raced with alu hub 971 Tail rotor lever ball raced 2447 Glass fiber canopy LOGO 500 DX 4110 Glass fiber canopy LOGO 500 3D 4109 ...

Page 24: ...Modellhubschrauber Page 24 22 Overview Chassis LOGO 500 DX Canopy 4112 LOGO 500 DX Decal 4082 LOGO 500 3D Canopy 4111 LOGO 500 3D Decal 4083 LOGO 600 DX Canopy 4114 LOGO 600 DX Decal 4084 LOGO 600 3D Canopy 4115 LOGO 600 3D Decal 4085 ...

Page 25: ...Manual The New Generation Mikado Modellhubschrauber Page 25 23 Overview Tail Rotor LOGO 500 600 DX ...

Page 26: ...Manual The New Generation Mikado Modellhubschrauber Page 26 24 Overview Tail Rotor LOGO 500 3D ...

Page 27: ...Manual The New Generation Mikado Modellhubschrauber Page 27 25 Overview Tail Rotor LOGO 600 3D ...

Page 28: ...Manual The New Generation Mikado Modellhubschrauber Page 28 26 Overview Rotor Head LOGO 500 ...

Page 29: ...Manual The New Generation Mikado Modellhubschrauber Page 29 27 Overview Rotor Head LOGO 600 ...

Page 30: ...Manual The New Generation Mikado Modellhubschrauber Page 30 28 Overview V Bar Head LOGO 500 ...

Page 31: ...Manual The New Generation Mikado Modellhubschrauber Page 31 29 Overview V Bar Head LOGO 600 ...

Page 32: ...Construction Rendering Mehran Mahinpour Tirooni Layout Realisation CDT Berlin www mikado heli de ...

Reviews: