background image

1.  

2.  

3.  

Powering

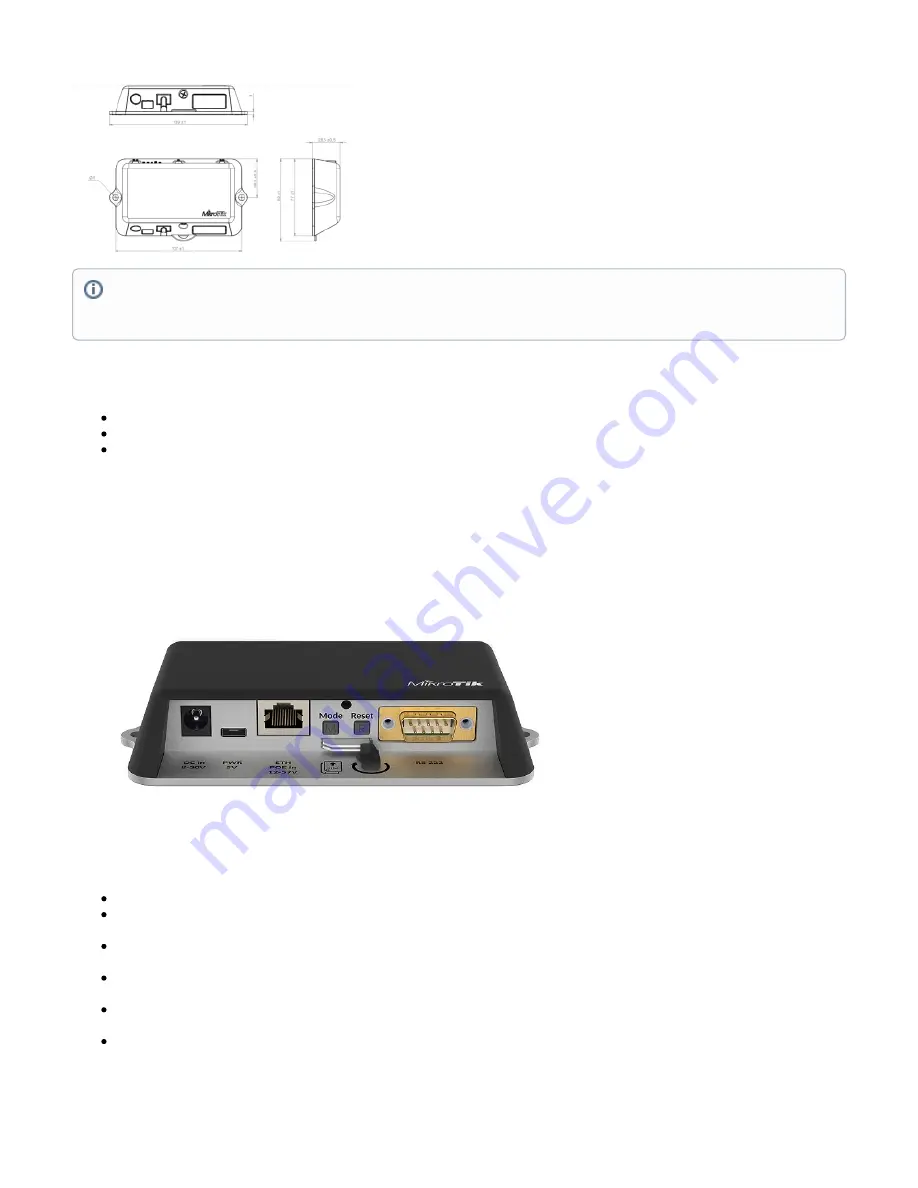
Direct-input power jack (5.5 mm outside and 2 mm inside, female, pin positive plug) accepts 8-30 V DC.

microUSB port accepts 5 V powering.

Ethernet port accepts passive and 802.3af/at Power over Ethernet 8-57 V DC (compensate for loss on cable, so more than 12 V recommended).

The power consumption under maximum load with attachments can reach 9 W.

Connecting to a PoE Adapter:

Connect the Ethernet cable from the device to the PoE+DATA port of the PoE adapter.

Connect an Ethernet cable from your local network (LAN) to the PoE adapter.

Connect the power cord to the adapter, and then plug the power cord into a power outlet.

Extension slots and ports

Built-in 2 GHz wireless access point module, AP/station/bridge/p2p modes are supported. Onboard PIF antennas built-in. Antenna gain1.5 dBi.

miniPCIe slot and two SIM slots (can't be used without a modem installed, can't be used both at the same time) to be used with a 3G/4G/LTE 

modem. Onboard antennas available, but openings for external antennas are provided on the case.

Built-in GPS module - uFL connector provided for an external antenna. To enable, set the port to serial0 (this disables the DB9 port on the unit). 

Supports - GPS, GLONASS, BeiDou, Galileo).

One 10/100 Ethernet port, supporting automatic cross/straight cable correction (Auto MDI/X). Either straight or crossover cable can be used for 

connecting to other network devices. The Ethernet port accepts 12-57 V DC powering from a passive PoE injector.

One DB9 RS232 serial port for serial console access. Configured as 115200 bit/s, 8 data bits, 1 stop bit, no parity. Can't be used if built-in GPS is 

enabled on serial0.

One microUSB 2.0 port for powering only.

Configuration

Warning! This equipment should be installed and operated with a minimum distance of 20 cm between the device and your body. The operation 
of this equipment in the residential environment could cause radio interference.
The mounting and configuration of this device should be done by a qualified person.

Summary of Contents for LtAP mini

Page 1: ... Check for updates button and updating your RouterOS software to the latest version to ensure the best performance and stability Choose your country to apply country regulation settings and set up your password on the screen that loads Mounting It is possible to attach the device to a wall using the provided screw holes on the sides of the unit The device should be mounted in a way that the cable ...

Page 2: ...at the same time to be used with a 3G 4G LTE modem Onboard antennas available but openings for external antennas are provided on the case Built in GPS module uFL connector provided for an external antenna To enable set the port to serial0 this disables the DB9 port on the unit Supports GPS GLONASS BeiDou Galileo One 10 100 Ethernet port supporting automatic cross straight cable correction Auto MDI...

Page 3: ... screws on the bottom of the case and lift off the top part of the case You will see the antenna attached to it Locate the mini PCIe slot on the PCB and remove two factory attached screws Attach provided a thick thermal pad to the card and install the card into miniPCIe slot so that the thermal pad is between PCB and card The secure card in place using previously removed two screws Attach the grey...

Page 4: ... release it to make the RouterBOARD look for Netinstall servers total 15 seconds Regardless of the above option used the system will load the backup RouterBOOT loader if the button is pressed before power is applied to the device Useful for RouterBOOT debugging and recovery Mode button The action of the mode buttons can be configured from RouterOS software to execute any user supplied RouterOS scr...

Page 5: ...r compliance could void the user s authority to operate this equipment This device complies with Part 15 of the FCC Rules Operation is subject to the following two conditions 1 This device may not cause harmful interference and 2 this device must accept any interference received including interference that may cause undesired operation This device and its antenna must not be co located or operatio...

Page 6: ...products ES Por la presente Mikrotīkls SIA declara que el tipo de equipo radioeléctrico RouterBOARD es conforme con la Directiva 2014 53 UE El texto completo de la declaración UE de conformidad está disponible en la dirección Internet siguiente https mikrotik com products ET Käesolevaga deklareerib Mikrotīkls SIA et käesolev raadioseadme tüüp RouterBOARD vastab direktiivi 2014 53 EL nõuetele ELi v...

Page 7: ...rektywą 2014 53 UE Pełny tekst deklaracji zgodności UE jest dostępny pod następującym adresem internetowym https mikrotik com products PT O a abaixo assinado a Mikrotīkls SIA declara que o presente tipo de equipamento de rádio RouterBOARD está em conformidade com a Diretiva 2014 53 UE O texto integral da declaração de conformidade está disponível no seguinte endereço de Internet https mikrotik com...

Page 8: ...en Lisää tietoa _ https mt lv help fi _ FR Mode d emploi Connectez l adaptateur d alimentation pour allumer l appareil Ouvrez 192 168 88 1 dans un navigateur Web pour configurer le produit Plus d informations dans _ https mt lv help fr _ HR Uputa za uporabu Priključite napajanje i uključite uređaj Za konfiguraciju uređaja u pregledniku otvorite 192 168 88 1 Više informacija je na _ http s mt lv he...

Page 9: ...re för att konfigurera produkten Mer information på _ https mt lv help sv _ NO Bruksanvisningen Koble strømadapteren for å slå på enheten Åpne 192 168 88 1 i en nettleser for å konfigurere produktet Mer informasjon på _ https mt lv help no _ RU Руководство по эксплуатации подключите адаптер питания чтобы включить устройство Откройте 192 168 88 1 в своем веб браузере для конфигурации Дополнительная...

Reviews: