3.0
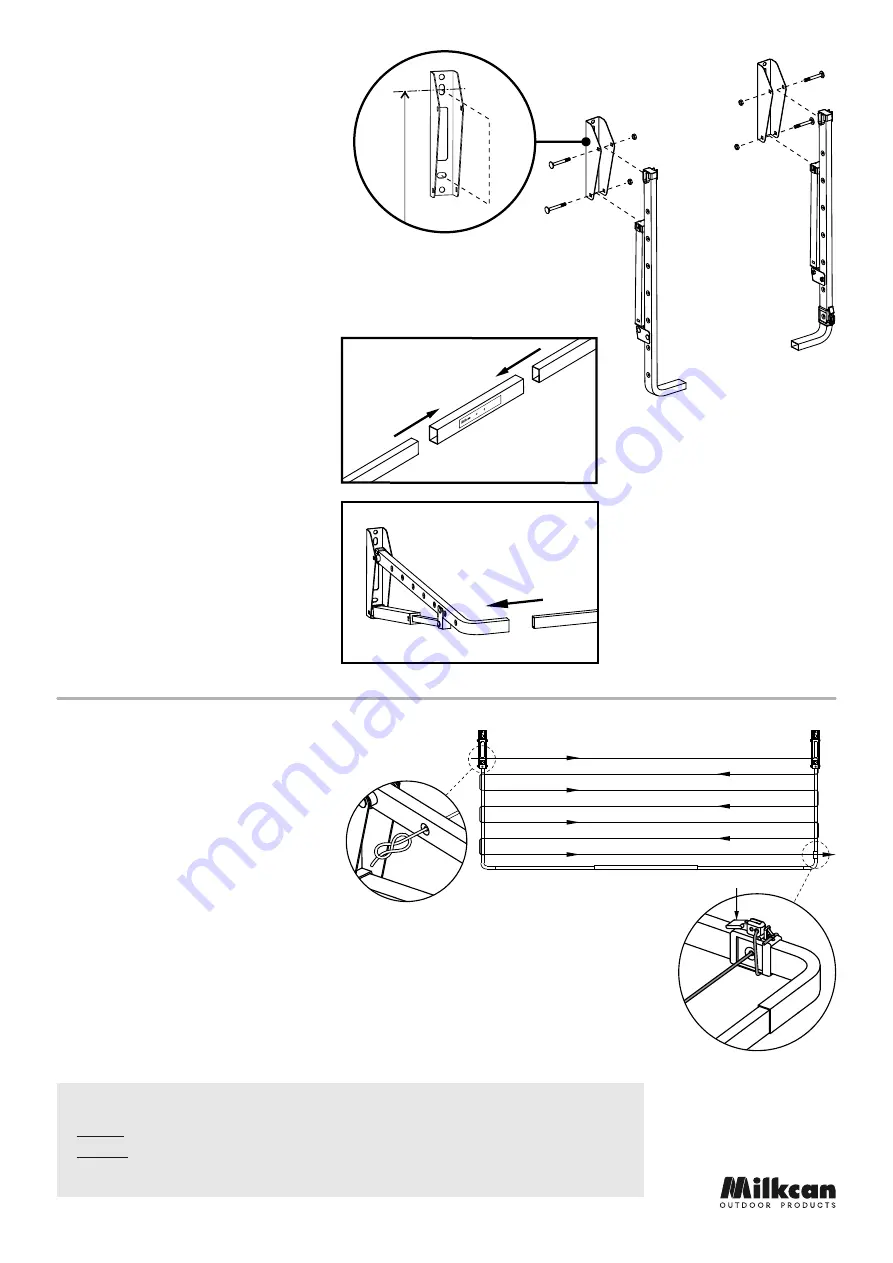
Cut the cable tie securing the strut and t the free end to the bottom hole of the wall brackets
using the 60mm Coach bolts and nuts provided.
3. Fit the side arms to the top hole of the wall brackets using 60mm coach bolts provided.
4. Assemble the front bar, pushing the left and
right bars fully into the front brace until they
hit the small indent in the middle of the front
brace.
5. Spread the side arms slightly apart and insert
the assembled front bar into the corners as
shown right.
O U
T D
O O
R
P R
O D
U C
T S
LIF
T
CL
IC
K
LO
CK
&
RE
LE
AS
E
User’s
height
+
10cm
User’s
height
+
10cm
Attach
through
these holes
Attach
through
these holes
1. Ensure the Line Tensioner is at the front of the right hand side arm.
Line Cord Installation
2. Start threading the line cord through the left
side arm hole nearest the wall bracket. Tie
off the end as shown right.
CLAMPING LEVER
3. Progressively tighten each line, starting from the rear, working towards the front. Don't over-tighten or you
will distort the side arms.
4. Thread the cord through the Line Tensioner as shown. Lift the clamping lever up before threading the cord.
Push the lever down to clamp the cord.
To Lower Lift the front bar higher until you hear another click from each side. It can now be folded
fully down.
To Raise Slowly lift the front bar until you hear a single click from each strut.
Using your Clothesline
Installation and Assembly
(cont...)
- For brick walls, use the M8 (10mm) masonry
anchors provided
- For timber posts, use the M10 coach screws
provided
2. Attach the wall brackets to your brick wall or
timber posts.


