background image

EN


10


         millnorway.com


Operation


To switch the patio heater on: 


1.


Put the plug into an electric socket 


2.


Press I on the ON/OFF button at the  top of the patio heater to set the heater in standby 
mode (green light)


3.


Press the button at the back of the patio heater 1 time for 750W (orange light) and 2 times 
for maximum effect of 1500W (red light).


Attention! Please be aware that the carbon heating element will take 

some time to reach maximum effect.


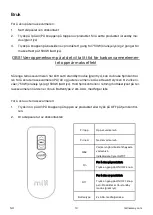
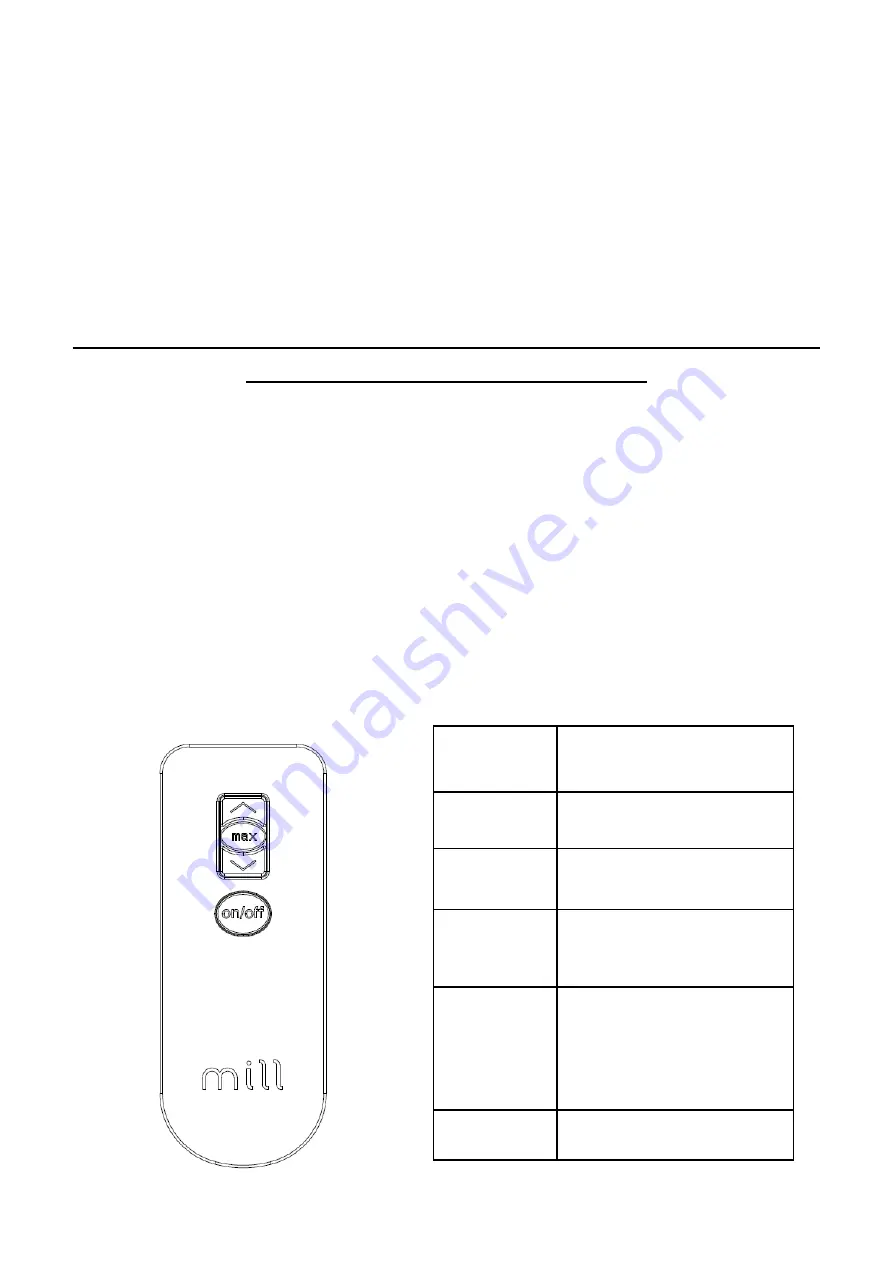
As long as the heater has been set in standby mode (green light), you can use the wireless re-
mote control to turn the patio heater ON/OFF and adjust the heat by setting the watt power to 
2 different levels; 750W (orange light) and 1500W (red light). Point the remote control in the di-
rection of the indicator light on the patio heater when using it. Battery type: 2 pcs AAA, not in-
cluded.


To switch the patio heater off: 


1.


Press o on the ON/OFF button at the top of the patio heater or press OFF on the remote 
control


2.


Pull the plug out of the electric socket.


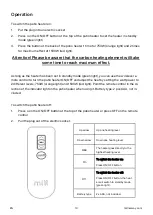
Up arrow


Up one heating level


Down arrow


Down one heating level


MAX


The heater goes directly to the 
highest heating level. 


On


To switch the heater on:


Press ON/OFF button


Off


To switch the heater off:


Press ON/OFF button: the heat-
er will switch to standby mode 
(green light). 


Battery type


2 x AAA, not included.


Summary of Contents for JDB1500CL

Page 1: ...the patio heater is installed according to the provided instructions The use and maintenance of the product must follow the operation manual as well Failure to carefully observe these instructions ma...

Page 2: ...hould have more styles to choose from other than the typical old fashioned traditional heaters Since heaters are part of so many homes Philip and Cato decided to use their extensive knowledge to re in...

Page 3: ...ications 7 Benefits of Carbon heating element 7 Description of patio heater 7 Installation 8 Minimum distances 8 How to install the patio heater 9 Operation 10 Troubleshooting 11 Maintenance 12 Guaran...

Page 4: ...he heating elements of the product These pieces must be removed in order to avoid unpleasant odors Prevent the product from overheating do not cover Always turn off the product and unplug it when not...

Page 5: ...in connection with a fault any fingerprints have to be wiped off using a soft cloth mois tened with denatured alcohol The fingerprints leave grease which can burn to the heating lamp This shortens the...

Page 6: ...under the age of 3 should be kept away from the product unless they are under constant supervision Children aged 3 to 8 years are only permitted to turn the product ON OFF assuming the product is moun...

Page 7: ...rs 40 32 3 1 kg 1500 IP25 Yes Specifications Maximum length that is permitted under European Standard Benefits of Carbon heating element This patio heater has a carbon heating element that provides a...

Page 8: ...ire and carabiner when installing the product to the ceiling Inspect it for damages and make sure it is intact The patio heater should be installed so that it hangs at a distance of at least 1 8 m fro...

Page 9: ...re you attach the patio heater by connecting the carabiner to the suspension Please see illustration below Adjust the height of the patio heater with the adjustable wire To adjust the height use a scr...

Page 10: ...turn the patio heater ON OFF and adjust the heat by setting the watt power to 2 different levels 750W orange light and 1500W red light Point the remote control in the di rection of the indicator light...

Page 11: ...ntrol flat battery or defective remote con trol Check whether the battery is properly in serted and make sure that the battery is not flat Try to use manual control In case the problem persists after...

Page 12: ...t please contact the store where you have purchased the product or the product importer Waste Management The symbol indicates that this product may not be thrown away along with ordinary house hold wa...

Page 13: ...esifikasjoner 7 Fordeler med karbon varmeelement 7 Beskrivelse av terrassevarmer 7 Installasjon 8 Minimumavstander 8 Hvordan installere terrassevarmeren 9 Bruk 10 Feils king 11 Vedlikehold 12 Garanti...

Page 14: ...hagelig lukt Unng at produktet blir overopphetet m ikke tildekkes Skru alltid ovnen Off og dra ut kontakten n r den ikke er I bruk over lengre tid V r spesielt oppmerksom hvis produktet er i bruk hvor...

Page 15: ...er montert p en trygg m te og sitter godt fast I taket Ta aldri p produktet med v te hender Produktet blir varmt n r det st r p V r derfor oppmerksom slik at du unng r brenne eller svi huden din Produ...

Page 16: ...har f tt instruksjon eller tilsyn vedr rende bruk av produktet p en sikker m te og forst r farene som er in volvert Terrassevarmeren m ikke plasseres I en avstand mindre enn 1 m fra m bler markiser e...

Page 17: ...ksimum lengde som er tillatt i f lge Europeisk standard Fordeler med karbon varmeelement Denne terrassevarmeren har et karbon varmeelement som avgir en sk nsom og komfortabel varme Dette elementet har...

Page 18: ...alltid medf lgende oppheng vaier og karabinkrok n r du monterer produktet til taket Sjekk at det ikke er noe skader p delene Terrassevarmeren b r installeres minst 1 8m fra bakken og 0 6 m fra tak ell...

Page 19: ...nger opp terrasse varmeren ved hjelp av medf lgende karabinkrok som festes til opphenget Vennligst se illustra sjon nedenfor Juster h yden p terrassevarmeren med den justerbare vaieren For justere h y...

Page 20: ...errassevarmeren P AV og justere varmen ved sette watt styrken til 2 ulike ni v er 750W oransje lys og 1500W r dt lys Hold fjernkontrollen i retning mottakerlyset p ter rassevarmeren n r den er I bruk...

Page 21: ...fjernkontroll flatt batteri eller defekt fjernkon troll Kontroller at batteri er korrekt innsatt samt at batteriet ikke er flatt Ved vedvarende problem etter nevnte ret telse kontakt Mill for tilsende...

Page 22: ...oduktet ta kontakt med butikken der den ble kj pt eller med import ren Avfallsh ndtering Symbolet angir at dette produktet ikke skal kastes sammen med vanlig husholdningsavfall For hindre mulig skade...

Reviews: