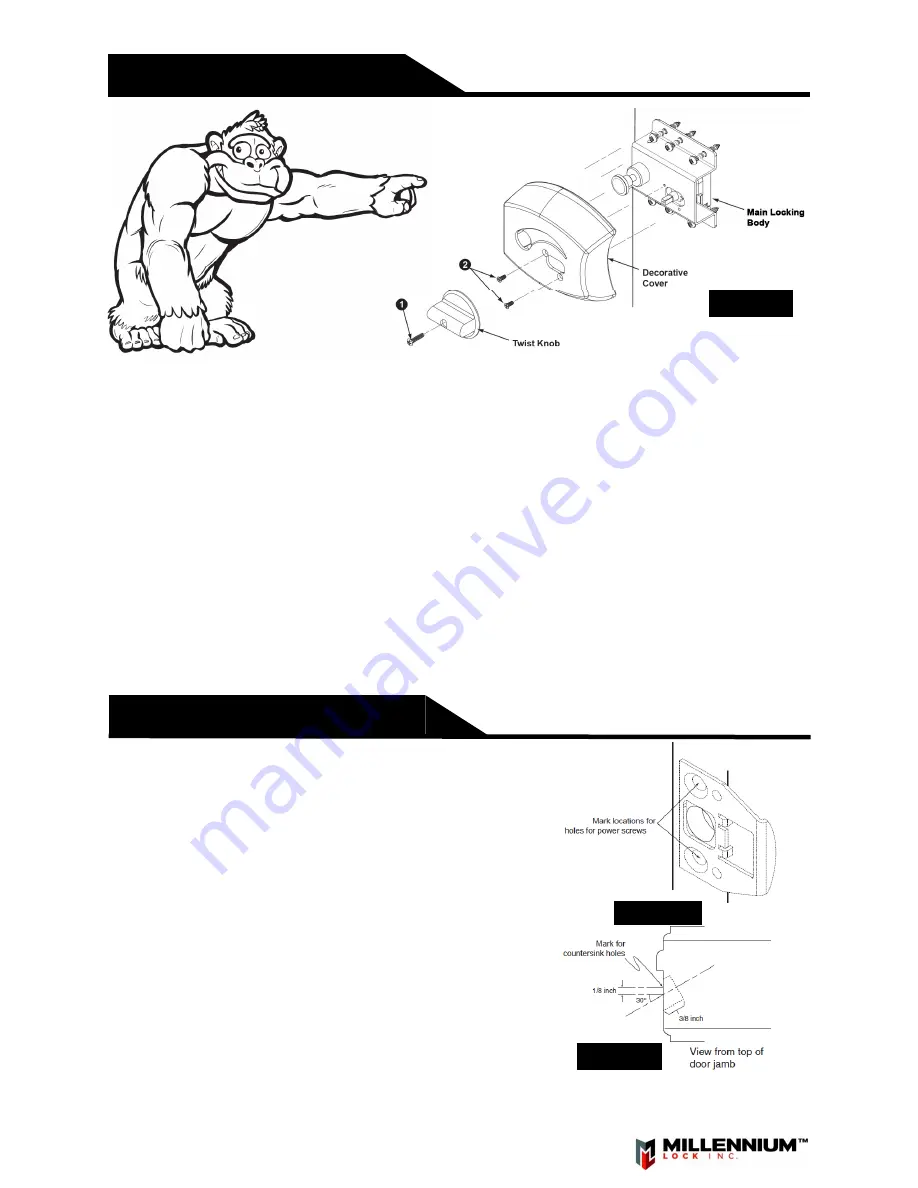
a.
Install decorative cover and secure with two case screws (found in
Bag E
) using No. 1 Phillips
screwdriver. Tighten 90 percent of the first screw, then 90 percent of the second. Then the final 10
percent on each screw.
DO NOT OVER TIGHTEN!
b.
Use the
twist knob
and
key
to test the lock. Make sure the lock still turns smoothly. If the lock
hangs or seems to be obstructed while turning, c
all our office at
866-MLS-4005
.
c.
Both the deadbolt and the security bar should lock and unlock at the same time.
d.
With the deadbolt and security bar in the unlocked position, place the twist knob onto the lock
vertically oriented and secure with screw 1(found in
BAG E
).
7. Final Lock Assembly
Figure 7
Page 5 of 8
Copyright© 2013
All Rights Reserves
-
8-a. Install Striker Plate
a.
Remove the old deadbolt striker plate from the door frame.
Close the door and see if the new deadbolt aligns with the old
hole in door jamb. If not, use the 1" spade bit to enlarge the
old hole for the new bolt. Make sure it will extend the full 1"
depth and the security button will engage.
b.
With the deadbolt partially extended, close the door until the
deadbolt touches the door frame. Mark the top and bottom of
the deadbolt on the edge of the frame.
c.
Hold the
striker plate
on the door frame with the two edge
tabs on the edge of the door frame aligned to the top and bot-
tom of the deadbolt marks. While holding the striker plate in
place, mark along the outside edge of the striker plate. This
will usually be larger than the old striker plate. Using the
chisel, hollow out the space for The Ultimate Lock® striker
plate. Correct as needed until flush (aligned).
Figure 8b
Figure 8a
6


