background image

Ê

Setting Procedures

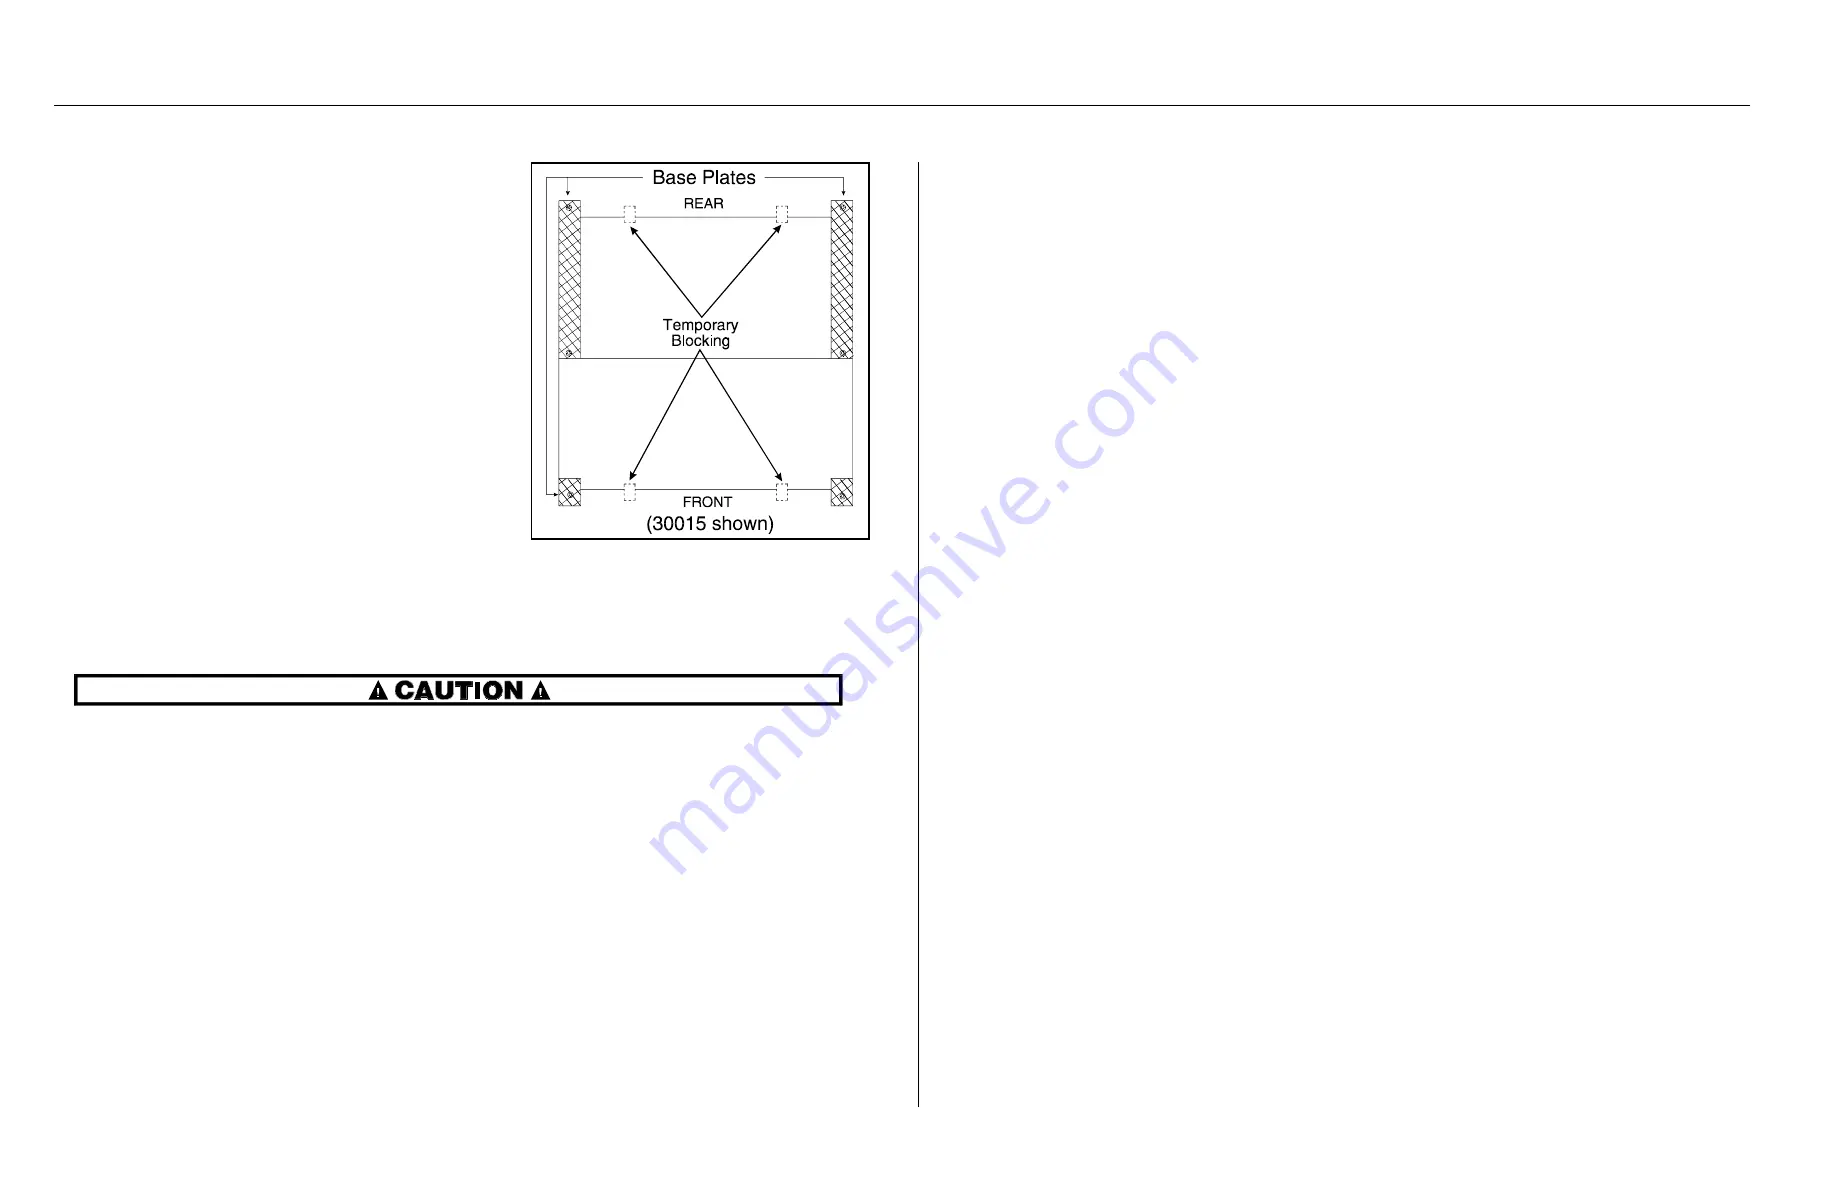
See FIGURE 1 during the following procedures:

1. With the machine near the final location, unbolt the shipping

skids. Observing all precautions, lift the machine off its
skids and lower the machine onto temporary blockings as
shown in FIGURE 1. Install anchor bolts, taking care to
align the bolts with the base plates to avoid bolt thread
damage.

2. Determine that the minimum clearance between each

base plate and floor surface is as specified (see dimen-
sional drawings).
 Shim the machine at temporary block-
ings to level the machine from left to right and front to
backUse a carpenter’s level along the right and left side
of the base to determine if the machine is level from front
to back. Place a level laterally across the base plates to de-
termine if the machine is level from right to left.

NOTE: Do not pull on conduit when moving the machine.
Tampering with the conduit may require adjustment of the
door switch. 

MACHINE DAMAGE AND MALFUNCTION HAZARDS—Tightening anchor bolt fasteners
onto spacers (without grout or with improperly applied grout) twists the machine frame and
causes cylinder misalignment.

Never tighten anchor bolt fasteners before grouting. 

Grout must displace total clearance between base plate and existing foundation floor.
Voids must not exist!

3. After determining the final position of the machine, apply grout between the existing foundation floor and

base plates, while observing the following considerations:

All machines are designed to be grouted under the full area of all base plates. Grout prevents the anchor
bolts from distorting the frame when the fasteners are tightened. Total area under each base plate must be
completely filled with grout (see dimensional drawings). Voids under base plates can magnify vibration,
causing unsatisfactory operation. Use only industrial strength non-shrinking grout.

If the grout (after mixing) is of proper consistency, pack or trowel it by hand.

If the grout (after mixing) is too thin (causing it to flow from under the base pads), install temporary
cardboard framing around the pads to retain the grout until it cures.

4. After the grout has completely cured, raise the machine sufficiently to remove all temporary blocking and

shims. Be careful to avoid disturbing or damaging grout.

5. Tighten all foundation fasteners until they contact the top of the base plate. Center bolt holes are located in-

side rear console. Install center hold down bolts properly to ensure successful operation.

6. Tighten all fasteners evenly, using only one-quarter turn on each fastener before moving to the next one.

While tightening, frequently skip from front to back and right to left to insure uniform tension. After tighten-
ing all fasteners, check each fastener at least twice.

Î

FIGURE 1

 (MSIN0703BE)

Î

Temporary Blocking Points

for 30015 and 30022

Cxx, Sxx, Mxx, Txx and

Vxx Machines

17

Summary of Contents for 30015

Page 1: ...AE 2002044N Publishing System TPAS Access date 01 30 2002 Document ECN s Latest Available Installation 30015 30022 Cxx Vxx Txx Rigid Mount Washer Extractors PELLERIN MILNOR CORPORATION POST OFFICE BOX 400 KENNER LOUISIANA 70063 0400 U S A ...

Page 2: ...ublishing system access date and whether the document ECN s are the latest available or exact References to Yellow Troubleshooting Pages This manual may contain references to yellow pages Although the pages containing troubleshooting procedures are no longer printed on yellow paper troubleshooting instructions if any will be contained in the easily located Troubleshooting chapter or section See th...

Page 3: ...on 14 Handling and Setting Procedures for Rigid Mount 30015 30022 Washer Extractors MSIN0703BE 2001036V 18 Service Connections BIRQVI01 20020125 23 Section 2 Dimensional Drawings 25 Dimensional Drawing 30015C4A 30015C4T BD3015C4BE 2001332D 27 Dimensional Drawing 30015V7J T5E T5X BD3015V7BE 2002044D 29 Dimensional Drawing 30015J4P BD3015J4AE 2001064D 30 Dimensional Drawing 30015J4P Options BD3015J4...

Page 4: ......

Page 5: ...oints brake and clutch linings and similar parts are not covered by this warranty nor are parts damaged by exposure to weather or to chemicals We reserve the right to make changes in the design and or construction of our equipment including purchased components without obligation to change any equipment previously supplied ANY SALE OR FURNISHING OF ANY EQUIPMENT BY MILNOR IS MADE ONLY UPON THE EXP...

Page 6: ...2 ...

Page 7: ... In correspondence regarding motors or electrical controls please include all nameplate data including wiring diagram number and the make or manufacturer of the motor or controls All parts will be shipped C O D transportation charges collect only Please read this manual It is strongly recommended that you read the installation and operating manual before attempting to install or operate your machi...

Page 8: ...ctional and safety aspects of the machine ensure safety devices installed on the machine are in place and properly maintained ensure all machine parts and assemblies are properly maintained Ë Laundry Facility Provide a supporting floor that is strong and rigid enough to support with a reasonable safety factor and without undue or objectionable deflection the weight of the fully loaded machine and ...

Page 9: ... functional and safety aspects of the machine ensure safety devices installed on the machine are in place and properly maintained ensure all machine parts and assemblies are properly maintained Ë Laundry Facility Provide a supporting floor that is strong and rigid enough to support with a reasonable safety factor and without undue or objectionable deflection the weight of the fully loaded machine ...

Page 10: ...hand inching Any evidence of cylinder damage Missing or removed guards covers or side panels Malfunctioning tilting components including but not limited to safety limit switches electrical interlocks and operator controls If any of these conditions occur The machine makes a sound like skidding automobile tires as it comes out of extract The wash or drain clutch does not disengage or it reengages d...

Page 11: ...rong and rigid enough and has not subsided to leave the floor slab suspended without support on grade installations can often be made directly to an existing floor slab if it has enough strength and rigidity to safely withstand our published forces without transmitting undue vibration If the subsoil has subsided or if the floor slab itself has insufficient strength and rigidity a deeper foundation...

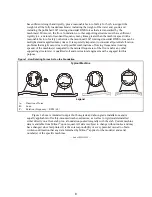
Page 12: ...ting speeds of the machine s compared to the natural frequencies of the floor and or any other supporting structure s A qualified soil and or structural engineer must be engaged for this purpose Figure 1 How Rotating Forces Act on the Foundation Typical Machine Legend A Direction of force B Load C Rotation Frequency RPM 60 Figure 1 above is intended to depict both on grade and above grade installa...

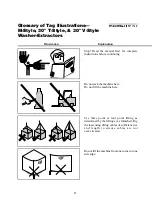
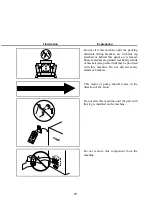
Page 13: ...omplete instructions before continuing Do not jack the machine here Do not lift the machine here Use three point or four point lifting as determined by the lifting eyes furnished Rig the load using lifting cables of sufficient size and length to ensure cables are not over stressed Do not lift the machine from one corner or one side edge 9 ...

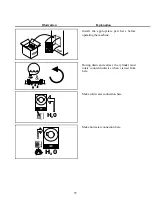
Page 14: ...emoved These materials are painted red Safety stands or brackets also painted red may be provided with this machine Do not discard safety stands or brackets This motor or pump should rotate in the direction of the arrow Do not start this machine until the part with this tag is installed on the machine Do not remove this component from the machine 10 ...

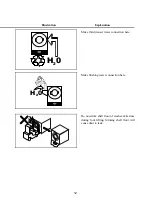
Page 15: ...fore operating the machine During drain and extract the cylinder must rotate counterclockwise when viewed from here Make cold water connection here Make hot water connection here H 0 2 H 0 2 7 _ccQbi _V DQW 9 ecdbQdY_ c Cdi U D Cdi U F Cdi U GQcXUb 5hdbQSd_bc 11 ...

Page 16: ...nation Make third reuse water connection here Make flushing water connection here Do not strike shell front of washer extractors during fork lifting Striking shell front will cause door to leak H 0 2 H 0 2 C9EE D715 F 12 ...

Page 17: ...Section 1 Installation 13 ...

Page 18: ...s lights machine controls and any additional controls associated with the machine e g electrical power connections water and steam shut offs etc Ë Foundation Requirements The machine must be anchored in accordance with the installation instruc tions The floor and or all other support components must have sufficient strength and rigidity with due considera tion for the natural or resonant frequency...

Page 19: ...tatus lights machine controls and any additional controls associated with the machine e g electrical power connections water and steam shut offs etc Ë Foundation Requirements The machine must be anchored in accordance with the installation instruc tions The floor and or all other support components must have sufficient strength and rigidity with due considera tion for the natural or resonant frequ...

Page 20: ...osition of the machine apply grout between the existing foundation floor and base plates while observing the following considerations All machines are designed to be grouted under the full area of all base plates Grout prevents the anchor bolts from distorting the frame when the fasteners are tightened Total area under each base plate must be completely filled with grout see dimensional drawings V...

Page 21: ...osition of the machine apply grout between the existing foundation floor and base plates while observing the following considerations All machines are designed to be grouted under the full area of all base plates Grout prevents the anchor bolts from distorting the frame when the fasteners are tightened Total area under each base plate must be completely filled with grout see dimensional drawings V...

Page 22: ...pecified range may cause the machine to operate inefficiently or malfunction and may damage machine components 2 Throughly flush all water lines before making connections 3 When connecting water and steam inlets always install unions and shut off valves at the point of connection to permit removal of the machine components for servicing when necessary 4 Suds overflow if so equipped to drain must b...

Page 23: ...izes of these fuses and wires along with the motor fuses supplied with the machine depend on the machine voltage See the fuse and wire sizing information in the schematic manual and on the machine nameplate See dimensional drawings in this manual for electrical connection locations 1 Electrical connections must be made by a competent electrician 2 See fuse and wire sizing information in the schema...

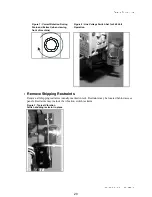
Page 24: ...of machine Figure 2 Line Voltage Switch Set for 240 Volt Operation AT eT BWX__X V ATbcaPX cb Remove all shipping restraints usually marked in red Restraints may be located behind access panels Restraints may include the vibration switch restraint Figure 3 Typical Vibration Switch showing restraint in place 20 ...

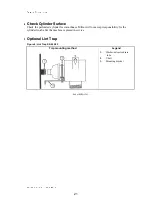
Page 25: ...ated cylinder for smoothness Milnor will not accept responsibility for the cylinder finish after the machine is placed in service _cX P X c CaP_ Figure 4 Lint Trap SA 02 069 Trap mounting method Legend 1 Washer extractor drain tube 2 U bolt 3 Mounting bracket End of BIRQVI01 21 ...

Page 26: ...22 ...

Page 27: ...Section 2 Dimensional Drawings 23 ...

Page 28: ...24 ...

Page 29: ...25 ...

Page 30: ...26 ...

Page 31: ...27 ...

Page 32: ...28 ...

Page 33: ...29 ...

Page 34: ...30 ...

Page 35: ...31 ...

Page 36: ...32 ...

Page 37: ...33 ...

Page 38: ...34 ...

Page 39: ...35 ...

Reviews: