background image

MSSMA405AE/8737BV    (1  of  2)

È

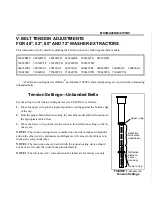
V-BELT TENSION ADJUSTMENTS
FOR 48", 52", 60" AND 72" WASHER-EXTRACTORS

This instruction is to be used for adjusting the belt tension on the following machine models:

48032BHE

48032BTG

48032BTH

48036QHE

48036QTG

48036QTH

52038WE1

52038WTF

52038WTB

52038WTG 52038WTH

60036WE2

60036WE3

60036SG2

60036SG3

60044WE2

60044WE3

60044SG2

60044SG3

72044SG2

72044SG3

72044WE2

72044WE3

72044WTB

72044WTG 72044WTH

A belt tension testing device (Milnor

®

 part number 30T001) and a straight edge are required when tensioning

unbanded belts.

Ê

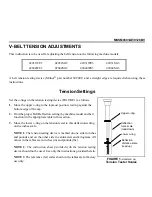
Tension Settings—Unbanded Belts

Set the o-rings on the tension testing device (see FIGURE 1) as follows:

1. Move the upper o-ring to the topmost position, resting against the bottom edge

of the cap.

2. Find the proper belt deflection setting (by machine model and belt function) in

the appropriate table below.

3. Move the lower o-ring on the tension tester to this deflection setting on the in-

ches scale.

NOTE 1: The tension testing device is marked on one side in inches and pounds
and on the other side in centimeters and kilograms. All values in the tables are in
inches (in.) and pounds (lbs.).

NOTE 2: The instruction sheet provided with the tension testing device should
not be used. Use only the instructions provided herein.

NOTE 3: The reference (ref.) code shown in the tables are for factory use only.

Ê

Belt Tension Measurements

Ë

Unbanded Belts

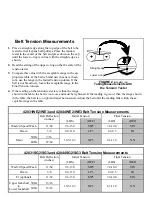
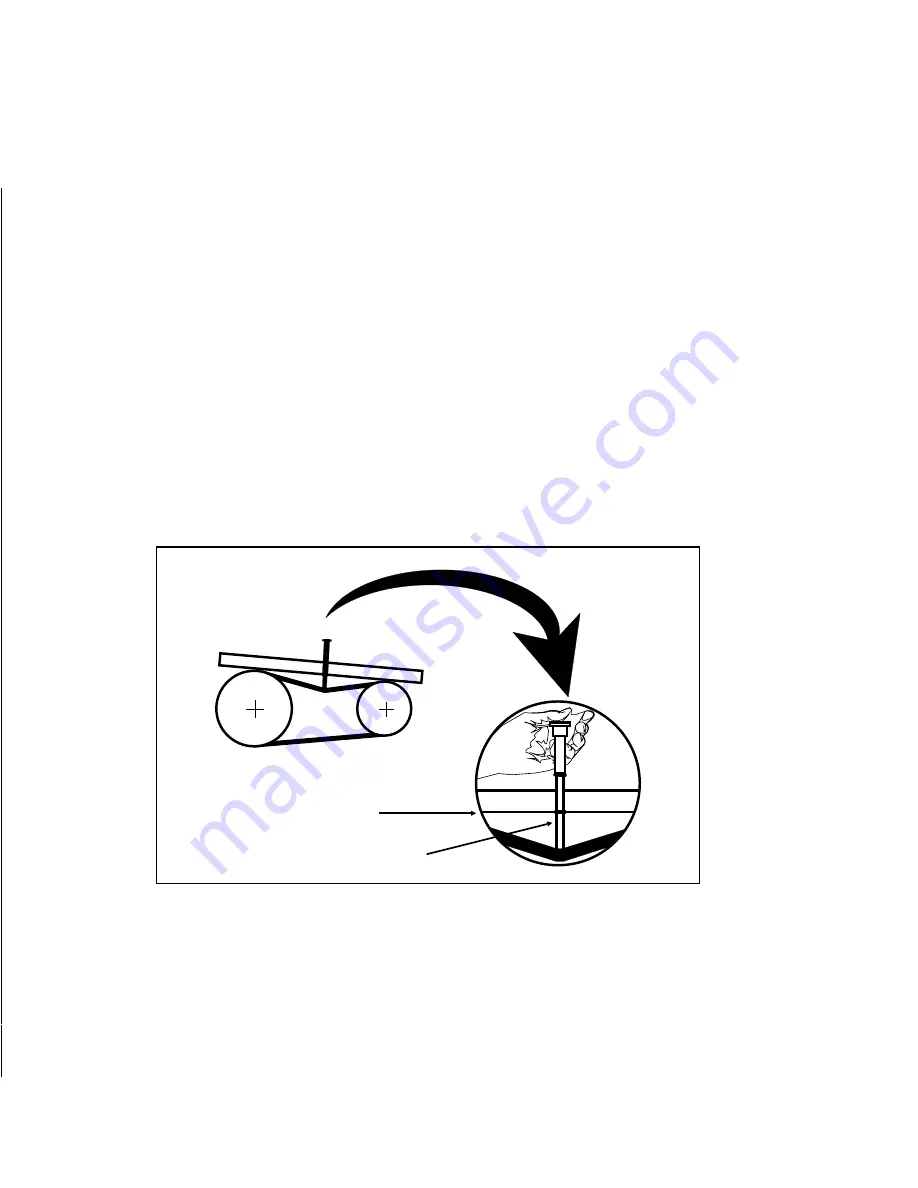
1. Place a straight edge along the top edge of the belt to be tested so that it spans both pulleys.  Place the tension

tester in the center of the belt and press down on the cap until the lower o-ring is in line with the straight
edge, as shown.

2. Read the setting of the upper o-ring on the lbs scale of the tension tester.

3. Compare this value with the acceptable range in the appropriate table. If the belt is brand new (has never been

run), use the range in the Initial Tension column. If the belt is not brand new, locate the acceptable range in
the Final Tension column.

4. If the reading on the tension tester is less than the range shown in the table, the belt is too loose and must be

tightened. If the reading is greater than the range shown in the table, the belt is too tight and must be
loosened. Adjust the belt until the reading falls within the acceptable range in the table.

Upper o-ring

Deflection
force scale
(read down) 

Deflection
distance
scale
(read up)

Lower o-ring

Î

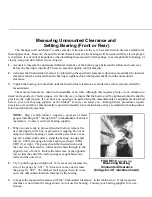
FIGURE 1 

(MSSMA405AE)

Î

Tension Settings

Lower o-ring

Straight edge

Î

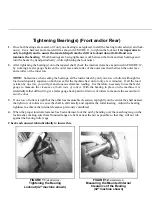
FIGURE 2

 (MSSMA405AE)

Î

Measuring Belt Tension

Summary of Contents for K28 0010

Page 1: ...r ECN H28 0010 2001074N Publishing System TPAS Access date 2 14 01 Document ECN s Latest Available Kit Instruction K28 0010 K36 0005 K36 0005R PELLERIN MILNOR CORPORATION POST OFFICE BOX 400 KENNER LOUISIANA 70063 0400 U S A ...

Page 2: ...ublishing system access date and whether the document ECN s are the latest available or exact References to Yellow Troubleshooting Pages This manual may contain references to yellow pages Although the pages containing troubleshooting procedures are no longer printed on yellow paper troubleshooting instructions if any will be contained in the easily located Troubleshooting chapter or section See th...

Page 3: ......

Page 4: ...t is too loose and must be tightened If the reading is greater than the range shown in the table the belt is too tight and must be loos ened Adjust the belt until the reading falls within the acceptable range in the table Ï 3 0016BWE 36021BWE Belt Deflect inches Initial Tension lbs ref Initial Tension lbs ref Belt Deflect IN Initial Tension lbs ref Initial Tension lbs ref WASH 2 SPEED WASH 50C 5 1...

Page 5: ...opriate table in this section 3 Move the lower o ring on the tension tester to this deflection setting on the inches scale NOTE 1 The tension testing device is marked on one side in inches and pounds and on the other side in centimeters and kilograms All values in the tables are in inches in and pounds lbs NOTE 2 The instruction sheet provided with the tension testing device should not be used Use...

Page 6: ...nd must be tightened If the reading is greater than the range shown in the table the belt is too tight and must be loosened Adjust the belt until the reading falls within the ac ceptable range in the table Ï 42031SG2 SG3 and 42044SG2 SG3 Belt Tension Measurements Belt Deflection inches Initial Tension Final Tension LBS REF LBS REF Wash 2 Speed Wash 11 64 9 6 13 0 MP3 7 4 10 0 MN Drain 3 8 8 0 11 0...

Page 7: ...as follows 1 Move the upper o ring to the topmost position resting against the bottom edge of the cap 2 Find the proper belt deflection setting by machine model and belt function in the appropriate table below 3 Move the lower o ring on the tension tester to this deflection setting on the in ches scale NOTE 1 The tension testing device is marked on one side in inches and pounds and on the other si...

Page 8: ...cceptable range in the appropriate table If the belt is brand new has never been run use the range in the Initial Tension column If the belt is not brand new locate the acceptable range in the Final Tension column 4 If the reading on the tension tester is less than the range shown in the table the belt is too loose and must be tightened If the reading is greater than the range shown in the table t...

Page 9: ...D EXTRACT 13 64 6 6 9 2 KP3 5 1 7 1 KN 3 16 9 62 13 0 MP3 7 4 10 0 MN Ï 52038WE1 WTF WTB WTG WTH 60036 60044WE2 WE3 Belt Deflect inches Initial Tension lbs ref Initial Tension lbs ref Belt Deflect in Initial Tension lbs ref Initial Tension lbs ref WASH 2 SPEED WASH 25 64 10 5 14 3 NP3 8 1 11 0 NN 3 16 5 7 7 6 JP3 4 4 5 9 JN DRAIN 5 32 10 5 14 3 NP3 8 1 11 0 NN 13 32 6 6 9 2 KP3 5 1 7 1 KN E1 1 4 6...

Page 10: ...PPER JACK BANDED BELTS NEED SPECIAL INSTRUCTIONS BANDED BELTS NEED SPECIAL INSTRUCTIONS Ï 52038WE1 WTF WTB WTG WTH 60036 60044WE2 WE3 Belt Deflect inches Initial Tension lbs ref Initial Tension lbs ref Belt Deflect in Initial Tension lbs ref Initial Tension lbs ref WASH 2 SPEED WASH 15 64 5 7 7 6 JP3 4 4 5 9 JN 15 64 5 7 7 6 JP3 4 4 5 9 JN DRAIN 13 32 6 6 9 2 KP3 5 1 7 1 KN 25 64 6 6 9 2 KP3 5 1 7...

Page 11: ......

Page 12: ...xpansion of the shaft during operation and is thus the floating bearing Both bearings are held in place on the tapered portion of the shaft by a bearing lockwasher and locknut The front and rear bearings are each protected from contamination from wash water by three spring loaded lip type seals and a shaft seal leak off cavity that carries off any water that leaks past the main water seals as show...

Page 13: ...ve the front soil side bearing first 2 Remove bearing housings seal sleeves and seals 3 If both bearings were removed install the bearing housing seal sleeve seals and new bearing on the rear clean side 4 Install the bearing housing seal sleeve seals and new bearing on the front soil side 5 Tighten bearing s See the Main Bearing Assembly drawing for your machine for bearing component part numbers ...

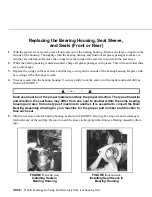
Page 14: ...from the Milnor factory With the bearing cover or shaft seal holder and the bearing removed proceed as follows 1 Remove the three bearing housing cap bolts and the grease lines from the bearing housing front plate Install guide rods in two of the bolt holes as shown in FIGURE 3 2 Install the pulling fixture as shown in FIGURE 4 by placing each of the four threaded rods through a hole in the steel ...

Page 15: ...n the plate and the bearing housing 3 Once the bearing housing is free of the shell carefully slide it off of the guide rods and place on a clean work surface 4 The seal sleeve will almost always remain on the shaft when the housing is removed Remove the seal sleeve taking care not to damage or scar it and place it on a clean work surface Ê Precautions for Bearing Replacement The most important in...

Page 16: ...e bearing housing You may gently work the seals in with a mallet and metal drift as shown in FIGURE 5 Each seal must be of the proper material and face the proper direction The type of material and direction the seal faces may differ from one seal to another within the same bearing housing and also from one type of machine to another It is essential to consult the Main Bearing Assembly drawing for...

Page 17: ...ms under bearing housing pads 8 Install the third guide rod spacers if required and hex nuts using these to seat the housing fully as shown in FIGURE 9 Remove the seal sleeve setting fix ture 9 Remove the guide rods and install the bearing housing cap bolts See BOLT TORQUE REQUIRE MENTS elsewhere for proper torques 10 With the grease gun pump grease into the inner por tion of the bearing cavity su...

Page 18: ...escribed below your local bearing supplier or the Milnor factory can assist you Although these procedures require precision over and above that normally required for laundry room maintenance they are standard in bearing instal lation and absolutely essential NOTE Step 1 which follows requires a good set of feeler gauges including 001 through 010 in thousandths of an inch increments Contact your lo...

Page 19: ...set in position first because it is the fixed bearing 6 Set the bearing into the housing with the taper facing the proper direction and seat the bearing using the bear ing setting fixture This fixture is installed in similar fashion to the seal sleeve setting fixture If you have just set the rear bearing and the front bearing housing is yet to be installed leave the bearing setting fixture in plac...

Page 20: ... for only a few minutes If all the load is taken by one row you will get an erroneous clearance reading It is therefore necessary to use the feeler gauge to measure the clearance of both rows of rollers With the bearing in place on the machine it is admittedly rather difficult to get a feeler gauge back past the first row of rollers to measure the second but it must be done 3 If one row of rollers...

Page 21: ...shaft seal holder as appropriate When installing the shaft seal holder take care not to damage the seal as it is gently pushed over the shaft Cover the keyway on the end of the shaft with tape to prevent the sharp corners of the keyway from cutting the seal lip Also make sure that the seal lip does not turn over as it passes over rough areas ...

Reviews: