104
5.1.1.5 Calibration of the x-axis (step 4/5)
1 Press Calibrate to proceed with calibration.
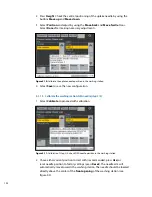
Figure 5.13: Calibration 1 Step 4/5: Calibration of the x-axis.
2 If you haven’t done so yet, place a Chill 15 Rack onto the MACS MiniSampler.
Place three 5 mL conical centrifugation tubes in positions A1, B1 and C1. Press
Done to confirm. The needle arm will move to position A1 of the tube rack.
3 Select Use to start the calibration at current position (recommended). Press
Reset to use factory settings.
4 Press Height and check the positioning of the uptake needle at the bottom
of the tube. To do so, press Down until the needle hits the bottom and the
Down button disappears. Go up again by one increment. The needle should be
centered.
5 If the needle tip is not located directly in the middle of the tube, press Position.
Use the needle navigation buttons (Move left, Move right) to correct the
needle position. Press Done to continue with calibration.
6 Press Save to store new settings.
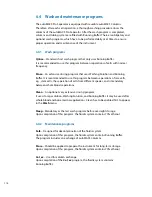
5.1.1.6 Test current calibration settings (step 5/5)
1 Press Test to check the new configuration. The autoMACS Pro Separator will
perform a complete test of Calibr_1 settings.


