130
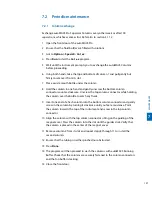
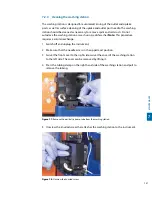
Figure 7.5: Wash the syringe with distilled water.
9 Gently push the plunger halfway into the syringe. Dry the plunger lock screw
before proceeding with installation of the syringe.
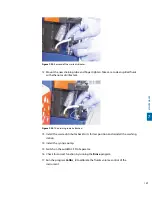
10 Fasten the syringe at the dilutor valve by turning the top screw clockwise until
a resistance is met. Unfasten again by one rotation. Grip the syringe at the top
knurled screw only. Do not compress the glass, as it might break.
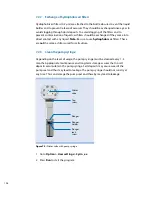
11 Pull the plunger out of the syringe until it reaches its fitting in the plunger
holder. The plunger must have the same orientation as the fitting (see figure
7.2). Tighten the plunger lock screw.
Figure 7.6: Place the plunger in its fitting and tighten the plunger lock screw
12 Tighten the syringe at the diluter valve by turning until a resistance is met.
13 Switch on the instrument. The plunger holder will move up again.
14 Prime the autoMACS Pro Separator as described in section 3.1.3.
15 Run the program Calibr_2 to calibrate the fluidic volume control of the
instrument. Refer to section 5 for details.


