2
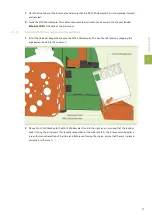
Click
Start
calibration under the heading
Needle arm calibration relative to
washing
station
. The
robotic needle arm will move toward the washing station before being inserted into the sample injection
port. If the uptake needle pops out of the robotic needle arm holder, a system failure is caused and a prompt
screen to reinitialize appears. Reinsert the uptake needle, adjust the robotic needle arm appropriately, and
click
OK
to confirm.
3
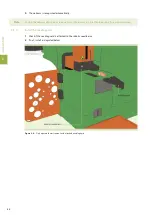
Manually adjust the robotic needle arm in order to position the uptake needle over the center of the sample
injection port.
4
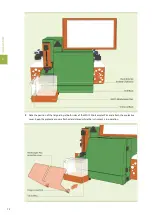
Gently lower the robotic needle arm manually into the sample injection port makes first contact with the
bottom of the orifice. The uptake needle must not pop out of the needle holder and always remain
perpendicular to the horizontal plane. Do not bend the needle or insert it diagonally.
5
In the field ZX-offset, enter 30.
6
Click
Save
calibration.
7
In the field ZX-offset, set the value back to 0 and confirm with the
Enter key
.
8
The closed green circle indicates that the calibration is completed. Click
Test
to confirm that the correct
coordinates are saved.
4
C
A
LI
B
R
A
T
IO
N
78
Summary of Contents for MACSQuant 10
Page 1: ...MACSQuant Instrument User manual ...
Page 8: ...6 ...
Page 18: ...IMPORTANT SAFETY INFORMATION EN DE ES FR IT 16 ...
Page 61: ...1 INTRODUCTION 59 Figure 1 2 BFront view of the MACSQuant Instrument doornot shown ...
Page 62: ...Figure 1 3 BRearview of the MACSQuant Instrument 1 INTRODUCTION 60 ...
Page 76: ...2 INSTALLATION 74 ...
Page 86: ...4 CALIBRATION 84 ...
Page 90: ...5 HARDWARE MONITOR 88 ...
Page 92: ...6 LIVE SUPPORT 90 ...
Page 106: ...10 TECHNICAL SUPPORT 104 ...


