7
SE
TT
IN
G
U
P
A
N
EX
P
ER
IM
EN
T
39
11
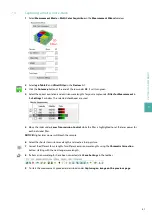
Click the
Start live preview
button in the
Measurement Wizard
window to start the live preview.
12
Lower the objective lens.
13
Click the
Show crosshair
button on the right side of the live window to activate the crosshair.
14
Use the jog wheel to move the sample inside the cuvette until the surface of the sample is visible in the
center of the crosshair.
7.2.2
Optimizing the measurement settings
1
Draw a rectangle over an illuminated and/or a dark region. If drawing is not possible, click the
ROI for
active profile
button on the right side of the live window twice.
2
Click the
Adjust window/level
button to achieve a better contrast.
3
Click the
Rayleigh ROI
button to show the horizontal focus. Move the horizontal focus in the picture until
you have the optimal contrast for your region of interest.
4
Optional: Move the slider under
Optics > sheet NA
to reduce the numerical aperture of the light sheet.
This will create a more homogeneous light sheet, but will reduce the resolution in the z-plane.
Summary of Contents for UltraMicroscope II
Page 1: ...UltraMicroscope II Imaging System User manual...
Page 14: ...1 IMPORTANT SAFETY INFORMATION 12...
Page 20: ...2 INTRODUCTION 18...
Page 30: ...5 PREPARING THE INSTRUMENT 28...
Page 38: ...6 LASER ALIGNMENT 36...
Page 46: ...7 SETTING UP AN EXPERIMENT 44...
Page 48: ...8 MAINTENANCE 46...
Page 54: ...10 TECHNICAL SUPPORT 52...
Page 57: ......


