9
4. Remove cir cuit bo ard from its three m ounting
standoffs.
2.7.2 Required Modifications
Identify old circuit board type (see Figure 5 and 6)
and fo llow dir ections spe cific to b oard. ECC Part
Number 30033 - (Figure 5)
No adaptation needed. Motor plug is the same, and
the run capacitor will plug di rectly into the new cir-
cuit board. Discard the old cup style safety cover.
Proceed to paragraph 2.7 .3, “ Install New Circuit
Board”.
2.7.2.1 ECC Par t Number 0152226XXX and
0152195XXX (Figure 6)
1. Adapter for the motor plug is required, (Milton
Roy p /n 0 4913009000, a 5 p in m ale to 9 p in
female connector).
2. Appropriate motor ru n ca pacitor is re quired
since the se boards ha d capacitor sold ered to
circuit board.
3. Motor run resistor if use d, may need to be re-
located on the ba se plate (Fig ure 7) to allow
room to locate the motor run capacitor.
4. The mo tor r un cap acitor sh ould be mo unted
using a new base plate mo unting screw, p/n
0405-0264-031 (6-32 x 7/16”).
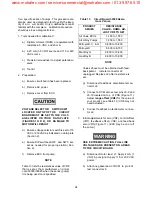
VOLTAGE SELECTOR SWITCH SW1
LOCATED ON TOP OF THE CIRCUIT
BOARD MUST BE SET TO THE VOLT-
AGE LISTED ON YOUR DATA PLATE
(FIGURE 1 OR 2), OR DAMAGE TO
MOTOR WILL RESULT.
5. Voltage sele ctor switch SW1 (Figure 11),
located o n top of the ci rcuit bo ard, is a two-
position switch used to co nfigure the ECC for
an input of 115 VAC or 230 VAC. Insure SW1 is
set to the voltage listed on your data plate (Fig-
ure 1 or 2), attached to the enclosure. The fac-
tory set s SW1 for the m odel or dered an d
should not be changed. If the operating voltage
must be changed, contact the Milton Roy fa c-
tory at (215) 441-0800 for conversion parts and
instructions.
6. Set DIP switch SW2 (Paragraph 2.6.2, Inp ut
Signal).
7. Set DIP switch SW3 for 4-20 mA or (1-5 VDC)
output app ropriately. (Par agraph 2.6 .3, Fe ed-
back Output Signal).
8. Proceed to paragraph 2.7.3 “Install New Circuit
Board”.
2.7.3 Install New Circuit Board
1. Connect:
J1 - - - - - - (9-pin motor connector, use adapter
as required).
J2 - - - - - - (3-pin potentiometer connection.)
J3 - - - - - - (4-pin motor run capacitor connec-
tion.)
J4 - - - - - - (2-pin AC power connector.)
J5 - - - - - - (4-pin control signal connector.)
2. Mount the board on the standoffs utilizing three
captive 8 -32 scr ews. Orie nt circuit bo ard with
voltage selector switch over feedback potenti-
ometer (Figure 7).
3. Calibrate as required Section 4, Maintenance.
www.motralec.com / service-commercial@motralec.com / 01.39.97.65.10


