background image

10

COMPONENTES

Por favor, compruebe si la caja que ha recibido contiene todos los componentes indicados a continuación.

Si faltase alguno, póngase en contacto con su proveedor.

Contenido:  


1 chasis con cesta y asiento incorporadas
2 ruedas delanteras 


2 ruedas traseras   

1 capota   

sistema reclinado asiento

asa de transporte

palanca bloqueo secundaria

palanca bloqueo 

primaria

capota

ventana capota

bolsillo para 

pañal

palanca freno

botón de freno

manivela de plegado

cesta

asiento

arnés seguridad 5 ptos.

reposapiés 

reclinable

almohadilla ventilada

ENG

ENG

ES

Summary of Contents for bo

Page 1: ... warranty manual del usuario y garantía manual do usuário e garantia handleiding garantie Gebrauchsanleitung und Gewährleistung mode d emploi et garantie manuale dell utente e garanzia 매뉴얼 품질보증 NL PT ES DE FR IT KR ...

Page 2: ...u and your child We hope you enjoy using bo Please read these instructions with care before using it for the first time This will enable you to appreciate all features and will ensure a safe usage mima CONTENTS WHAT YOU GET 3 PAY ATTENTION 4 FOLDING AND UNFOLDING 5 WHEELS 5 ATTACH THE CANOPY 6 CANOPY WINDOW 6 PARKING BRAKE 6 RECLINE POSITIONS 6 RECLINING LEG REST 6 CARE AND MAINTENANCE 7 WARRANTY ...

Page 3: ...t your supplier Content 1 chassis with basket seat attached 2 front wheels 2 rear wheels 1 canopy seat recline adjuster carrying handle secondary lock lever primary lock lever canopy canopy window nappy pocket brake release arm brake button folding hook basket seat 5 point safety harness reclining leg rest ventilated seat pad ENG ...

Page 4: ... for running or skating Do not let your child play with this product Always use the safety harness Ensure the harness is fitted correctly to prevent the risk of your child sliding or falling out Any load attached to the handle affects the stability of the buggy and increases the risk of the stroller tipping over accidentally Always apply the brake when standing still even for only a few moments Ap...

Page 5: ...lever and collapse the arm located on the right hand side of the stroller Then push the arm downwards to facilitate the fold A click sound signals that the fold is complete Secure the chassis by engaging the hook WHEELS 3 Attach front wheels Insert the wheel rod into the wheel housing and push upwards until you hear a click 4 Remove front wheels Push the unlock button on the wheel housing and pull...

Page 6: ...ake even when standing still for only a few moments 8 Apply and release parking brake Press the brake button to park Pull the arm upwards to release RECLINE POSITIONS 9 Recline positions bo features 3 different recline positions To recline the seat simply lift the hinges located on either side of the chassis and lower the seat into the desired position 1 Seated 2 Resting 3 Sleeping RECLINING LEG R...

Page 7: ...s CHASSIS CLEANING Brush off excess dirt and remove sand and salt after visiting the beach wipe clean with a moist cloth and a mild cleaning agent LUBRICATING MOVING PARTS Periodically lubricate the wheels hinges and other sliding parts using a light oil or silicon spray Do not use heavy oil as this will attract dust and grit which tends to clog and damage moving parts SEAT CLEANING The seat may b...

Page 8: ...he warranty is made to the original owner of the product and is not transferable to any subsequent owner The warranty provides a right to repair and specifically not to a product s exchange or return The warranty does not apply in the following circumstances The product has been modified or repaired by third parties Corrosion or rust on the wheels and chassis due to extreme environmental condition...

Page 9: ...uestra Esperamos que disfrutéis de bo Por favor lea estas instrucciones atentamente antes de utilizar el cochecito por primera vez Os permitirá conocer todas las características y garantizarán un uso seguro mima ÍNDICE COMPONENTES 10 PRESTA ATENCIÓN 11 PLEGADO Y DESPLEGADO 12 RUEDAS 12 MONTAJE DE LA CAPOTA 13 VENTANA DE LA CAPOTA 13 FRENO DE ESTACIONAMIENTO 13 POSICIONES DE RECLINADO 13 RECLINADO ...

Page 10: ...ontenido 1 chasis con cesta y asiento incorporadas 2 ruedas delanteras 2 ruedas traseras 1 capota sistema reclinado asiento asa de transporte palanca bloqueo secundaria palanca bloqueo primaria capota ventana capota bolsillo para pañal palanca freno botón de freno manivela de plegado cesta asiento arnés seguridad 5 ptos reposapiés reclinable almohadilla ventilada ENG ENG ES ...

Page 11: ...correr ni patinar No permita al niño jugar con el producto Utilice el arnés de seguridad en todo momento Asegúrese de que el arnés está correctamente colocado para evitar que el niño pueda resbalarse o caerse Toda carga en el manillar afecta a la estabilidad de la silla y aumenta el riesgo de que ésta vuelque de manera accidental Ponga el freno siempre que se detenga aunque solo sean unos minutos ...

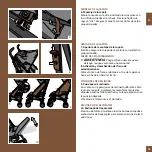
Page 12: ... y pliegue el brazo situado en el lateral derecho de la silla A continuación presione el brazo hacia abajo para facilitar la operación de plegado Cuando oiga un clic el plegado se habrá completado Asegure el chasis ajustando el gancho RUEDAS 3 Montaje de las ruedas delanteras Inserte el eje en el orificio de la rueda y presione hasta que oiga un clic 4 Desmontaje de las ruedas delanteras Presione ...

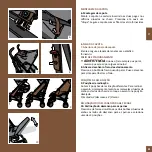
Page 13: ...unque solo sean unos minutos 8 Activación y desactivación del freno de estacionamiento Pulse el botón de freno al detenerse Tire de la palanca hacia arriba para liberar el freno POSICIONES DE RECLINADO 9 Posiciones de reclinado bo cuenta con 4 posiciones de reclinado diferentes Para reclinar el asiento simplemente levante las manivelas situadas a ambos lados del chasis y coloque el asiento en la p...

Page 14: ...ra mantener la seguridad de su producto repare lo antes posible los componentes torcidos rotos o desgastados LIMPIEZA DEL CHASIS Retire salitre y arena tras ir a la playa Elimine los excesos de suciedad Después límpielos con un paño húmedo y un producto de limpieza delicado LUBRICACIÓN DE LOS COMPONENTES MÓVILES Lubrique de manera periódica las ruedas bisagras y otros componentes móviles con un lu...

Page 15: ...ENTES Revise su producto bo de vez en cuando para comprobar si existen tornillos flojos componentes rotos material desgastado o tejidos descosidos Póngase en contacto con su proveedor en caso de que deba sustituir o reparar algún componente ...

Page 16: ...ía se hace al propietario original del producto y no es transferible a ningún propietario posterior La garantía proporciona un derecho de reparación y en concreto no el cambio o devolución de un producto La garantía no se aplica en las siguientes circunstancias El producto ha sido modificado o reparado por una tercera parte Corrosión u oxidación en las ruedas y el chasis debido a condiciones ambie...

Page 17: ...mo a nossa Esperamos que apreciem o bo Por favor leia estas instruções atentamente antes de utilizar o carrinho pela primeira vez Irão permitir lhe conhecer todas as características e garantir uma utilização segura mima ÍNDICE COMPONENTES 18 ATENÇÃO 19 DOBRAR E DESDOBRAR 20 RODAS 20 MONTAGEM DA CAPOTA 21 JANELA DA CAPOTA 21 TRAVÃO DE ESTACIONAMENTO 21 POSIÇÕES DE RECLINAÇÃO 21 RECLINAÇÃO DO DESCAN...

Page 18: ... e assento incorporados 2 rodas dianteiras 2 rodas traseiras 1 capota sistema de reclinação do assento alça de transporte alavanca de bloqueio secundária alavanca de bloqueio principal capota janela da capota saco para fraldas alavanca de freio botão de freio manivela de dobragem cesto assento arnês de segurança 5 ptos descanso para as pernas reclinável almofada ventilada ENG ...

Page 19: ...ado para correr nem patinar Não permita que a criança brinque com o produto Utilize sempre o arnês de segurança Certifique se de que o arnês está corretamente colocado para evitar que a criança escorregue ou caia Toda a carga no guidão afeta a estabilidade da cadeira e aumenta o risco desta virar de maneira acidental Acione o freio sempre que parar mesmo que seja só por alguns minutos Acione o fre...

Page 20: ... as para cima Levante a alavanca e dobre o braço situado na lateral direita da cadeira De seguida pressione o braço para baixo de modo a facilitar a operação de dobragem Quando ouvir um clique a dobragem está completa Segure o chassi ajustando o gancho RODAS 3 Montagem das rodas dianteiras Insira o eixo no orificio da roda e pressione até ouvir um clique 4 Desmontagem das rodas dianteiras Pression...

Page 21: ...nutos 8 Ativar e desativar o freio de estacionamento Pressione o botão de freio quando parar Puxe a alavanca para cima para libertar o freio POSIÇÕES DE RECLINAÇÃO 9 Posições de reclinação bo tem 4 posições de reclinação diferentes Para reclinar o assento simplesmente levante as manivelas situadas de ambos os lados do chassi e coloque o assento na posição desejada 1 Sentada 2 Descanso e 3 Dormir R...

Page 22: ... manter a segurança do produto arranje o mais cedo possível os componentes torcidos rotos ou gastos LIMPEZA DO CHASSIS Remova a areia e o salitre após idas à praia Elimine os excessos de sujidade Depois limpe com um pano húmido e um produto de limpeza delicado LUBRIFICAÇÃO DOS COMPONENTES MÓVEIS Lubrifique periodicamente as rodas dobradiças e outras componentes móveis com óleo lubrificante ou lubr...

Page 23: ...OMPONENTES Verifique o seu produto bo de vez em quando para comprovar se existem parafusos soltos componentes rotos material gasto ou tecidos descosidos Contate o seu vendedor no caso de necessitar de substituir ou reparar alguma peça ...

Page 24: ... ao proprietário original do produto e não é transferível a nenhum proprietário posterior A garantia proporciona o direito de reparação em concreto e não o de troca ou devolução do produto A garantia não se aplica nas seguintes circunstâncias O produto foi modificado ou reparado por uma terceira parte Corrosão ou oxidação nas rodas e na armação devido a condições ambientais extremas incluindo elev...

Page 25: ... van u en uw kind We hopen dat u plezier heeft van de bo Lees deze instructies aandachtig door voordat u de bo voor de eerste keer gebruikt Hierdoor zult u de bijzondere eigenschappen waarderen en is veilig gebruik verzekerd mima INHOUD WAT U KRIJGT 26 LET OP 27 INKLAPPEN EN UITKLAPPEN 28 WIELTJES 28 DE LUIFEL VASTMAKEN 29 LUIFELRAAMPJE 29 PARKEERREM 29 LEUNSTANDEN 29 VERSTELBARE BEENSTEUN 29 VERZ...

Page 26: ...et uw detailhandelaar Inhoud 1 frame met mand zitting eraan bevestigd 2 voorwieltjes 2 achterwieltjes 1 luifel zitleuning verstelknop draaggreep secundaire vergrendelhendel primaire vergrendelhendel luifel luifelraampje luiervak ontgrendelingsarm rem remknop inklaphaak mand ventilerende zitting zitje 5 punts veiligheidsgordel verstelbare beensteun NL ...

Page 27: ...roduct spelen Gebruik de veiligheidsgordel altijd Let erop dat de gordel op de juiste manier vast zit om het risico dat uw kind uit de buggy glijdt of valt te voorkomen Ieder gewicht dat aan het handvat wordt gehangen beïnvloedt de stabiliteit van de buggy en vergroot het risico dat de buggy per ongeluk omkiept Gebruik de rem altijd als u stil staat zelfs al is het maar even Gebruik de rem wanneer...

Page 28: ...n vouw het hendeltje aan de rechterkant van de wandelwagen op Duw vervolgens het hendeltje naar beneden om het inklappen mogelijk te maken Een klik geeft aan dat het inklappen klaar is Vergrendel het frame door de haak vast te zetten WIELTJES 3 Bevestigen voorste wieltjes Steek de wielstang in de wielkast en duw omhoog tot u een klik hoort 4 Verwijderen voorste wieltjes Druk op de ontgrendelingskn...

Page 29: ...slechts heel even stil staat 8 De parkeerrem gebruiken Duw op de remknop om de parkeerrem in te schakelen Trek het hendel omhoog om van de parkeerrem af te halen LEUNSTANDEN 9 Leunstanden bo heeft vier verschillende leunstanden Het verstellen van het zitje gaat eenvoudig door de scharnieren aan beide kanten van het frame op te tillen en de zitting in de gewenste stand te laten zakken 1 Zitstand 2 ...

Page 30: ...re bevestigingsmiddelen strak genoeg zitten indien nodig aandraaien Regel directe reparatie van verbogen gescheurde versleten of kapotte onderdelen om de veiligheid van uw product te behouden REINIGEN VAN HET FRAME Borstel het overmatig vuil af en verwijder zand en zout na een bezoek aan het strand neem af met een vochtige doek en een zacht reinigingsmiddel SMEREN VAN BEWEGENDE DELEN Smeer de wiel...

Page 31: ...oduct in een goed geventileerde ruimte te bewaren of het product niet in te klappen ANDERE ONDERDELEN CONTROLEREN Controleer de bo van tijd tot tijd op losse schroeven versleten onderdelen gescheurd materiaal en losse naden Neem contact op met uw detailhandelaar indien onderdelen vervangen moeten worden of repareer wat nodig is NL ...

Page 32: ... eigenaar van het product en is niet overdraagbaar aan een volgende eigenaar De garantie geeft recht op reparatie en specifiek niet op inruilen of retourneren van een product De garantie geldt niet onder de volgende omstandigheden Het product is aangepast of gerepareerd door derden Corrosie of roest op de wieltjes en het frame door extreme weersomstandigheden waaronder ook hoge luchtvochtigheid st...

Page 33: ...nd Ihr Kind im Auge behalten Wir hoffen dass Sie viel Freude an bo haben werden Lesen Sie diese Anweisungen sorgfältig bevor Sie den Wagen zum ersten Mal gebrauchen Hierdurch lernen Sie alle wichtigen Elemente kennen und können Sie bo sicher benutzen mima INHALT WAS SIE ERHALTEN 34 ACHTUNG 35 ZUSAMMENKLAPPE AUSKLAPPEN UND 36 RÄDER 36 VERDECK ANBRINGEN 37 VERDECKFENSTER 37 PARKBREMSE 37 RÜCKLEHN PO...

Page 34: ...hrem Lieferanten Kontakt auf Inhalt 1 Fahrgestell komplett mit Korb Sitz 2 Vorderräder 2 Hinterräder 1 Verdeck Verdeck Verdeck Sichtfenster Windeltasche Bremslösehebel Klapphaken Bremsknopf Sekundäre Blockierhebel Sitzneigungsversteller Tragegriff Primäre Blockierhebel Sitz Korb 5 Punkte Sicherheitsgurt Ventilierende Sitzeinlage Verstellbare Beinstütze DE ...

Page 35: ...hlaufen Lassen Sie Ihr Kind nicht mit diesem Produkt spielen Immer den Sicherheitsgurt verwenden Sorgen Sie dafür dass der Gurt richtig angelegt wird um das Risiko zu vermeiden dass Ihr Kind aus dem Buggy rutscht oder fällt Jede Last die an dem Griff hängt beeinflusst die Stabilität des Buggys und erhöht das Risiko dass der Buggy unabsichtlich umkippt Immer die Bremse anziehen wenn Sie stillstehen...

Page 36: ...Den Hebel hochziehen und den Arm an der rechten Seite des Sportwagens einklappen Dann den Arm nach unten drücken um das Zusammenfalten zu erleichtern Ein Klick bedeutet dass das Einklappen stattgefunden hat Das Gestell sichern indem man den Haken einrastet RÄDER 3 Montage der Vorderräder Stecken Sie die Radachse ins Radgehäuse und drücken Sie diese nach oben bis Sie einen Klick hören 4 Vorderräder...

Page 37: ...ie Bremse gebrauchen selbst wenn Sie nur einige Augenblicke stillstehen 8 Parkbremse benutzen und loslassen Zum Parken Bremsknopf drücken Arm hochziehen zum Entriegeln SITZNEIGUNGSPOSITIONEN 9 Sitzneigung bo kennt 4 unterschiedliche Sitzneigungen Um den Sitz rückwärts zu lehnen einfach die Drehpunkte an beiden Seiten des Gestells hochheben und dann den Sitz in die gewünschte Position senken lassen...

Page 38: ... sind Kontrollieren Sie regelmäßig ob Schrauben Muttern und andere Verschlüsse fest angezogen sind falls nötig fest anziehen Um die Sicherheit Ihres Produktes zu gewährleisten verbogene gerissene abgenutzte oder kaputte Teile sofort reparieren lassen GESTELL REINIGEN Übermäßigen Schmutz abfegen und Sand und Salz nach Strandbesuch entfernen saubermachen mit einem feuchten Tuch und einem milden Rein...

Page 39: ...en das Produkt in einem gut belüfteten Raum lagern oder das Gestell nicht zusammenklappen KONTROLLIEREN SIE AUCH ANDERE TEILE Von Zeit zu Zeit bo auf lockere Schrauben abgenutzte Teile gerissenes Material und lose Steppnähte kontrollieren Nehmen Sie Kontakt auf mit Ihrem Händler wenn Teile in bestimmten Fällen ersetzt oder repariert werden müssen DE ...

Page 40: ... Die Garantie wird dem originalen Besitzer des Produkts gegeben und ist nicht auf einen folgenden Besitzer übertragbar Die Garantie gibt ein Recht auf Reparatur und spezifisch nicht auf Tausch oder Rückgabe des Produkts Die Garantie gilt nicht in den folgenden Fällen Am Produkt sind Änderungen vorgenommen oder das Produkt ist repariert von Dritten Korrosion oder Rost an den Rädern und Gestell durc...

Page 41: ...le bo répondra à vos attentes Veuillez lire attentivement ces instructions avant d utiliser la poussette pour la première fois Vous pourrez ainsi découvrir toutes les fonctionnalités du produit et utiliser la poussette en toute sécurité mima TABLE DES MATIERES CE QUE VOUS ACHETEZ 42 ATTENTION 43 PLIAGE ET DEPLIAGE 44 ROUES 44 FIXATION DE LA CAPOTE 45 FENETRE DE LA CAPOTE 45 FREIN A MAIN 45 POSITIO...

Page 42: ...sis avec nacelle siège fixés 2 roues avant 2 roues arrière 1 capote barre de réglage de l inclinaison du siège poignée de transport levier de verrouillage secondaire levier de verrouillage primaire capote fenêtre de la capote poche à couches tige de déblocage du frein bouton de frein crochet de pliage nacelle siège harnais de sécurité à 5 points d ancrage repose pied inclinable assise ventilée FR ...

Page 43: ...as être utilisé en courant ou en faisant du roller Ne laissez pas votre enfant jouer avec ce produit Utilisez toujours le harnais de sécurité Vérifiez que le harnais est correctement fixé pour éviter que votre enfant ne glisse ou ne tombe du siège Toute charge fixée sur la poignée affecte la stabilité de la poussette et augmente le risque de basculement accidentel Enclenchez toujours le frein lors...

Page 44: ...aissez la tige située sur le côté droit de la poussette Poussez ensuite la tige vers le bas pour faciliter le pliage Un clic signale que le pliage est réussi Immobilisez le châssis en utilisant le crochet ROUES 3 Fixer les roues avant Insérez la tige de la roue dans le carter de roue et appuyez jusqu à ce que vous entendiez un clic 4 Enlever les roues avant Pressez le bouton de déverrouillage sur ...

Page 45: ...erait ce que quelques instants 8 Enclencher et désactiver le frein à main Appuyez sur le bouton de frein pour immobiliser la poussette Tirez sur la tige pour désactiver le frein POSITIONS INCLINABLES 9 Positions inclinables bo présente 4 positions inclinables différentes Pour incliner le siège il suffit de soulever les charnières situées de chaque côté du châssis puis de baisser le siège pour le p...

Page 46: ...is des boulons et autres éléments de fixation Serrez si besoin est Pour garantir la sécurité de votre enfant faites réparer immédiatement les pièces pliées tordues ou cassées de la poussette NETTOYAGE DU CHASSIS Enlevez la boue à la brosse éliminez le sable et le sel après une promenade à la plage Nettoyez à l aide d un chiffon humide et d un agent nettoyant doux LUBRIFICATION DES PIECES MOBILES L...

Page 47: ... que cela ne se produise rangez la poussette dans un endroit aéré ou évitez de la plier CONTROLE DES AUTRES PIECES Contrôlez de temps en temps le serrage des vis l usure des pièces ou la présence de matériaux tordus et de coutures détachées Contactez votre revendeur si des pièces ont besoin d être remplacées ou réparées FR ...

Page 48: ... produit et n est pas transférable à un propriétaire ultérieur La garantie offre un droit de réparation mais n offre aucun droit d échange ou de restitution du produit La présente garantie ne s applique pas si Le produit a été modifié ou réparé par des tierces parties La corrosion apparaît sur les roues et le châssis en raison d un manque d entretien ou d une utilisation dans des conditions climat...

Page 49: ... Speriamo che bo vi piaccia Vi preghiamo di leggere attentamente le seguenti istruzioni prima di usare il prodotto per la prima volta In questo modo potrete venire a conoscenza di tutte le sue caratteristiche e assicurarvi un uso sicuro mima INDICE COMPONENTI 50 ATTENZIONE 51 APRIRE E CHIUDERE 52 RUOTE 52 MONTAGGIO DELLA CAPOTTA 53 FINESTRA DELLA CAPOTTA 53 FRENO DI STAZIONAMENTO 53 POSIZIONI SCHI...

Page 50: ...aio con cestello e sedile montati 2 ruote anteriori 2 ruote posteriori 1 capotta regolatore per reclinare il sedile manico per il trasporto leva secondaria di blocco leva principale di blocco capotta finestra della capotta tasca per pannolini braccio per togliere il freno pulsante freno gancio per chiudere cestello sedile bardatura di sicurezza 5 punti poggiapiedi reclinabile materassino ventilato...

Page 51: ...e giocare il bambino con il prodotto Utilizzate sempre le cinture di sicurezza Assicuratevi che la cintura di sicurezza sia posizionata correttamente per evitare che il bambino possa scivolare o cadere Il carico sui manici influisce sulla stabilità del passeggino e aumenta il rischio che si ribalti accidentalmente Quando state fermi mettete sempre il freno anche se si tratta solo di qualche minuto...

Page 52: ...re Sollevate la leva e piegate il braccio situato sul lato destro del passeggino In seguito premete il braccio verso il basso per rendere più semplice la chiusura Una volta fatto clic la chiusura è completata Fissate il telaio tramite il gancio RUOTE 3 Montaggio delle ruote anteriori Inserite l asse nel foro della ruota e premete fino a che faccia clic 4 Smontaggio delle ruote anteriori Premete il...

Page 53: ...e se si tratta solo di qualche minuto 8 Mettere e togliere il freno di stazionamento Premete il pulsante di freno quando vi fermate Tirate il braccio verso l alto per togliere il freno POSIZIONI SCHIENALE 9 Posizioni Schienale bo offre 4 diverse posizioni dello schienale Per reclinare lo schienale del passeggino basta sollevare le cerniere situate su entrambi i lati del telaio e posizionare lo sch...

Page 54: ...ro prodotto riparate il prima possibile i componenti storti rotti o usurati PULIZIA DEL TELAIO Eliminate gli eccessi di sporcizia e togliete la salsedine e la sabbia dopo essere stati al mare pulite il telaio con un panno umido e un prodotto leggero LUBRIFICAZIONE DEI COMPONENTI MOBILI Lubrificate periodicamente ruote cerniere e altri componenti mobili con un olio leggero o un spray di silicone No...

Page 55: ...Controllate saltuariamente il vostro prodotto bo per vedere se ci sono viti allentate componenti rotti materiale usurato o tessuti scuciti Contattate il vostro fornitore nel caso in cui dobbiate sostituire o riparare qualche componente IT ...

Page 56: ...iene concessa al proprietario originale del prodotto e non si può trasferire a successivi proprietari La garanzia dà diritto a effettuare riparazioni ma non direttamente a sostituzione o restituzione del prodotto La garanzia non sarà applicata nelle seguenti circostanze Se il prodotto è stato modificato o riparato da terzi Se le ruote o il telaio sono corrosi o arrugginiti a causa di condizioni am...

Page 57: ...이를 위해 안락함과 안전을 최우선으로 생각 하여 제품을 개발 디자인하였습니다 여러분이 안전하고 편안하게 bo를 사용하시기를 바랍니다 아이의 안전을 위해 반드시 사용자 매뉴얼의 지시사항을 따라주시기 바라 며 mima bo 미마 보는 유럽의 엄격한 안전기준과 국내의 안전기준을 통과하였습니다 mima CONTENTS 상품구성 58 주의사항 59 유모차 펴기 접기 60 바퀴 장착 60 캐노피 장착 61 캐노피 아이확인창 61 주차 브레이크 61 등받이 각도조절 61 다리 받침대 각도조절 61 유모차 유지관리 62 품질보증 63 ...

Page 58: ... 포장되어 있습니다 상자를 받으신 후 아래 리스트의 모든 부품이 상자 안에 있는지 확인하십시오 만약 빠진 부품이 있으면 판매처에 문의하시기 바랍니다 Box 1 1 바스켓과 시트가 부착된 프레임 2 앞바퀴 2 뒷바퀴 1 캐노피 등받이 각도조절 장치 이동 손잡이 유모차 잠금 레버 회색 유모차 잠금 레버 검은색 캐노피 캐노피 아이확인창 기저귀 보관 주머니 브레이크 해제 레버 브레이크 버튼 폴딩 잠금고리 바스켓 시트 5점식 안전벨트 다리 받침대 통풍형 시트패드 ...

Page 59: ...부착하거나 걸지 마십시오 아기의 물건을 유모차에 보관할 시에는 바스켓을 활용하시되 정해진 무게 이상의 보관을 하지 마십시오 당신의 아이가 도움을 받지 않고 좌석에 앉을 수 있더라도 항상 안전벨트를 사용하시기 바랍니다 아이가 미끄러지거나 밖으로 떨어지는 것을 방지하기 위하여 안전벨트를 항상 사용하시길 바랍니다 시트는 6개읠 미만의 유아에게는 적합하지 않습니다 본 제품을 밀어 달리거나 스케이팅하지 마십시오 아이가 유모차에 탑승한 채로 놀지 않도록 하십시오 유모차를 사용할 때에는 바퀴에 손상이 가거나 유모차가 넘어지는 것을 방지하기 위하여 천천히 이동해 주십시오 유모차를 사용할 때에는 바퀴에 손상이 가거나 유모차가 넘어지는 것을 방지하기 위하여 천천히 이동해 주십시오 어떤 부품이 손상되었거나 없는 경우 유모차를 ...

Page 60: ...들을 잡고 프레임의 뒤쪽 하단에 있는 검은색의 잠금 레버를 발등을 이용하여 위쪽 방향으로 들어 올리고 유모차의 오른쪽 뒷바퀴 윗부분에 있는 회색 잠금 레버를 발로 내려준 후 핸들을 잡고 안쪽으로 모아주면서 유모차를 앞쪽의 아래 방향으로 완전히 내려 접은 후 프레임의 오른쪽에 있는 잠금 고리가 잠금 걸이에 안전하게 걸리도록 고정하여 주십시오 WHEELS 바퀴 3 앞바퀴 부착방법 앞바퀴를 연결해주는 은색 부분을 유모차 프레임의 바퀴 장착 부분에 넣고 딸각 소리가 날 때까지 밀어 넣어 주십시오 바퀴가 제대로 장착되었는지 확인하여 주십시오 4 앞바퀴 분리방법 바퀴의 하단 부분에 있는 검은색 잠금해제 버튼을 누르면서 바퀴를 잡아당겨 분리하십시오 5 앞바퀴 방향 회전 및 잠금장치 평평하지 않은 지형 또는 사용자의 의도...

Page 61: ...레이크 작동과 해제 브레이크 작동 오른쪽 프레임 상단에 있는 회색의 동그란 버튼을 눌러 브레이크를 잠가 주십시오 브레이크가 제대로 작동되었는지 유모차를 살짝 밀어 확인하여 주십시오 브레이크 해제 오른쪽 프레임 상단에 있는 회색의 레버를 딸각 소리가 날 때까지 위로 올려 브레이크를 해제하십시오 RECLINE POSITIONS 등받이 각도조절 9 등받이 각도조절 bo유모차 시트의 등받이 각도는 3단계로 조절할 수 있습니다 시트의 등받이 각도를 조절하기 위해서 시트의 양옆에 있는 경첩을 양손으로 살짝 들어 올리면서 원하는 각도에 맞춰 3단계로 조절할 수 있습니다 1단계 앉기 위한 시트 등받이 각도 2단계 쉬기 위한 시트 등받이 각도 3단계 잠을 자기 위한 시트 등받이 각도 RECLINING LEG REST 다리 ...

Page 62: ...주십시오 바퀴 및 기타 조인트 부분 최소한 1개월에 1회는 바퀴를 분리하여 닦아 주시고 점검하여 주십시오 지속적인 사용에 따라 윤활제를 필요로 하는 부분에는 사용자의 판단에 따라 적당량을 사용하여 주십시오 바퀴 이외의 타 부분에는 가급적 삼가주시고 공식 A S 지점을 통하여 관리하여 주십시오 윤활제 사용 시 석유성분 또는 바셀린 등은 삼가시고 적은 양의 스프레이식 윤활제를 사용하여 주십시오 시트 청소 깨끗한 물을 이용한 젖은 스펀지로 닦아 주십시오 필요에 따라 약간의 세척제를 사용할 수 있으나 세척제 사용 시 깨끗한 물수건으로 세척제를 닦아 주십시오 너무 많은 양의 세척제를 사용하거나 세척제가 깨끗이 닦이지 않으면 색이 변질하거나 손상될 수 있으니 주의하여 주십시오 완전히 말린 후 접거나 보관하여 주십시오 ...

Page 63: ... 제3자 또는 비공식 A S 지점을 통한 수리로 인해 발생한 파손 5 일상적인 사용으로 발생하는 정상적인 부품 노후손상 6 세탁 및 관리 부주의로 인한 얼룩 및 자외선 과다 노출 등으로 인해 제품이 변색 또는 부식된 경우 7 차량 또는 항공기 등 유모차 운반 부주의로 발생한 파손 8 본 제품은 1명의 유아 아기를 태워야 하나 1명 이상의 아기를 탑승시키거나 15kg 이상의 아기를 탑승하여 과다 적재로 인해 발생한 파손 9 사용자 또는 제3자의 의류 지퍼 단추 또는 기타 외부 물체로 인한 제품의 파손 10 유모차 주행에 영향을 주는 도로 턱 계단 출입문 등의 충돌 또는 무리한 주행에 따른 제품의 파손 11 타이어 소재로 인한 바닥면의 손상 12 기타 보증기간 또는 필수 조건 등이 갖춰지지 않은 경우 유모차 사...

Page 64: ...www mimakids com All rights reserved Mima Europe S L 2012 A03EU IV03 ...

Reviews: