Chapter 4 Helpful Tips
116
4.7 Changing the Cutting Sequence
[SORTING]
Cutting data sent from the host computer can be reordered to change the cutting sequence. (Sorting
function)
If the order of data sent from the application software prevents data from being cut using a single cut, the
cutting sequence can be altered to enable the data to be cut using a single cut. (This function may not be
supported depending on the firmware version.)
Cutting using a single cut will not be possible in the following case, even when the sorting function is
used:
• Depending on the application software, data may be sent to the plotter in the sequence in which
it was created/edited. Single-cut cutting will not be possible in cases where data imported using
a scanner has been modified, as the modified parts will be cut at the end.
l
Precautions when cutting using the sorting function
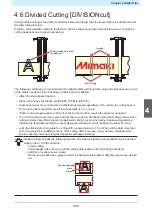
Sorting enables cutting in individual blocks, where one block corresponds to movement with the pen down to
raising the pen.
Once one block has been cut, the block with the nearest origin position is then cut.
The host data start point and cutting direction are not changed.
● mark: Data start point = Cutting start point
Arrow: Data direction = Cutting direction
Numbers: Cutting block sequence
l
Features of the sorting function
Enabling the sorting function enables the following functions:
• Auto feed function:
This function detects the length of the data to be cut and pulls out the length of sheet corresponding to
the data length in advance.
• Area management function:
Areas can be specified in advance to cut block data contained within that area first.
Once there is no longer any block data remaining within the area, the area is expanded and cutting
proceeds gradually in the sheet feed direction.
Without specified
areas
With specified areas
Specified area
Summary of Contents for CG-100AR
Page 39: ...Chapter 1 Before Using This Machine 39 2 Shut down the computer connected to the machine 1 ...
Page 76: ...Chapter 2 Cutting 76 ...
Page 98: ...Chapter 3 Cutting Data with Register Marks 98 ...
Page 131: ...Chapter 4 Helpful Tips 131 4 Press the END key several times to exit 4 ...
Page 132: ...Chapter 4 Helpful Tips 132 ...
Page 133: ...Chapter 5 Settings This chapter Describes the individual settings FUNCTION 134 SET UP 135 ...
Page 150: ...Chapter 6 Maintenance 150 ...
Page 158: ...Chapter 7 Options 158 ...
Page 178: ...Chapter 9 Appendix 178 ...
Page 182: ...MEMO ...


