Chapter 4 Helpful Tips
123
Item
Setting
*1
Details
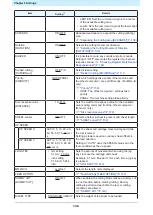
AutoIP
ON/OFF
Select "ON" to use the IP address set by the
AutoIP protocol. Note that DHCP takes priority if
DHCP is set to "ON".
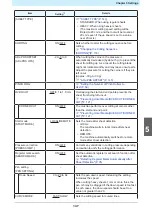
IP Address
-
Sets the machine's IP address.
• This can be set when both [DHCP] and
[AutoIP] are set to "OFF".
Def.Gateway
-
Sets the machine's gateway.
• This can be set when both [DHCP] and
[AutoIP] are set to "OFF".
DNS Address
-
Sets the machine's DNS server address.
• This can be set when both [DHCP] and
[AutoIP] are set to "OFF".
Sub Net Mask
-
Sets the number of subnet mask digits used by
this machine.
• This can be set when both [DHCP] and
[AutoIP] are set to "OFF".
*1. The default settings are shown underlined.
1
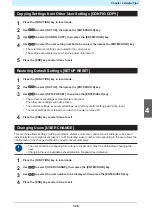
Press the [FUNCTION] key in local mode.
2
Use
to select [SET UP], then press the [ENTER/HOLD] key.
3
Use
to select [NETWORK], then press the [ENTER/HOLD] key twice.
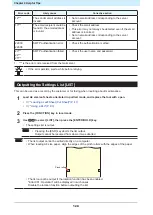
• The machine's current IP address is displayed. "Info" is displayed at the top right.
• It may take some time after connecting to the network to determine the IP address. If the IP
address cannot be acquired, the display will indicate "0.0.0.0".
4
Press the [ENTER/HOLD] key.
5
Use
to select [MAC Address], then press the [ENTER/HOLD] key.
• Displays the machine's current MAC address.
• Press
to display the next address.
6
Press the [ENTER/HOLD] key.
7
Use
to select [DHCP], then press the [ENTER/HOLD] key.
• Use
to enable or disable.
• Select "ON" to use the IP address assigned by the DHCP server.
8
Use
to select [AUTO IP], then press the [ENTER/HOLD] key.
• Use
to enable or disable.
• Select "ON" to use the IP address set by the AutoIP protocol. Note that DHCP takes priority if
DHCP is set to "ON".
9
If both DHCP and AutoIP are disabled, use
to select the following item, then press the
[ENTER/HOLD] key. In all other cases, press the [END] key several times to exit.
• Setting items: IP Address ("Info" is not displayed at the top right of the display), Def.Gateway, DNS
Address, SubNet Mask
4
Summary of Contents for CG-100AR
Page 39: ...Chapter 1 Before Using This Machine 39 2 Shut down the computer connected to the machine 1 ...
Page 76: ...Chapter 2 Cutting 76 ...
Page 98: ...Chapter 3 Cutting Data with Register Marks 98 ...
Page 131: ...Chapter 4 Helpful Tips 131 4 Press the END key several times to exit 4 ...
Page 132: ...Chapter 4 Helpful Tips 132 ...
Page 133: ...Chapter 5 Settings This chapter Describes the individual settings FUNCTION 134 SET UP 135 ...
Page 150: ...Chapter 6 Maintenance 150 ...
Page 158: ...Chapter 7 Options 158 ...
Page 178: ...Chapter 9 Appendix 178 ...
Page 182: ...MEMO ...


