Chapter 7 Options
155
3
Place the cutting sheet on top of the sheet tables, and pass it through to the platen.
• Insert into the gap between the pinch rollers and the grid rollers.
• Note the insertion direction of the cutting sheet.
297 mm
420 mm
Sheet
Adhesive surface
(available cutting area)
Cutting sheet
Insertion direction
4
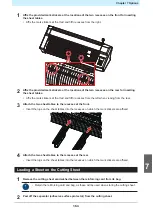
Move the cutting sheet so that the left pinch roller is positioned as shown in the following
figure.
Move the right pinch roller to match the cutting sheet.
7
Summary of Contents for CG-100AR
Page 39: ...Chapter 1 Before Using This Machine 39 2 Shut down the computer connected to the machine 1 ...
Page 76: ...Chapter 2 Cutting 76 ...
Page 98: ...Chapter 3 Cutting Data with Register Marks 98 ...
Page 131: ...Chapter 4 Helpful Tips 131 4 Press the END key several times to exit 4 ...
Page 132: ...Chapter 4 Helpful Tips 132 ...
Page 133: ...Chapter 5 Settings This chapter Describes the individual settings FUNCTION 134 SET UP 135 ...
Page 150: ...Chapter 6 Maintenance 150 ...
Page 158: ...Chapter 7 Options 158 ...
Page 178: ...Chapter 9 Appendix 178 ...
Page 182: ...MEMO ...


