Chapter 1 Before Using This Machine
30
Operating panel
This is used to control the product and make/change settings.
can be used to operate the machine remotely from a computer or smartphone.
For more information, refer to online help.
• The keys are designed for finger input. Do not use sharp or pointed objects, as this may
damage the keys.
1
2
4
6
5
3
No.
Name
Outline
1
Display
Displays tool conditions such as speed, pressure, and offset, tool
coordinates, functions, and error messages.
2
POWER lamp
Lights up when the machine power is turned on.
3
END key
Press to cancel the value entered or to return to the previous settings menu.
Also used to detect the sheet width.
4
FUNCTION keys
Press to set individual functions. The functions assigned to FUNCTION 1 to
FUNCTION 3 are indicated at the bottom of the display.
5
Jog keys
Press to move the carriage or sheet in the direction of the arrows or to select
settings.
6
ENTER/HOLD key
Used to confirm operations and settings. Also used to correct sheet offsets
during cutting (or printing).
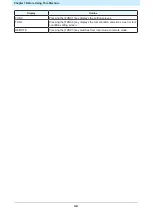
Pressing the [ENTER/HOLD] key on the "During remote control. [Ent]"
screen aborts , and returns machine control to the operating panel.
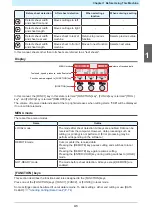
l
Note about jog keys
The functions of the jog keys change according to the situation.
Summary of Contents for CG-100AR
Page 39: ...Chapter 1 Before Using This Machine 39 2 Shut down the computer connected to the machine 1 ...
Page 76: ...Chapter 2 Cutting 76 ...
Page 98: ...Chapter 3 Cutting Data with Register Marks 98 ...
Page 131: ...Chapter 4 Helpful Tips 131 4 Press the END key several times to exit 4 ...
Page 132: ...Chapter 4 Helpful Tips 132 ...
Page 133: ...Chapter 5 Settings This chapter Describes the individual settings FUNCTION 134 SET UP 135 ...
Page 150: ...Chapter 6 Maintenance 150 ...
Page 158: ...Chapter 7 Options 158 ...
Page 178: ...Chapter 9 Appendix 178 ...
Page 182: ...MEMO ...


