Chapter 2 Cutting
46
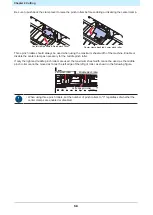
Sheet detection can be performed using any of the following five methods.
Key
Roll sheet set to rear
Leaf sheet set to rear
[END]
Sheet width detection only
Detection
method
Sheet width detected, then
sheet front edge detected
B
A
Origin
Machine front
Sheet width detected, then
sheet front and rear edges
detected
A
A
B
Origin
Machine front
Sheet width detected
B
Origin
Machine front
Example sheet
size display
after detection
Key
Roll sheet set to front
Leaf sheet set to front
Detection
method
Sheet width detected, then
sheet rear edge detected
A
B
Origin
Machine front
Sheet width detected, then
sheet front and rear edges
detected
B
A
A
Origin
Machine front
Example sheet
size display
after detection
• The detected size is displayed as "****" if 3 m or greater.
• If using the [END] key, in which only sheet width is detected, or if the rear edge of a roll sheet is
not detected, do not over-feed the sheet with the jog keys
or when cutting data extending
beyond sheet edges, as the sheet may fall out.
• Note that the positive directions for each axis will vary as shown in the diagrams above,
depending on the direction in which the sheet was loaded.
• Sheet detection has the same effect as using DATA CLEAR. Even if data is sent before
detection and switched to remote after sheet detection, cutting will not start, as the data has
been cleared. (Data can still be copied.)
• If using "Leaf Mode" in for continuous register mark cutting, be sure to perform sheet detection
in [Leaf Mode].
• If the sheet front edge is not detected, a parameter error will occur, and the system will not
switch to copy mode.
• Sheet detection may take some time when using long sheets or when using a sheet from
midway with it pulled out.
• In such cases, detection time can be reduced by pressing the [END] key to detect only sheet
width.
Summary of Contents for CG-100AR
Page 39: ...Chapter 1 Before Using This Machine 39 2 Shut down the computer connected to the machine 1 ...
Page 76: ...Chapter 2 Cutting 76 ...
Page 98: ...Chapter 3 Cutting Data with Register Marks 98 ...
Page 131: ...Chapter 4 Helpful Tips 131 4 Press the END key several times to exit 4 ...
Page 132: ...Chapter 4 Helpful Tips 132 ...
Page 133: ...Chapter 5 Settings This chapter Describes the individual settings FUNCTION 134 SET UP 135 ...
Page 150: ...Chapter 6 Maintenance 150 ...
Page 158: ...Chapter 7 Options 158 ...
Page 178: ...Chapter 9 Appendix 178 ...
Page 182: ...MEMO ...

