© 2014 MIMAKI ENGINEERING CO.,LTD.
5.1
P.4
5.1 Changing the Joints
R.1.4
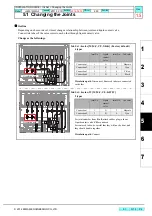
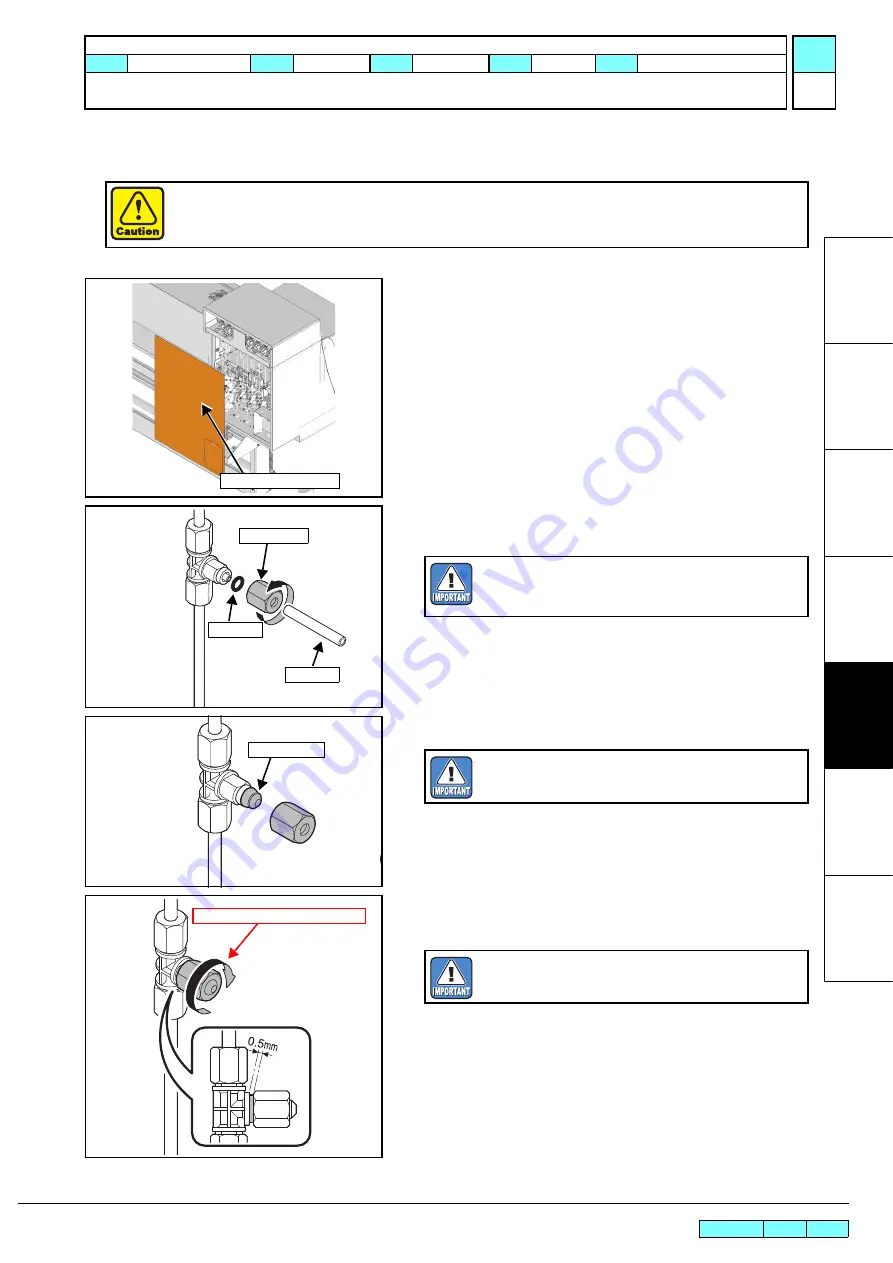
Work procedures
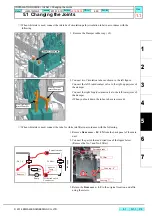
1. Remove
Rear cover - LU LX
from the back panel of the main
unit.
2. Loosen the
joint screws
and remove the
tube
and
O-rings
.
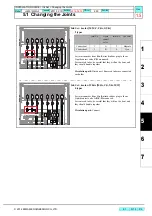
3. Put the
rubber plugs
on the joint.
4. Tighten the joint screws.
Leave a space of around 0.5 mm between the coupler and screw.
5. Return the
Rear cover - LU
to the original location, and affix
using the screws.
Use protective glasses and gloves during work.
Depending on the working condition, ink may reach your eyes or your skin may be roughed due to ink.
Rear cover - LU LX
Tube
O-ring
Joint Screw
The O-rings are required when the 4-color, 6-color
and 4-color +W ink set is used.
Store these carefully to avoid losing them.
Rubber Plugs
Make sure that O-ring is not remaining in the joint
screws.
Take care to avoid over tightening
When clamping the joint screws, do not clamp them
too much.
INSTALLATION GUIDE > Ink Set > Changing the Joints
Model
JV400-130/160LX
Issued
2011.02.15 Revised 2013.10.10 F/W ver.
2.50
Remark
1.4
Summary of Contents for JV400-130LX
Page 49: ......
Page 50: ...D500698 22 30042014 2013 MIMAKI ENGINEERING CO LTD KF FW 2 50...


