2-22
Correct the ink drop position for bidirectional printing
When the condition for printing (media thickness/head height/etc.) has been changed, perform the following
operation to correct the ink drop position for bidirectional (Bi) printing and obtain the proper printing result.
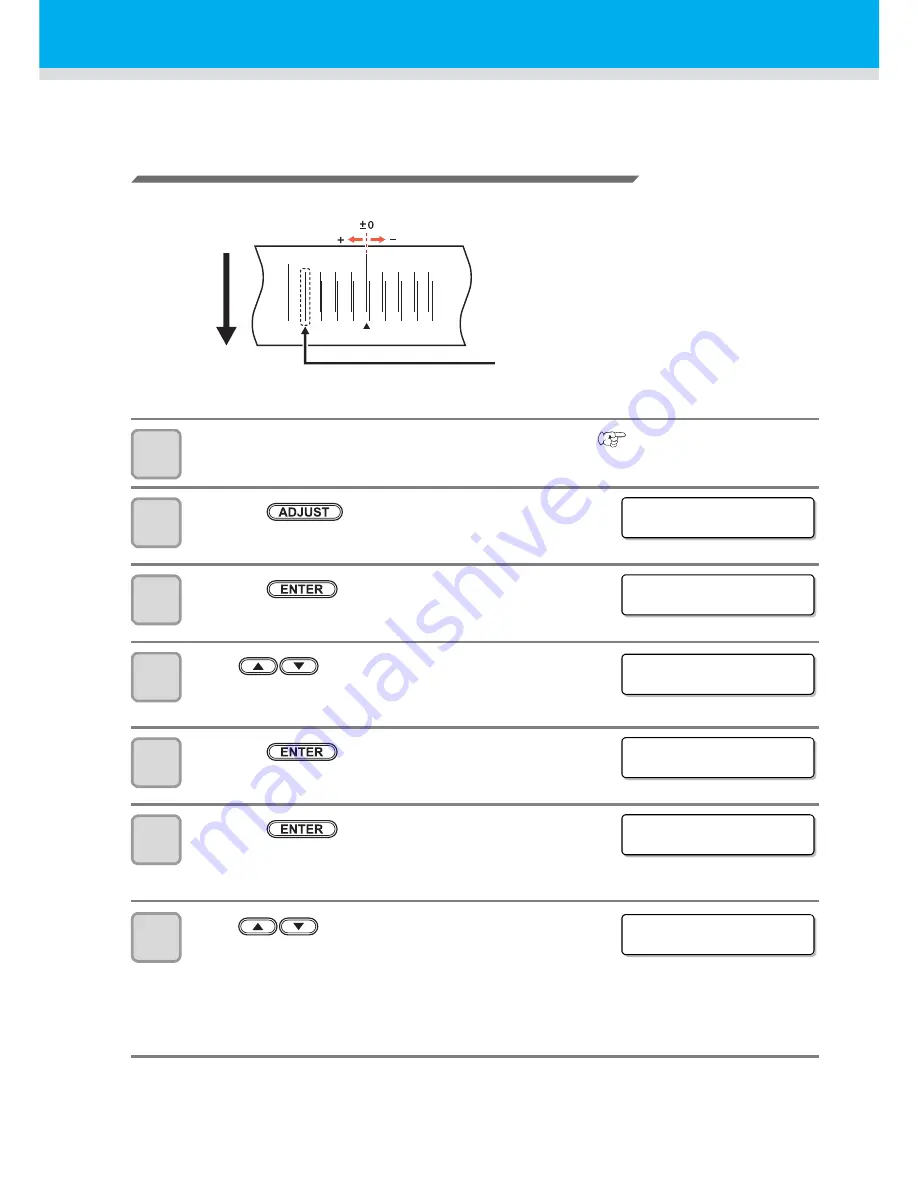
Example of a Drop Position correct Printed Pattern
1
Set a media on the machine and set a printing origin. (
P.2-5)
2
Press the
key twice in LOCAL.
3
Press the
key.
4
Press
to select the resolution.
• Setting value: Y600dpi / Y900dpi / Y1200dpi
• Perform correction for all resolutions.
5
Press the
key.
6
Press the
key to start pattern printing.
• Test pattern is printed. (The printed patterns are called Pattern 1,
Pattern 2, Pattern 3... in the order of printing.)
7
Press
to correct the dot position of Pattern
1~.
• Corrected feeding rate: -40.0 to 40.0
• Check the test patterns. The position where an outward feeding line and a return feeding line become
one straight line is the correction value.
• When the correction value in not between -40.0 and 40.0, adjust the height of the printing heads and
then perform the operations in Step 2 and later.
The dots at the fourth position counted from the zero
position in the positive direction form a straight line.
In this case, the dot position correction value is 4.0.
Output
direction
DROP . POS c o r r e c t
[ ENT ]
DROP . POS c o r r e c t
: Y 6 0 0 d p i
DROP . POS c o r r e c t
: Y 6 0 0 d p i
DROP . POS c o r r e c t
PR I NT
[ ENT ]
* * PR I NT I NG * *
P L EASE WA I T
PA T T ERN 1
=
0 . 0
Summary of Contents for JV400-130SUV
Page 1: ...MIMAKI ENGINEERING CO LTD URL http eng mimaki co jp D202394 17 Original instructions ...
Page 58: ...2 28 ...
Page 73: ...3 15 1 1 3 Convenient use 5 6 9 Press the key several times to end the setting ...
Page 100: ...3 42 ...
Page 162: ...5 20 ...
Page 179: ...Function Flowchart 6 17 Appendix 6 ...
Page 187: ...Function Flowchart 6 25 Appendix 6 ...
Page 192: ...6 30 ...


