2-22
Printing Data
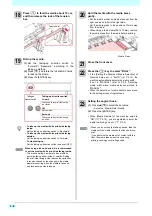
Starting a Printing Operation
1
Setting a Media (
2
Checking the Heater Temperature
3
Press the
(REMOTE) key in LOCAL.
• If the heater temperature has not reached the
setting
value,
the
worning
message
“TEMPERATURE CONTROL” is displayed.
Even if it has not reached, you can move to
Remote when pressing the [ENTER] key.
• The screen changes to Remote, and data can be
received from the PC.
4
Transmit data to be printed from the PC.
• For the method of data transmission, see the
instruction manual for the output software.
5
Start printing.
• The printing speed may change, depending on
the width of the set media or the position of the
print origin even when the same data is printed.
This is because of a difference in resolution.
Stopping a Printing Operation
Perform the following operation when stopping a printing
operation halfway.
1
Press the
(LOCAL)
during printing.
• The printing operation stops.
• Interrupt data sending at the PC side during the
data is sent from the PC.
• Printing restarts from the interrupted data by
repressing the [REMOTE] key.
Deleting Received Data (Data Clear)
When you want to stop printing, delete the already
received data.
1
Press the
key, and press the
(DATA CLEAR)
in LOCAL.
2
Press the
key.
• The received data is erased then it returns to the
Local.
• When using a roll media, rewind the media by
hand before printing so that it is not loose.When
the roll media has not been rewound tightly, it may
cause the image quality to deteriorate.
• When the same data is printed, the color may
differ if print conditions are changed, including the
resolution, pass, scanning speed, and printing
direction. Check the effects before printing.
Resolution
Number of passes
The length of
media printed
Scan direction
Ud :Unidirectional / Bd : Bidirectional
Scanning speed
x1 : Standard speed/ x2 : Double speed
Data type
VD : Variable data
Nozzle recovery information
R: Nozzle recovery is performed.
Summary of Contents for SIJ-320UV
Page 1: ...MIMAKI ENGINEERING CO LTD URL http mimaki com D202809 13 Original instructions ...
Page 14: ...xiii Warning labels ...
Page 28: ...1 14 Chapter 1 Before Use ...
Page 98: ...4 26 ...
Page 116: ...5 18 Chapter 5 Troubleshooting ...
Page 122: ...Chapter 6 Appendix 6 6 ...

