If nozzle clogging is not solved (ink filling)
4-27
1
2
3
4
Maintenance
6
7
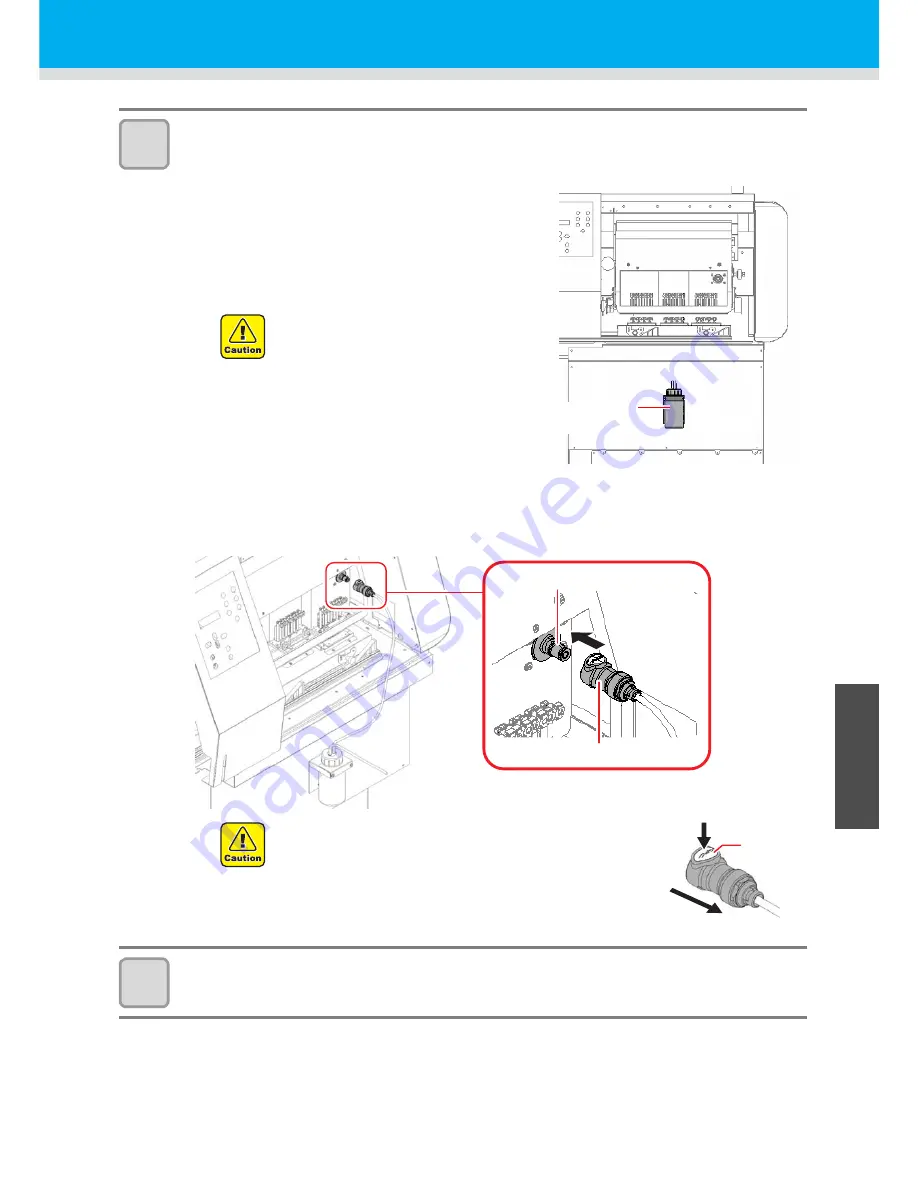
Attach the ink port discharging jig.
• Attach the ink port discharging jig on the Tx400.
(1)
Empty the waste ink bottle of the ink port discharging jig.
(2)
Paste the waste ink bottle on the position described in
the right figure.
• With the magnet attached on the waste ink bottle,
paste the waste ink bottle below the maintenance
cover R.
• When pasting waste ink bottle, make it vertical against
the ground.
(3)
Insert the pressure reducing coupling body of the ink port discharging jig into the pressure
reducing coupling insert located in the right side of the carriage.
• Insert it until you hear it “click”.
8
Remove ink blot of the pipe adapter of the ink port discharging jig.
• Wipe ink blot etc. of the pipe adapter with waste cloth immersed in cleaning liquid for maintenance.
• If ink replacement is performed in the
state of the waste ink bottle being slanted,
it may cause damages to the machine.
Be sure to paste the waste ink bottle
making it vertical against the ground.
• If you do not hear it “click” when you insert the pressure
reducing coupling body, remove it by pressing the release
button and insert it again until you hear it “click”.
• If you discharge ink while the pressure reducing coupling
body is not connected thoroughly, ink filling defect will occur
in the head due to air going into the head. Connect the body
until you hear it “click”.
Waste ink
bottle
Pressure reducing coupling insert
Pressure reducing coupling body
release
button
Summary of Contents for TEXTILE JET TX1800B
Page 1: ...MIMAKI ENGINEERING CO LTD URL http www mimaki co jp D202080 14 ...
Page 13: ...xii 1 2 3 4 5 6 How to Read This Operation Manual ...
Page 14: ...xiii ...
Page 40: ...1 26 ...
Page 80: ...2 40 ...
Page 196: ...5 30 ...
Page 205: ...Function Flowchart 6 9 1 2 3 4 Appendix 6 To P 6 10 To P 6 14 To P 6 20 ...
Page 220: ...6 24 ...
Page 221: ...D202080 14 29122011 ...


