© 2013 MIMAKI ENGINEERING CO., LTD. M015005-00(D202630-10)-22112013
11. Press
.
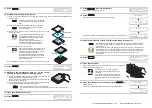
12. Set the nozzle cleaning tool on the cap.
(1) Wipe off ink or dust adhering to the nozzle cleaning tool with a waste cloth moisturized withmaintenance
cleaning liquid.
(2) Put one maintenance cloth on the nozzle cleaning tool base.
(3) Set the fixing bracket of the nozzle cleaning tool and fix the
maintenance cloth.
(4) Set the nozzle cleaning tool on the cap.
(5) For all heads (A line, B line and C line), perform the work from (1) to (4).
13. Press
.
14. Moisturize the maintenance cloth set on the noz-zle
cleaning tool with maintenance cleaning liq-uid.
(1) Absorb maintenance cleaning liquid in a dropper and drop iton the
maintenance cloth set on the nozzle cleaning tool.
Drop 3cc and more of maintenance cleaning liquid in orderto moisturize
the maintenance cloth enough.
(2) For all nozzle cleaning tools (A line, B line and C line),moisturize the
maintenance cloth with maintenance clean-ing liquid.
15. Close the maintenance cover R.
16. Press
.
S e t C l e a n i n g T o o l
C omp l e t e d
: e n t
• As the base rear surface of the nozzle cleaning
tool touches the cap, especially make it has no
dust.
Maintenance cloth
Fixing bracket
Base
• Do not use a maintenance cloth to which ink
blot or dust adheres.
• Set it so that the base and the fixing bracket are
not misaligned back and forth. If you perform
maintenance with it being misaligned, it may
damage the nozzle surface.
• Fay firmly the base and the fixing bracket. If
there is any gap between the base and the
fixing bracket, it may damage the machine.
Feont side
• Set it so that the base rear surface fays with all
caps. If the nozzle cleaning tool and the cap are
misaligned, or the nozzle cleaning tool is set on
the tilt, it may damage the machine.
• Set the nozzle cleaning tool with the direction
that is indicated in the right figure. If you set the
nozzle cleaning tool with wrong direction, it may
damage the machine.
D r o p Wa s h i n g L i q u i d
C omp l e t e d
: e n t
• Check that the maintenance cloth is fully moisturized.
If you perform maintenance using a dry maintenance cloth, it may damage the nozzle sur-
face.
N o z z l e C l e a n i n g 2
Wa i t T i me r
= 1 0m i n
17. Press
to set the leaving time.
Recommended time to leave is 10 min.
18. Press
.
When the leaving time has passed, wiping is performed.
If wiping is completed, the message prompting you toremove the cleaning tool.
19. Open the maintenance cover R and remove the nozzle cleaning tool.
20. Press
.
21. Clean the cap rubber.
Wipe off the ink sticking to the cap rubber with a clean stickdipped in
cleaning solution for maintenance.
22. Close the maintenance cover R and press the
key.
Perform cleaning.
When cleaning has ended, the machine returns to the mediaselection.
N o z z l e C l e a n i n g 2
Wa i t T i me r
= 1 1m i n
P l e a s e Wa i t
* * * * * * * * * - - - - - - - - - - -
Wa i t i n g
0 0 : 0 1 : 5 9
* * Wi p i n g * *
R emo v e C l e a n i n g T o o l
C omp l e t e d
: e n t
• After raising the nozzle cleaning tool from the cap, and by putting it on the waste cloth at
once, remove it paying attention not to drop maintenance cleaning liquid from the nozzle
cleaning tool.
• When the message “Remove cleaning tool” is displayed on the screen, remove the nozzle
cleaning tool at once. If you leave the nozzle cleaning tool on the cap for a long time, there
is the danger that the cap will be firmly fixed on the tool. In addition, if the status that the
head is left without being capped continues, the nozzle gets dry and it may cause
charging defect.
C a p C l e a n i n g
C omp l e t e d
: e n t
• Fine dust or dirt on the nozzle cleaning tool
base adheres to the cap. Be sure to clean the
cap rubber.
• If you use this machine without cleaning the cap
rubber, there is the danger that the nozzle sur-
face may be damaged, or capping defect may
occur.
P l e a s e Wa i t
* * * * * * * * * - - - - - - - - - - -
C l e a n i n g
0 0 : 0 0 : 0 0
IT


