4 Setup
Operator’s Manual
4 - 29
TIP:
Not all SCPs can support verification. See the SCP properties to confirm whether the SCP can
support this service. If not, the verification will not be successful.
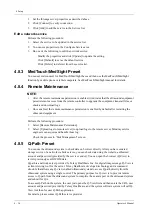
Perform the following procedure:
1.
Click [Set DICOM Service] on the DICOM/HL7 screen.
2.
Select the DICOM service tab to enter the corresponding settings screen.
3.
Enter the correct AE Title, port, etc.
–
Click [Add] to add the service to the Service List.
–
Select an item in the service list, change the parameters in the above area, and click
[Update] to update the item in the service list.
–
Click to delete the selected service in the service list.
–
Select an item in the service list, click [Default] and you can see “Y” in the Default
column.
4.
Click [Verify] to verify that the two DICOM application entities are properly connected.
If the verification is successful, the system displays “xxx Verify Succeed.” Otherwise, it
displays “xxx Verify Failed.”
If verification failed, possible causes may be: wrong IP address, not able to access IP address,
remote DICOM server is not running, wrong port, incorrect application name.
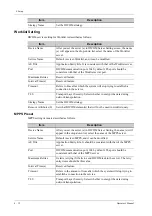
Storage Service Preset
DICOM storage preset items are described as follows:
Item
Description
Device
After you set the server (s) in DICOM Preset screen, the name (s) will
appear in the drop-down list, select the name of the storage server.
Service Name
Default is xxx-Storage, user-changeable.
AE Title
Application Entity title, here, it should be consistent with that of the storage
server.
Port
DICOM communication port, 104 is default. Here, the port should be
consistent with that of the storage server port.
Maximum Retries
Set the maximum retries (0-9). The default value is 3. If the DICOM task
sending to the server fails, the retry times should be 3.
Interval Time(s)
Interval time.
Timeout
Refers to the amount of time after which the system will stop trying to
establish a connection to the service.
TLS
Transport Layer Security. Select whether to encrypt the data during network
transportation.
Cine Zoom Mode
Select the cine zoom mode during image file storage.
Compression Mode Select the compression mode: original data (uncompressed), RLE (the
image not compressed), JPEG, and JPEG2000.
Compression Ratio Select the JPEG compression ratio: lossless, low, medium, and high.
The compression ratio is inversely proportional to the image quality
(reserved function).
Summary of Contents for Anesus ME7T
Page 2: ......
Page 58: ...This page intentionally left blank ...
Page 154: ...This page intentionally left blank ...
Page 164: ...This page intentionally left blank ...
Page 182: ...This page intentionally left blank ...
Page 190: ...This page intentionally left blank ...
Page 208: ...This page intentionally left blank ...
Page 254: ...This page intentionally left blank ...
Page 264: ...This page intentionally left blank ...
Page 280: ...This page intentionally left blank ...
Page 311: ......
Page 312: ...P N 046 018839 00 5 0 ...


