10-12 Patient Data Management
10.5 Recycle bin
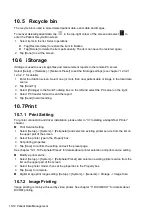
The recycle bin is used to store deleted patient data, exam data and images.
To recover deleted patient data, tap
in the top-right corner of the screen and select
to
enter the Patient Recycle Bin screen.
1. Select items in the list. Select operations:
Tap [Restore Items] to restore the item to iStation.
Tap [Delete] to delete the item permanently. The item can never be restored again.
2. Tap [Done] to exit the screen.
10.6 iStorage
iStorage is used to save image files and measurement reports to the remote PC server.
Select [Setup] -> [Network] -> [Network Preset] to set the iStorage settings (see chapter “12.3.2.1
12.3.2.1” for details).
1. Enter the iStation screen. Select one (or more than one) patient data or image in the local data
source.
2. Tap [Send To].
3. Select [iStorage] in the Send To dialog box on the left and select the PC server on the right.
4. Select PC transfer format to send the report.
5. Tap [Send] to start sending.
10.7 Print
10.7.1 Print Setting
For printer connection and driver installation, please refer to “3.7 Installing a Graph/Text Printer”
chapter.
Print Service Setting
1. Select [Setup] -> [System] -> [Peripheral] and select an existing printer service from the list on
the upper part of the screen.
2. Select the printer type in the Property box.
3. Set printing properties.
4. Tap [Save] to confirm the setting and exit the preset page.
See chapter “12.1.10 Peripheral Preset” for details about printer selection and print service setting.
Modify a print service:
1. Select [Setup] -> [System] -> [Peripheral Preset] and select an existing printer service from the
list on the upper part of the screen.
2. Select the printer model, then set the properties in the Property box.
3. Tap [Save] to complete.
Digital image print range setting: [Setup] -> [System] -> [General] -> Storage -> Image Size.
10.7.2 Image Printing
Image printing is mainly achieved by video printer. See chapter “11 DICOM/HL7” for details about
DICOM printing.
Summary of Contents for TE5
Page 1: ...TE7 TE5 Diagnostic Ultrasound System Operator s Manual Basic Volume ...
Page 2: ......
Page 6: ......
Page 12: ......
Page 24: ......
Page 36: ......
Page 54: ......
Page 110: ......
Page 115: ...Display Cine Review 6 5 6 Tap Return on the screen or tap Freeze to exit image compare ...
Page 120: ......
Page 124: ......
Page 156: ......
Page 174: ......
Page 192: ...12 18 Setup Select Advanced and do as follows Select MAPS and do as follows ...
Page 202: ...13 2 Probes and Biopsy C5 2s L12 4s L7 3s P4 2s L14 6s C11 3s L14 6Ns V11 3Ws P7 3Ts 7LT4s ...
Page 226: ...13 26 Probes and Biopsy NGB 034 NGB 035 ...
Page 250: ......
Page 272: ......
Page 276: ...A 4 Wireless LAN Tap Add Manually create a network profile to set ...
Page 282: ......
Page 318: ......
Page 322: ......
Page 323: ...P N 046 006959 07 1 0 ...


