3-8 System Preparation
3.7
Installing a Graph/Text Printer
Connecting a local printer
NOTE:
Printers listed in “2.3.4 Peripherals Supported” chapter have drivers installed already.
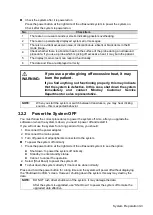
As shown in the figure below, a graph / text printer has a power cord and data cable. The
power cord should be directly plugged into a well-grounded outlet.
1. Connect the data cable to the USB port on the ultrasound system.
2. Power the system and the printer on.
3. Put the installation optical disk of the printer driver into the external DVD R/W drive.
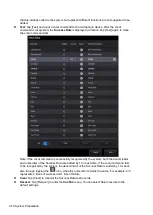
4. Install the printer driver: Select [Setup] -> [System] -> [Peripheral] -> [Add Printer].
5. Select [Add a local printer] and tap [Next] to enter the screen used for browsing driver.
Data cable
USB port
Power supply
cable
Summary of Contents for TE5
Page 1: ...TE7 TE5 Diagnostic Ultrasound System Operator s Manual Basic Volume ...
Page 2: ......
Page 6: ......
Page 12: ......
Page 24: ......
Page 36: ......
Page 54: ......
Page 110: ......
Page 115: ...Display Cine Review 6 5 6 Tap Return on the screen or tap Freeze to exit image compare ...
Page 120: ......
Page 124: ......
Page 156: ......
Page 174: ......
Page 192: ...12 18 Setup Select Advanced and do as follows Select MAPS and do as follows ...
Page 202: ...13 2 Probes and Biopsy C5 2s L12 4s L7 3s P4 2s L14 6s C11 3s L14 6Ns V11 3Ws P7 3Ts 7LT4s ...
Page 226: ...13 26 Probes and Biopsy NGB 034 NGB 035 ...
Page 250: ......
Page 272: ......
Page 276: ...A 4 Wireless LAN Tap Add Manually create a network profile to set ...
Page 282: ......
Page 318: ......
Page 322: ......
Page 323: ...P N 046 006959 07 1 0 ...


