39
Version C
Mini-Cam
Proteus Lite
Power ON sequence
1
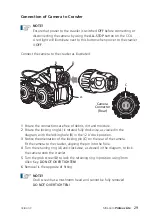
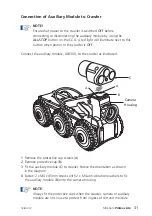
With the system power OFF, connect all system components: Cable reel,
crawler, camera
2
Press ON/OFF button to power the control unit ON.
3
Read and acknowledge the on-screen prompt.
4
Press the ALL STOP button.
5
If the control unit detects a crawler connected, the system will fully power up.
The red light next to the ALL STOP button will turn off. Video will be displayed
and crawler/camera status information will be displayed on the right hand side
of the screen.
NOTE!
If the control unit does not detect a crawler connected, the system will
not fully power up. The control unit will sound an audible beep several
times and the red light next to the ALL STOP button will be
illuminated. If this should happen, first check all connections on the
system are made correctly. If the problem persists then contact the
Mini-Cam Service Centre
or
Mini-Cam Partner
in your country.
NOTE!
Details of the nearest Mini-Cam Service Centre and Accredited
Mini-Cam Partners world-wide are made available on the website
www.minicam.co.uk
Power OFF sequence
1
Press the ALL STOP button. The red light next to this button will illuminate.
2
Press the ON/OFF button and press OK to confirm.
3
The control unit will now power down.
4
The system can now be disconnected.
NOTE!
Always fit the protective caps when the crawler, camera or auxiliary
module is not in use to protect from ingress of dirt and moisture.
Summary of Contents for Proteus Lite
Page 1: ...Original Instruction Manual Version C...
Page 2: ...2 Version C Mini Cam Proteus Lite...
Page 108: ...108 Version C Mini Cam Proteus Lite...
Page 112: ...112 Version C Mini Cam Proteus Lite...
Page 113: ...113 Version C Mini Cam Proteus Lite Notes...
Page 114: ...114 Version C Mini Cam Proteus Lite Notes...
Page 115: ......


