background image

Dear customer, 

Welcome to the coffee gourmets´club.

Many thanks for choosing to purchase a MINIMOKA by 

DEMOKA brand product.

Its technology, design and practicality, along with fact 

that it has passed the strictest quality tests, will bring 

total satisfaction for a long time, and will enable you to 

discover the pleasure of savouring real espresso coffee.

Description

A  Function displays

B  ON/OFF button

C  Height-adjustable dispenser unit

D  Coffee spout

E  Grounds box

F  5x function/menu buttons

G  Water tank

H  Removable drip tray

I  Plug-in card with quickstart instruction

J  Coffee powder shaft for ground coffee

K  Coffee bean container

L  Lever for setting the grinding fineness

M  Cover for bean container

N  Measuring spoon with cleaning brush and tool 

function

O  Descaling agent

P  Cleaning tablets

Q  Test strip for determing the water hardness

Safety advice and warnings

- Read these instructions carefully before switching on the appliance 

and keep them for future reference. Failure to follow and observe 

these instructions could lead to an accident. 

- Clean all the parts of the product that will be in contact with food, 

as indicated in the cleaning section, before use.

- This appliance is only for domestic use, not for industrial or pro-

fessional use. It is not intended to be used by guests in hospitality 

environments such as bed and breakfast, hotels, motels, and other 

types of residential environments, even in farm houses, areas of the 

kitchen staff in shops, offices and other work environments.

- This appliance shall not be used by children. Keep the appliance 

and its cord out of reach of children

- This appliance can be used by people with reduced physical, 

sensory or mental capabilities or lack of experience and knowledge 

if they have been given supervision or instruction concerning use of 

the appliance in a safe way and understand the hazards involved. 

- This appliance is not a toy. Children should be supervised to ensu-

re that they do not play with the appliance.

- Never submerge the appliance in water or any other liquid or place 

it under running water.

- If the connection to the mains has been damaged, it must be repla-

ced, take the appliance to an authorised technical support service. 

Automatic coffee maker CM-4758

Summary of Contents for CM-4758

Page 1: ...Cafetera automática CM 4758 ...

Page 2: ...E F C D A B G Q O P M J K L N H I ...

Page 3: ...to en marcha y guardarlo para posteriores consultas Antes del primer uso limpiar todas las partes del producto que puedan estar en contacto con alimentos procediendo tal como se indica en el apartado de limpieza Este aparato está pensado únicamente para un uso doméstico no para uso profesional o industrial No está pensado para ser utilizado por los huéspedes de establecimientos de alojamiento como...

Page 4: ...utilizar el aparato sin del agua No usar el aparato si su dispositivo de puesta en mar cha paro no funciona No mover el aparato mientras está en uso Respetar la indicación de nivel MAX Desenchufar el aparato de la red cuando no se use y antes de realizar cualquier operación de limpieza Guardar este aparato fuera del alcance de los niños y o personas discapacitadas No dejar nunca el aparato conecta...

Page 5: ...gundo y sacudir el exceso de agua Tras aproximada mente 1 minuto las franjas de color rosa mostrarán el grado de dureza del agua Ajustes del menú Para programar los distintos ajustes debe accederse a la función menú por ejemplo para programar el nivel de dureza del agua Para ello mantener pulsados simultáneamente los botones 2 y 3 durante unos 3 segundos La pantalla de símbolos parpadeará brevemen...

Page 6: ...l tamaño de taza deseado pulsando el botón 4 Es posible realizar las siguientes selecciones Jarra de café aprox 190ml Taza de café aprox 120ml Taza de espresso aprox 40ml Atención Únicamente es posible seleccionar el tamaño de la taza en el modo una dos tazas Para el modo cuatro ocho tazas la máquina viene configurada de serie con la opción de jarra aprox 120 ml por taza La cafetera tiene programa...

Page 7: ... café o jarra de café Pulsar la tecla 5 repetidamente hasta que se ilumine el símbolo corres pondiente a la cantidad de café molido necesario Mantener pulsado el botón de OK botón 6 hasta alcan zar el nivel de llenado deseado Soltar el botón El nuevo nivel de llenado quedará memorizado Atención Repetir el procedimiento para cambiar también el nivel de llenado de los demás tamaños de taza Todos los...

Page 8: ...nado deseado Soltar el botón El nivel de llenado de la taza deseado queda memorizado Atención Repetir el procedimiento para cambiar también el nivel de llenado de los demás tamaños de taza Todos los valores quedan memorizados incluso si se desconecta la máquina En caso de cambiar el tamaño de la taza puede adaptar el nivel de llenado individual mente cada vez Los niveles de llenado guardados para ...

Page 9: ...o se retrasará automáticamente 15 minutos A continuación la cafetera le pedirá si desea vaciar el contenedor para posos E La siguiente imagen apare cerá en la pantalla Vaciar el contenedor para posos cada vez para evitar la formación de moho La cafetera se apaga automáticamente a los 15 segundos En caso de emergencia puede desconectarse la ca fetera en cualquier momento aunque esté en funciona mie...

Page 10: ...spensadora de café C hacia su posición más elevada Abrir la trampilla de la unidad de salida de café tirando de ella hacia la izquierda La unidad dispensadora puede extraerse para acceder fácilmente al interior Limpiar la unidad dispensadora de café a fondo por dentro y por fuera con un cepillo y agua caliente para eliminar los restos de café y evitar que se forme moho Volver a introducir la unida...

Page 11: ...vado A continuación pulsar OK botón 6 El indicador programa de lavado parpadeará en la pantalla y el indicador de llenar depósito de agua quedará iluminado Retirar el depósito de agua 7 y llenarlo por lo menos con 1L de agua dulce Volver a introducir el depósito de agua Abrir la tapa del contenedor de granos de café N y el compartimento de café en polvo J Introducir una pastilla de lavado en el Co...

Page 12: ...de elaboración Comprobar que el contenedor para posos de café está situado en su posición El aparato realizará varios ciclos de descalcificación Los intervalos de pausa sirven para que el agente desin crustante haga su efecto Al finalizar la primera fase del proceso de descalcifi cación el indicador del programa de descalcificación parpadeará rápidamente Extraer y vaciar la bandeja antigoteo Presi...

Page 13: ...idad de elaboración Es esencial realizar un enjuague a fondo al finalizar cada proceso de descalcificación Anomalías y reparación En caso de avería llevar el aparato a un Servicio de Asistencia Técnica autorizado No intente desmontarlo o repararlo ya que puede existir peligro En caso de detectar cualquier anomalía consulte la siguiente tabla CAUSA SOLUCIÓN Unidad dispensadora de café sucia Retirar...

Page 14: ...tado ciclos distintos a los indicados Vaciar el contenedor para posos única mente cuando la máquina esté conectada Hay agua en el contenedor para posos El agua se filtra en el contenedor para posos durante el proceso de enjuague Contactar con el servicio técnico El café sale demasiado despacio La textura de molido es demasiado fina Programar una textura de molido más gruesa La cantidad de molido e...

Page 15: ...medio ambiente Recordar que deben respetarse las reglamentaciones concernientes a la eliminación de este tipo de contami nante Este símbolo significa que si desea deshacerse del producto una vez transcurrida la vida del mismo debe depositarlo por los medios adecuados a manos de un gestor de residuos autorizado para la recogida selectiva de Residuos de Aparatos Eléctricos y Electrónicos RAEE Este a...

Page 16: ...Coffeemotion S L Josep Escaler S n E 25790 Oliana Spain Net weight Aprox 8 16 Kg Gross weight Aprox 9 45 Kg ...

Page 17: ...Automatic coffee maker CM 4758 ...

Page 18: ...E F C D A B G Q O P M J K L N H I ...

Page 19: ...e instructions could lead to an accident Clean all the parts of the product that will be in contact with food as indicated in the cleaning section before use This appliance is only for domestic use not for industrial or pro fessional use It is not intended to be used by guests in hospitality environments such as bed and breakfast hotels motels and other types of residential environments even in fa...

Page 20: ...iance on without water Do not use the appliance if the on off button does not work Do not move the appliance while in use Respect the MAX level indicator Unplug the appliance from the mains when not in use and before undertaking any cleaning task This appliance should be stored out of reach of children and or the disabled Never leave the appliance connected and unattended if is not in use This sav...

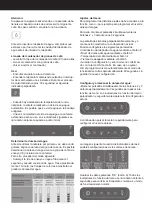
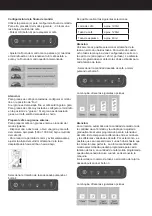
Page 21: ...st strip into cold water for 1 second and shake off the excess water After approximately 1 minute the water hardness can read from the pink coloured areas Menu settings The menu function must be accessed to undertake va rious settings for example to set the determined water hardness level To do this press buttons 2 and 3 simultaneously for approx 3 seconds The symbol display will briefly light up ...

Page 22: ... the dispensing spout height to suit your cup size by moving it up or down Select the desired cup size by pressing the button 4 The following selections are possible Jar of coffee approx 190ml Cup of coffee approx 120ml Cup of espresso approx 40ml Note The selection of cup size is only possible in one or two cup mode The default factory setting approx 120 ml per cup is set for the four or eight cu...

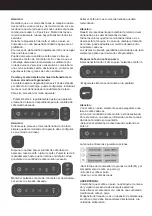
Page 23: ...tton 6 and keep it pressed until the desired filling amount is reached Release the button The new cup filling level is now stored Note Repeat the procedure if you also wish to change the filling level for the other cup sizes All values remain stored even when the coffee machine is switched off Should you change your cup size you can adapt the cup filling level individually at any time The stored c...

Page 24: ...when the coffee machine is switched off Should you change your cup size you can adapt the cup filling level individually at any time The stored cup filling levels for each individual cup sym bol only applies in powder mode Setting and storing the coffee temperature Switch to the menu function by simultaneously pressing buttons 2 and 3 for approx 3 seconds The function displays of the menu will fla...

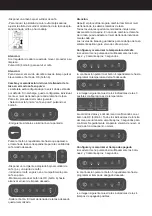
Page 25: ...ty the switch off process will automatically be delayed for 15 minutes The coffee machine subsequently prompts you to empty the waste container E The following appears on the display Empty the waste container every time to prevent mould from building up The coffee machine automatically switches itself off after 15 seconds In the event of an emergency you can switch off the coffee machine at any ti...

Page 26: ...nd cleaning the coffee dispensing unit To clean the coffee dispensing unit proceed as follow Push the coffee dispensing unit C into the uppermost position Open the door with the coffee outlet unit by pulling it up on the left side The dispensing unit can now be removed and the interior is easily accessible Thoroughly clean the coffee dispensing unit from the inside and outside with warm and a suit...

Page 27: ...splay is permanently lit Remove the water tank 7 and fill with min 1L fresh water Insert the water tank again Open the lid of the coffee bean container N and the coffee power shaft J Put a cleaning tablet into the coffee powder shaft The press OK button 6 The appliance will implement several cleaning cycles After the cleaning phase is completed the OK display will light up permanently Remove and e...

Page 28: ...amme is flashing quickly Remove and empty the drip tray Press the drip tray back onto the appliance until it audibly engages The OK display lights up permanently Then push OK button 6 The appliance performs additional descaling cycles After the completion of the second descaling cycle the function display descaling programme is flashing quickly Remove the drip tray and empty it Press the drip tray...

Page 29: ...orised technical support service if product is damaged or other problems arise Do not attempt to disassemble or repair the appliance yourself as this may be dangerous If any anomaly is detected check the following table CAUSE SOLUTION Brewing unit soiled Remove the brewing unit and rinse it thoroughly with flowing water Brewing unit soiled Insert the brewing unit into the appliance and close the d...

Page 30: ...und waste is formed resulting cycles other than indicated Empty the waste container only when the coffee machine is switched on Water in the waste container Water leaks into the waste container during each rinsing process Contact SAT service Coffee dispensing too slow container Grinding fineness set too fine Set coarser grinding fineness Grinding quantity set too high Set ground coffee quantity lo...

Page 31: ...ntains or could contain oil Remem ber that one should abide by the regulations concerning the elimination of this type of contaminant This symbol means that in case you wish to dispose of the product once its working life has ended take it to an authorised waste agent for the selective collection of Waste from Electric and Electronic Equipment WEEE This appliance complies with Directive 2006 95 EC...

Page 32: ...Coffeemotion S L Josep Escaler S n E 25790 Oliana Spain Net weight Aprox 8 16 Kg Gross weight Aprox 9 45 Kg ...

Reviews: