Chapter 5. Machine adjustment and setting up
EN
5.4. Introducing of the film
To insert the film, the machine must be in “Manual START” mode.
Rotate the “BYPASS SAFETY PROTECTIONS” (S3) switch to on, and open the front and back guards.
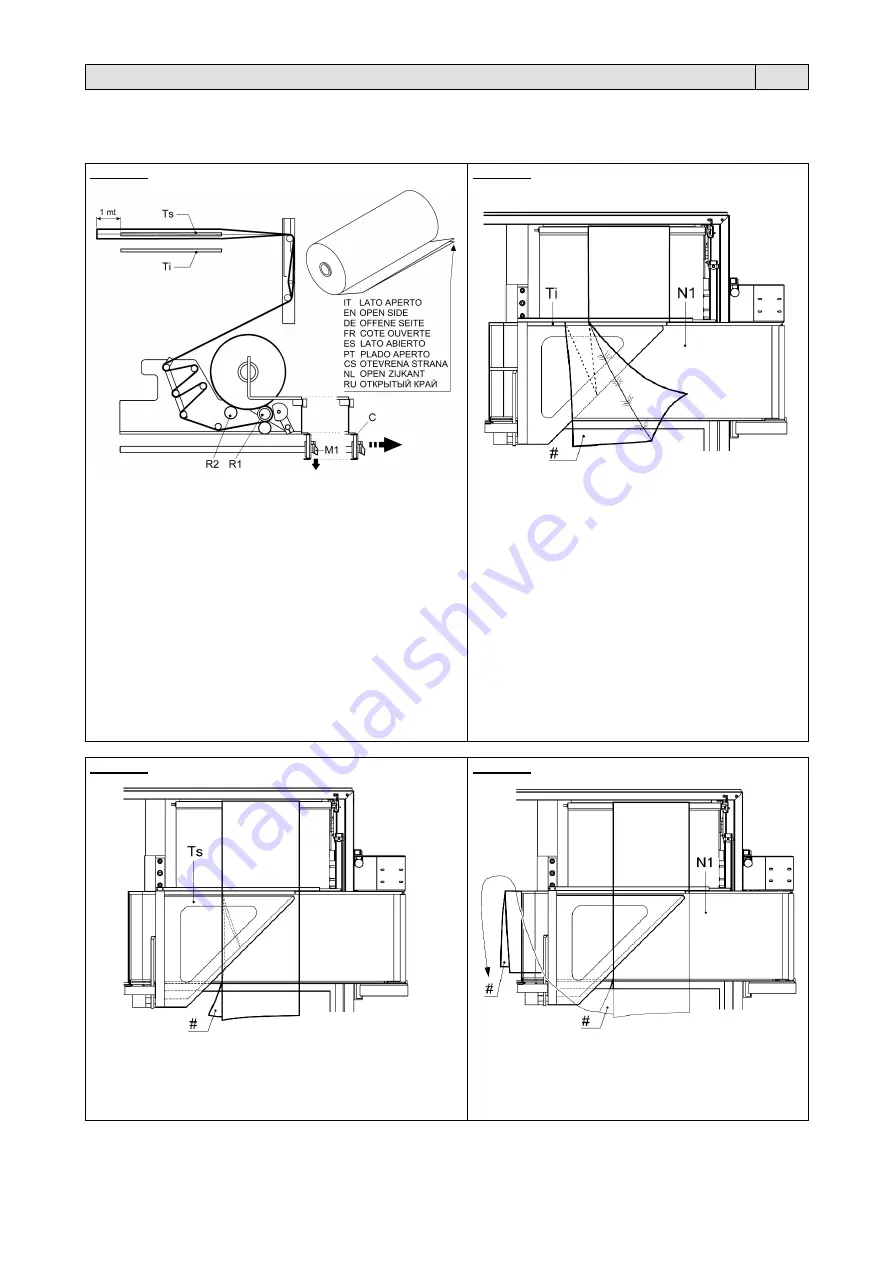
PHASE 1
To make it easier to position film reel, extract the reel
support carriage (C) by lowering the handle (M1) and pulling
the carriage out.
Position the film reel on the rollers (R1) and (R2).
The open end of the film must always be in the position
indicated by the arrow.
(Note: the reel unwinding direction must always be specified
when ordering the film).
Introduce the film as shown in the figure.
To make it easier to introduce the film, press the button on
the right of the reel.
Press and hold this button to activate the motorised roller
that the reel rests on in order to release the required quantity
of film.
Insert the two film flaps, one above and one below the upper
guide triangle (Ts).
Grasp the two ends of the film and unwind about 1 metre.
PHASE 2
Take the lower edge of the film corresponding to the
rear edge of the inversion triangle and feed it under
the lower triangle (Ti) from the outside towards the
inside and over the feeder belt (N1).
PHASE 3
Next, feed the upper edge of the film over the upper triangle
(Ts).
PHASE 4
Move the final part of the film (#) that passes through
the triangles and to the left, in parallel with the feeder
belt (N1) and feed the film under and over the feeder
belt, aligning it with the sides immediately after the
end of the belt.
52
Summary of Contents for MF21BA54
Page 90: ......


