3
INSTALLING THE FAN
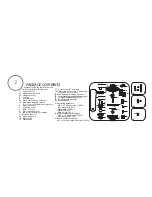
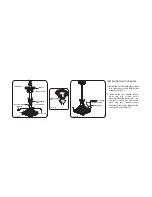
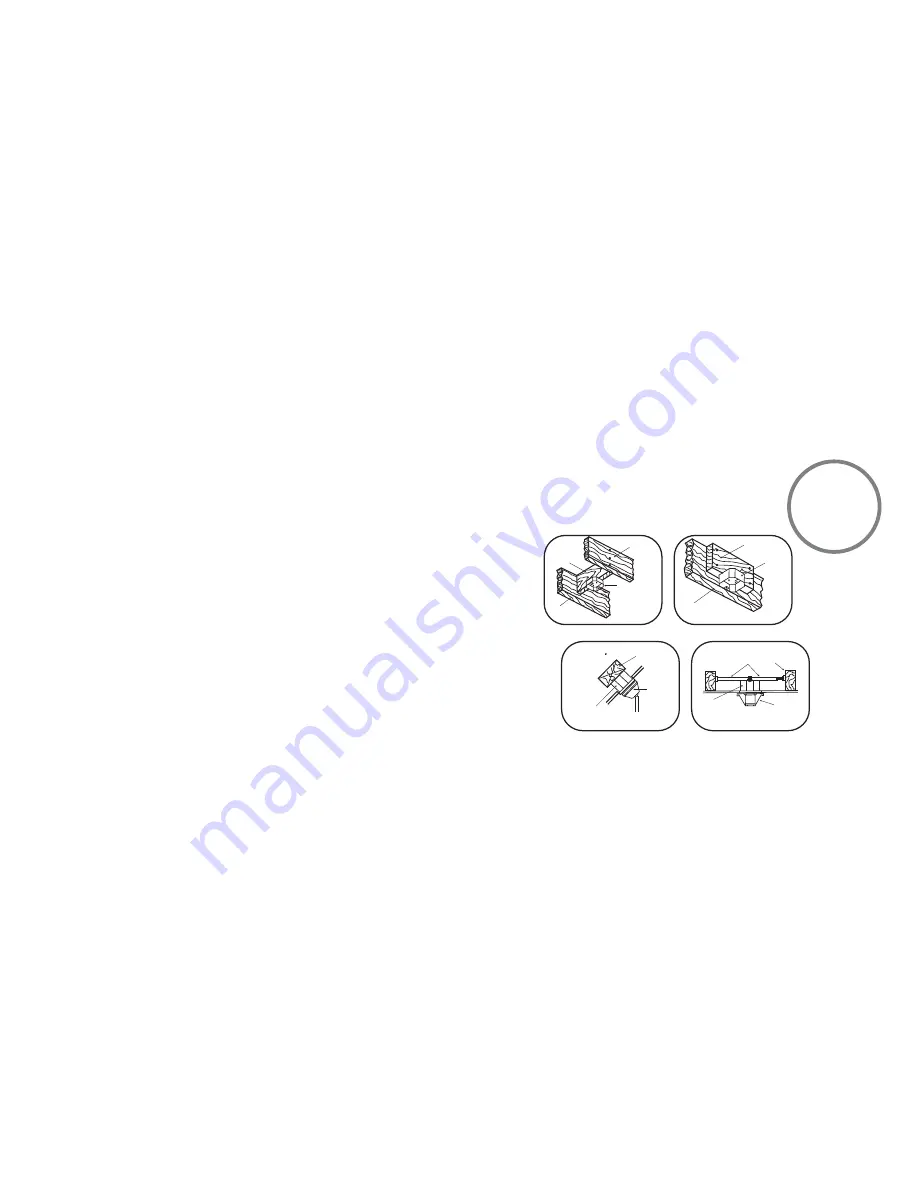
FIG. 1
FIG. 3
FIG. 2
FIG. 4
CROSS BRACE
CEILING
JOIST
CEILING
jOIST
CEILING
JOIST
OUTLET BOX
PARALLEL WOOD BRACE
(MIN. 2" THICK)
OUTLET
BOX
OUTLET BOX
CEILING JOIST OR
CROSS BRACE
ANGLED CEILING
MAXIMUM 29 ANGLE
PROVIDE
STRONG
SUPPORT
RECESSED
OUTLET BOX
HANGER
OPENING
must be
FACING
UPSIDE
HANGER BAR
(OPTIONAL)
HANGER
BRACKET
Tools Required: Phillips screw driver; slotted screw driver; pliers; wire cutters; electrical tape.
MOUNTING OPTIONS
If there isn't an existing mounting box, then read the following instructions. Shut the power off
at the circuit breaker or fuse box.
Secure the hanger bracket directly to the building structure via the knock outs from the outlet
box. The building joist and its support must be able to fully support the moving weight of the
fan. Figures 1,2 and 3 are examples of different ways to mount the outlet box. Note: You may
need a longer downrod to maintain proper clearance when installing on a steep, sloped ceiling,.
Longer downrods are available from your Minka-Aire
®
dealer.
To hanger your fan where there is an existing fixture but no ceiling joist, you may need to
install a hanger bar as shown in Fig. 4 (available at your Minka-Aire
®
dealer.)


