Basic Functions
4
Di551/Di650
4-21
Specifying the Paper Type/Size for the Bypass Tray
Specify the paper type and size that you are using with the bypass tray.
1
Load the paper onto the bypass tray.
For more information, see page 3-12.
2
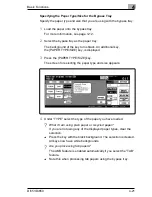
Select the bypass tray as the paper tray.
The background of the key turns black. An additional key,
the [PAPER TYPE/SIZE] key, is displayed.
3
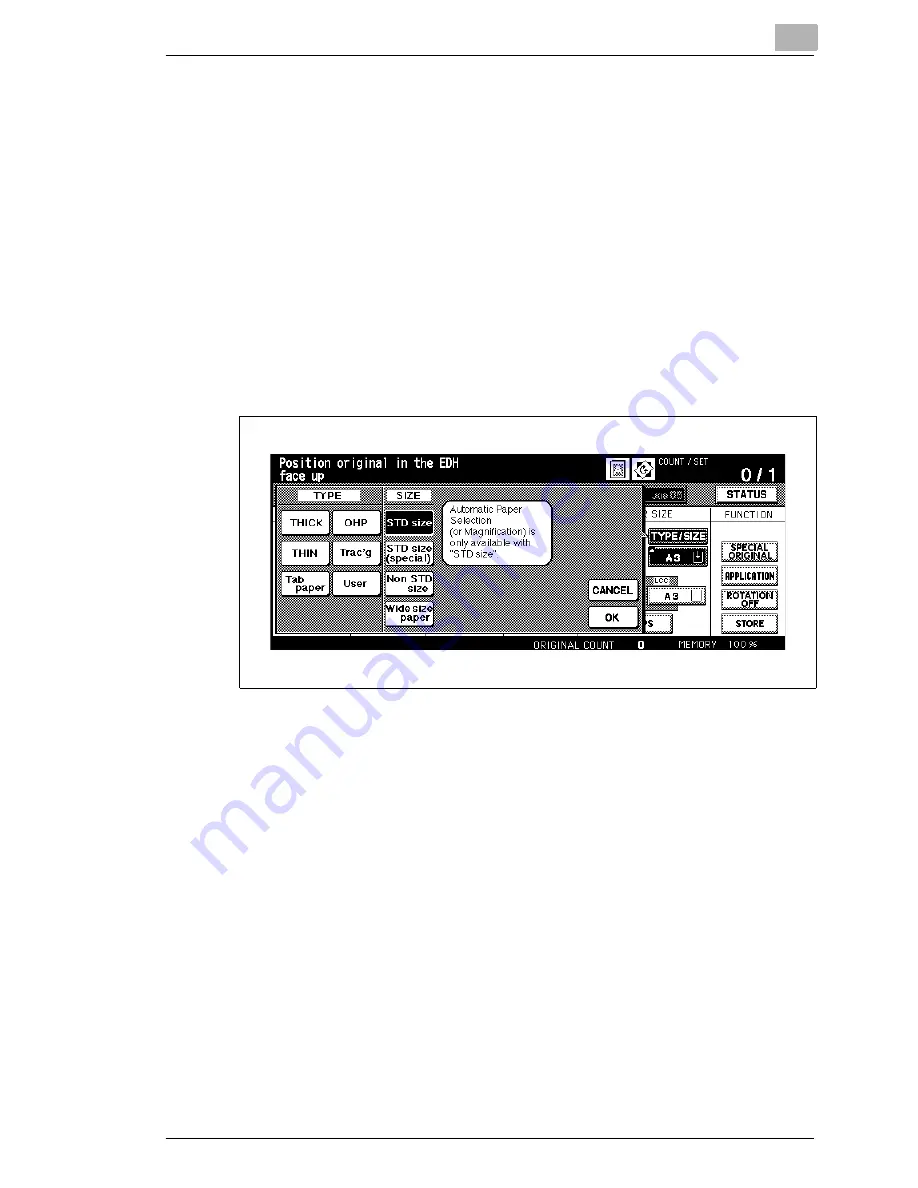
Press the [PAPER TYPE/SIZE] key.
The screen for selecting the paper type and size appears.
4
Under “TYPE” select the type of the paper you have loaded.
?
What if I am using plain paper or recycled paper?
If you are not using any of the displayed paper types, clear the
selection.
➜
Press the key with the black background. The selection is cleared.
All keys now have white backgrounds.
?
Are you processing tab papers?
The AMS feature is enabled automatically if you select the “TAB”
feature.
➜
Note this when processing tab papers using the bypass tray.
Summary of Contents for Di551
Page 1: ...The essentials of imaging www minoltaeurope com User Manual Di551 Di650 ...
Page 2: ......
Page 8: ...IVZ 6 Di551 Di650 ...
Page 22: ...1 Introduction 1 14 Di551 Di650 ...
Page 82: ...2 Getting to Know Your System 2 60 Di551 Di650 ...
Page 98: ...3 Initial Steps 3 16 Di551 Di650 ...
Page 122: ...4 Basic Functions 4 24 Di551 Di650 ...
Page 124: ...5 Applications CD 5 2 Di551 Di650 ...
Page 126: ...6 Network Functions CD 6 2 Di551 Di650 ...
Page 128: ...7 Settings in Key Operator Mode CD 7 2 Di551 Di650 ...
Page 140: ...8 Troubleshooting 8 12 Di551 Di650 5 Close the finisher door ...
Page 142: ...8 Troubleshooting 8 14 Di551 Di650 5 Close the finisher door ...
Page 144: ...8 Troubleshooting 8 16 Di551 Di650 5 Close the finisher door ...
Page 170: ...9 Appendix 9 26 Di551 Di650 ...

