2
Getting to Know Your System
2-40
Di551/Di650
Refilling Tray 3
Add paper to paper tray 3.
These trays allow various paper sizes and alignments.
CAUTION
Incorrect handling can cause damage to the copier!
Do not touch the upper area of the edge guides to adjust them to the paper
size.
➜
To adjust the side edge guides, proceed as described in step 7.
1
Pull the drawer out as far as it will
go.
2
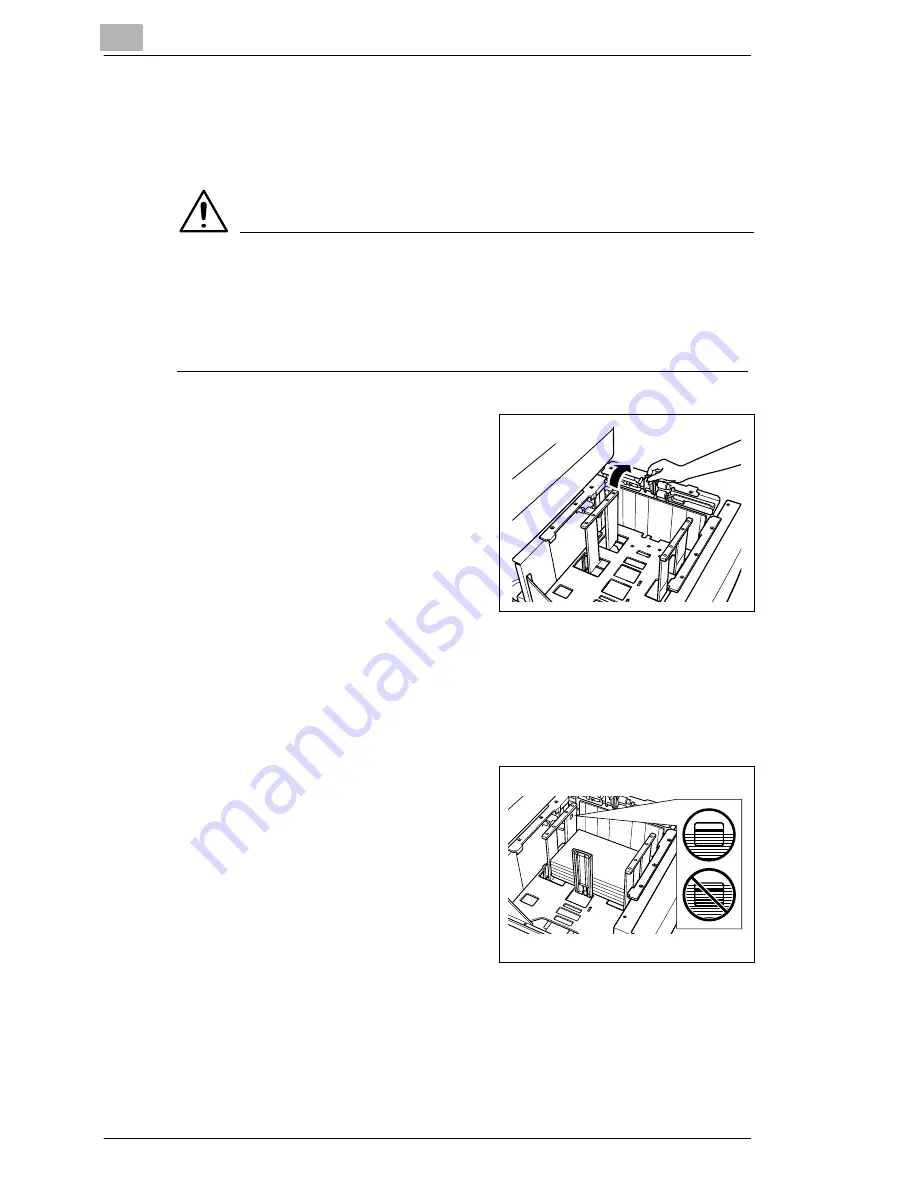
Lift the paper feed roller out of the
way.
3
only when changing the paper
size
Remove any remaining paper from
the paper tray. Slide the edge
guides completely out.
Set the back paper guide to the desired size.
4
Fan the new paper.
Align the paper edges straight.
5
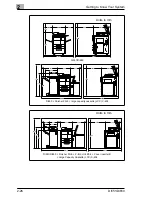
Load the new paper so that the side
that undulates upward is face up.
❍
Tray 3
up to 1,500 sheets (80 g/m²)
6
Make sure not to exceed the
maximum paper filling level.
The paper stack must not be higher
than the red mark of the level
indicator.
Summary of Contents for Di551
Page 1: ...The essentials of imaging www minoltaeurope com User Manual Di551 Di650 ...
Page 2: ......
Page 8: ...IVZ 6 Di551 Di650 ...
Page 22: ...1 Introduction 1 14 Di551 Di650 ...
Page 82: ...2 Getting to Know Your System 2 60 Di551 Di650 ...
Page 98: ...3 Initial Steps 3 16 Di551 Di650 ...
Page 122: ...4 Basic Functions 4 24 Di551 Di650 ...
Page 124: ...5 Applications CD 5 2 Di551 Di650 ...
Page 126: ...6 Network Functions CD 6 2 Di551 Di650 ...
Page 128: ...7 Settings in Key Operator Mode CD 7 2 Di551 Di650 ...
Page 140: ...8 Troubleshooting 8 12 Di551 Di650 5 Close the finisher door ...
Page 142: ...8 Troubleshooting 8 14 Di551 Di650 5 Close the finisher door ...
Page 144: ...8 Troubleshooting 8 16 Di551 Di650 5 Close the finisher door ...
Page 170: ...9 Appendix 9 26 Di551 Di650 ...


