background image

7

STARTING UP THE SOFTWARE

FERRITE CORE

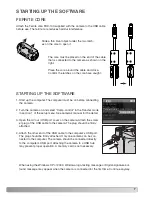
Attach the Ferrite core FRC-100 supplied with the camera to the USB cable
before use. The ferrite core reduces harmful interference.

Slide a thin blunt object under the two latch-
es on the core to open it.

The core must be placed on the end of the cable
that is connected to the camera as shown on the
right.

Place the core around the cable and close.
Confirm the latches on the core have caught.

STARTING UP THE SOFTWARE

1. Start up the computer. The computer must be on before connecting

the camera.

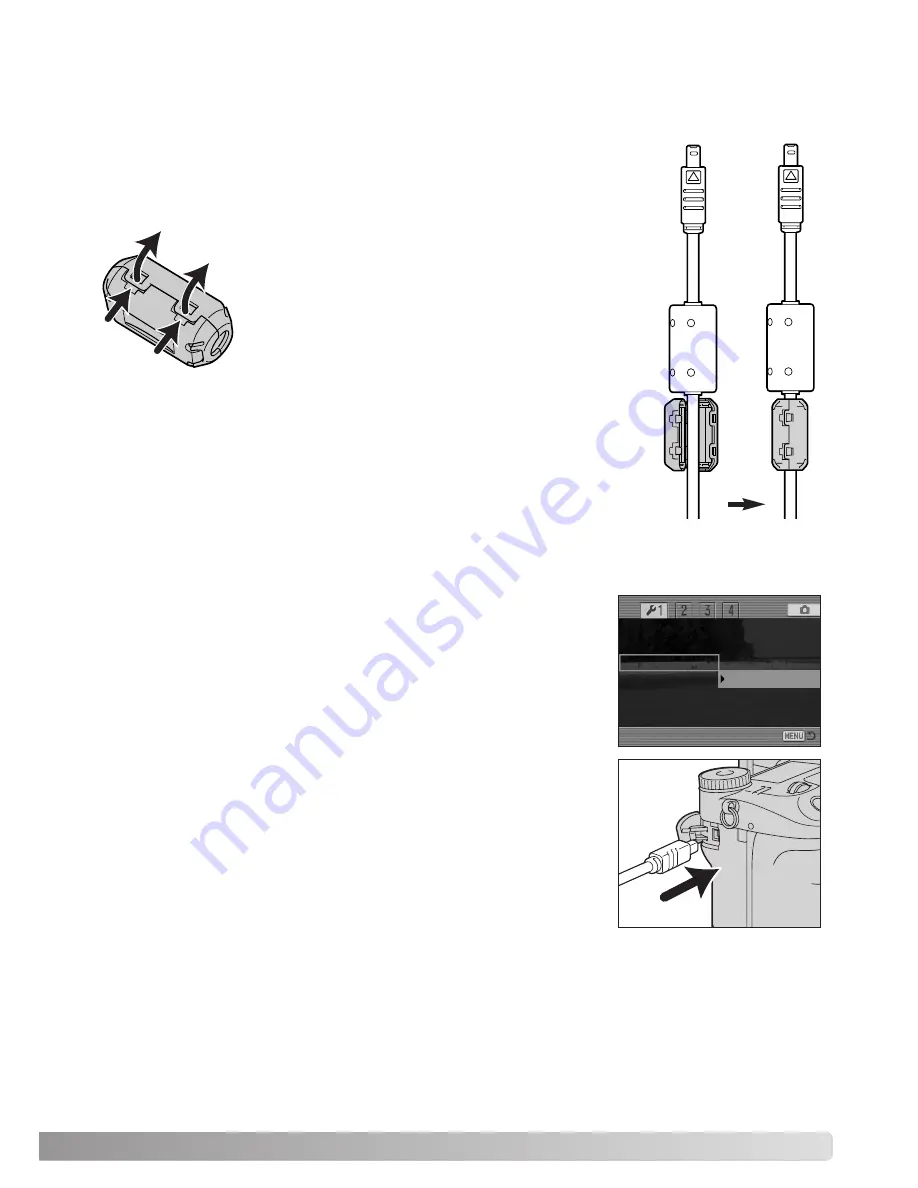
2. Turn the camera on and select “Comp. control” in the Transfer mode

in section 1 of the setup menu. See camera’s manual for the detail.

3. Open the AV out / USB port cover on the camera. Attach the small-

er plug of the USB cable to the camera. The plug should be firmly
attached.

4. Attach the other end of the USB cable to the computer’s USB port.

The plug should be firmly attached. Only one camera can be con-
nected to the computer. The camera should be connected directly
to the computer’s USB port. Attaching the camera to a USB hub
may prevent proper operation. A memory card is not necessary.

LCDbrightness
Shortcut help

Transfer mode     

Data storage

EVF auto swtch   

Comp. control

Video output
Language

When using the Windows XP or 2000, Windows-logo-testing message or Digital-signature-not-
found message may appear when the camera is connected for the first time. Continue anyway.

Summary of Contents for DIMAGE A1 - SOFTWARE

Page 1: ...INSTRUCTION MANUAL E 9222 7301 11 SY A307 ME 0308...

Page 2: ...Every precaution has been taken to ensure the accuracy of this material Contact Minolta if you have any questions Minolta is not responsible for any loss or damage caused by the use of this software T...

Page 3: ...lor 24 bit or greater monitor with a minimum resolution of 800 X 600 1024 X 768 XGA or higher is recommended CD ROM drive 300MHz Intel Pentium processor II or higher and must meet the the require ment...

Page 4: ...istrator privilege INSTALLATION Turn on the computer to start Windows Insert the DiMAGE Capture CD ROM into the CD ROM drive The DiMAGE Installer Menu window will open auto matically If this display d...

Page 5: ...ault program folder is displayed To install the software icons in this folder click Next Installation will begin To install the software icons in another folder select one of the folders listed in the...

Page 6: ...GE A1 4 Click Remove The DiMAGE Viewer installer window will be displayed Click Finish to close the window When using Windows Me re start the computer to complete the installation The license agreemen...

Page 7: ...in section 1 of the setup menu See camera s manual for the detail 3 Open the AV out USB port cover on the camera Attach the small er plug of the USB cable to the camera The plug should be firmly attac...

Page 8: ...G UP 5 Select and start the DiMAGE Capture Windows XP Choose Start All Programs DiMAGE Capture for DiMAGE A1 DiMAGE Capture Windows Me and 2000 Choose Start Programs DiMAGE Capture for DiMAGE A1 DiMAG...

Page 9: ...he live image it may damage the computer and the camera Always quit DiMAGE Capture first and turn the camera off before disconnecting the USB cable Use of the AC Adapter is recommended for extended us...

Page 10: ...t Disconnect Switches connection and disconnection between the camera and the computer DiMAGE Viewer If the DiMAGE Viewer is already installed clicking this button will start up the DiMAGE Viewer Indi...

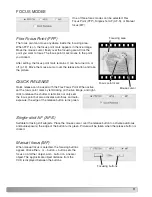
Page 11: ...us Point When active set the focus point mark by left clicking on the live image and right click to release the shutter A left click not only sets the focus point but also activates autofocus and auto...

Page 12: ...k and white in low light conditions When this function is in operation electronic magnification cannot be used BASIC TAB Image quality Image size Camera sensitivity Drive move Bracket increment Rotati...

Page 13: ...The computer standby appears Click OK 3 Select the length of the interval between frames and the number of frames in the series Length of the interval can be selected from 2 60 minutes 3 60 minutes wh...

Page 14: ...to close the window To take more pictures click the connect button to reconnect the camera Single advance bracket The bracket drive mode makes a series of three images with differing exposures normal...

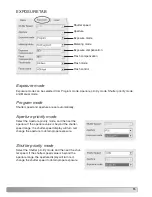
Page 15: ...aperture are set automatically Aperture priority mode Select the Aperture priority mode and then set the aperture If the aperture value is beyond the shutter speed range the shutter speed display wil...

Page 16: ...hen the exposure mode is set to Manual mode the exposure compensation cannot be adjusted Flash compensation Flash burst can be adjusted to make the final picture lighter or darker Exposure can be adju...

Page 17: ...When Auto is selected the white balance is adjusted automatically Preset white balance can be selected from Daylight Cloudy Shade several kinds of Fluorescent Tungsten and Flash Manual white balance...

Page 18: ...or meter can be used to measure the approximate color temperature of a scene when capturing a RAW image The recorded color temperature and CC index value from the meter can be entered in the text boxe...

Page 19: ...OR MODE IS SET TO NATURAL VIVID OR Adobe RGB Filter can be adjusted within eleven levels 5 A positive adjustment acts like a warming filter A neg ative adjustment makes the image cooler WHEN THE COLOR...

Page 20: ...e activated Right click the mouse to take a picture Using computer s keyboard Pressing the F9 key on the computer s keyboard will release the shutter This doesn t work when the focus is set to FFP and...

Page 21: ...Instant playback When checked a captured image is displayed for two seconds after it is record ed Version When clicked software version information window will appear Click OK to close the window Clo...

Page 22: ...can be changed The serial number is attached automatically and cannot be changed Use letters or numbers which are acceptable as a file name in the Windows operating system Unacceptable characters can...

Page 23: ...the default monitor profile select the desired profile from the list and click Set As Default To show other profiles in the list click Add select the profile and click Add The camera s clock and calen...

Page 24: ...2003 Minolta Co Ltd under the Berne Convention and the Universal Copyright Convention Printed in Germany 9222 7301 11 SY A307 ME 0308...

Reviews: