20
WINDOWS
®
98 / WINDOWS
®
2000 / WINDOWS
®
ME / WINDOWS NT
®
• In the procedure below, the hard disk drive for system startup is drive C, and the CD-ROM drive is drive D.
• Make sure the scanner isn’t connected to the computer when you install the software.
INSTALLING THE SOFTWARE — WINDOWS
1.
Turn on the computer to start
Windows
®
.
2.
Insert the DiMAGE Scan Multi
PRO CD-ROM into the CD-
ROM drive.
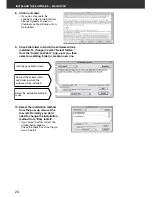
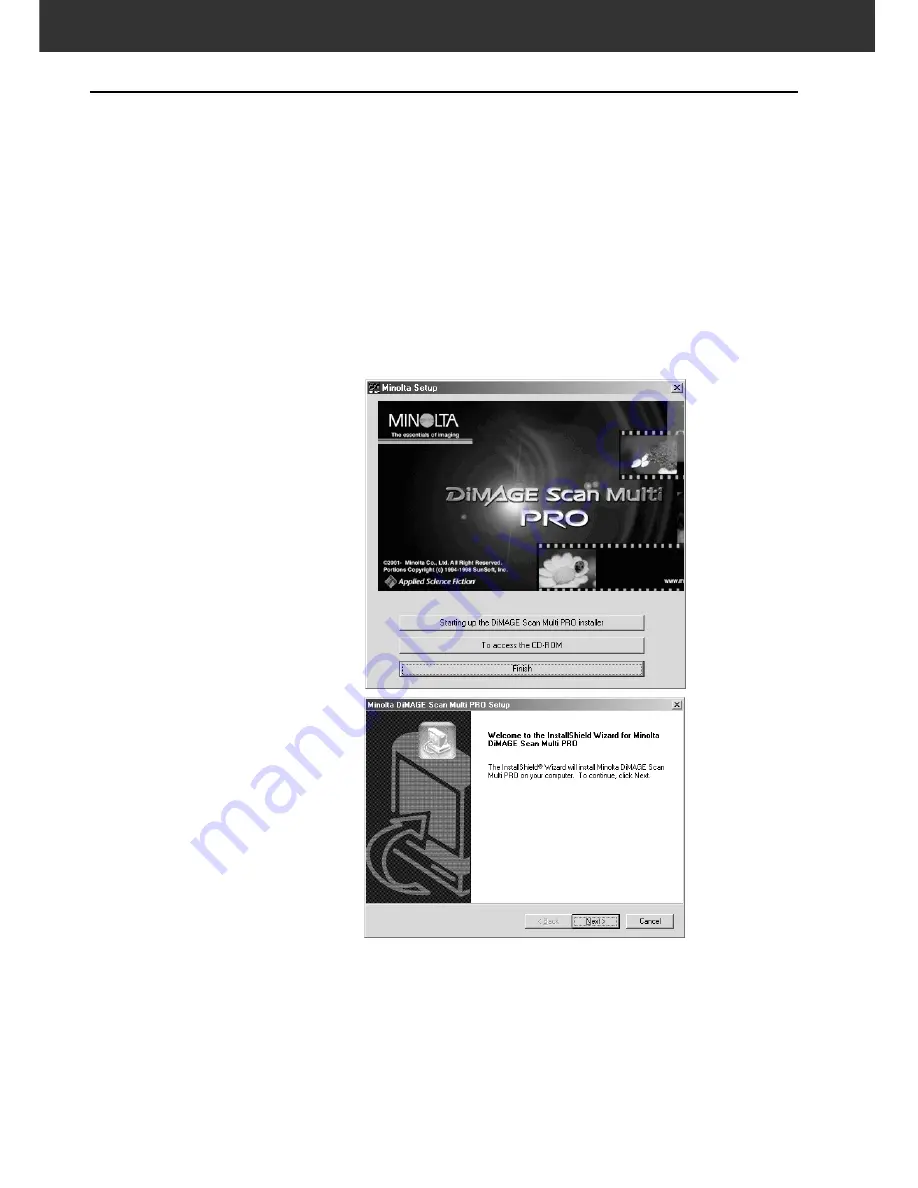
In a little while, a splash screen for
Setup will appear.
3.
Click on [Starting up the
DiMAGE Scan Multi PRO
installer].
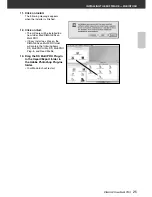
• In a little while, the program
decompression screen will appear
followed by the InstallShield
Wizard program screen, after that
the program will start
automatically.
• To confirm the contents of the
DiMAGE Scan Multi PRO CD-
ROM, click on [To access the CD-
ROM].
Summary of Contents for DiMAGE DiMAGE Scan Multi PRO
Page 1: ...INSTRUCTION MANUAL E 9224 2887 11 H A108...
Page 111: ...DiMAGE Scan Multi PRO 111 SCAN JOB FILE LIST 35 mm...
Page 113: ...DiMAGE Scan Multi PRO 113 SCAN JOB FILE LIST 120 220 6x4 5...
Page 115: ...DiMAGE Scan Multi PRO 115 SCAN JOB FILE LIST 120 220 6x6...
Page 117: ...DiMAGE Scan Multi PRO 117 SCAN JOB FILE LIST 120 220 6x7...
Page 119: ...DiMAGE Scan Multi PRO 119 SCAN JOB FILE LIST 120 220 6x8...
Page 121: ...DiMAGE Scan Multi PRO 121 SCAN JOB FILE LIST 120 220 6x9...
Page 123: ...DiMAGE Scan Multi PRO 123 SCAN JOB FILE LIST MULTI FORMAT 35 mm...


