DiMAGE Scan Multi PRO
89
The images of developed film are composed of high-density grains. These grains sometimes
clump together so that the images look rough. This function detects the grains when scanning
and equalizes them. So, a sharp and smooth image can be obtained even when a 35mm
image is magnified
DIGITAL GEM
5.
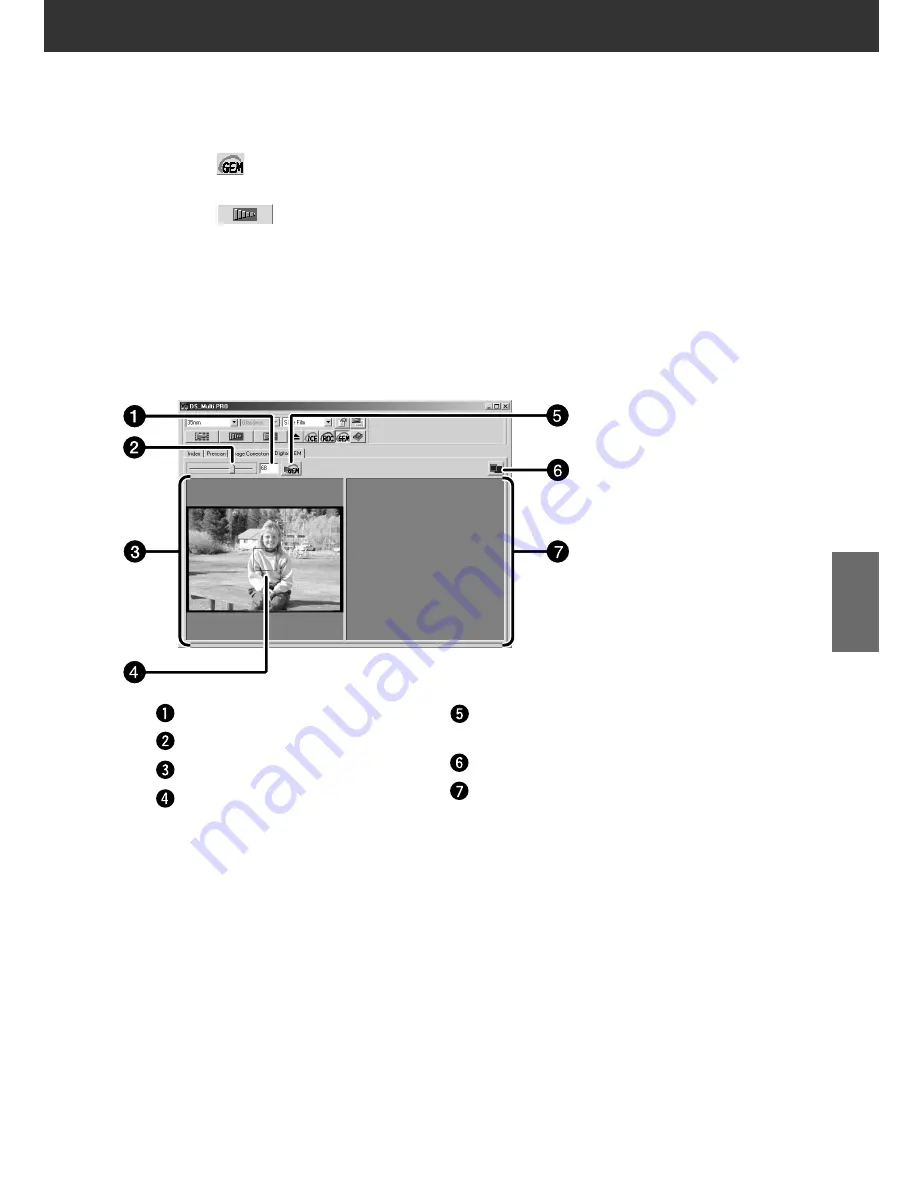
Drag the Digital GEM slider or input the desired
value directly in the text box.
• Values from 0 to 100 can be input.
• The bigger the value is, the more effective the correction
result is.
Digital GEM text box
Digital GEM slider
Digital GEM image display area
Confirm Digital GEM effect area
Confirm Digital GEM effect
button
Full screen view button
Digital GEM image display
check area
1.
Click on
in the Main window.
• The Digital GEM tab will be activated.
2.
Click on
.
• The prescan will begin.
• The Prescan tab will appear and the prescan image will
be displayed in the window.
3.
Select the desired Input Resolution in the Scan
Settings window (see page 92).
4.
Click on Digital GEM tab.
• The Digital GEM tab window will appear.
Summary of Contents for DiMAGE DiMAGE Scan Multi PRO
Page 1: ...INSTRUCTION MANUAL E 9224 2887 11 H A108...
Page 111: ...DiMAGE Scan Multi PRO 111 SCAN JOB FILE LIST 35 mm...
Page 113: ...DiMAGE Scan Multi PRO 113 SCAN JOB FILE LIST 120 220 6x4 5...
Page 115: ...DiMAGE Scan Multi PRO 115 SCAN JOB FILE LIST 120 220 6x6...
Page 117: ...DiMAGE Scan Multi PRO 117 SCAN JOB FILE LIST 120 220 6x7...
Page 119: ...DiMAGE Scan Multi PRO 119 SCAN JOB FILE LIST 120 220 6x8...
Page 121: ...DiMAGE Scan Multi PRO 121 SCAN JOB FILE LIST 120 220 6x9...
Page 123: ...DiMAGE Scan Multi PRO 123 SCAN JOB FILE LIST MULTI FORMAT 35 mm...


