background image

98

99

D

ATA

-

TRANSFER MODE

Once the camera is connected to the computer, image and audio
files can be accessed by double clicking on icons. Image folders are
located in the DCIM folder. To copying images and audio
recordings, simply drag and drop the file icon into a location in the
computer. 

Files and folders on the memory card can
be deleted using the computer. Never
format the memory card from the
computer; always use the camera to
format the card. Only files recorded by the
camera should be stored on the memory
card.

Image and audio file names begin with “PICT” followed by a four-digit file number and a
tif, jpg, mov, or thm extension. Voice-memo audio files have a wav extension and the file
name corresponds to its image file. The thumbnail images (thm) are produced with TIFF
images and movie clips and are only used in camera and DiMAGE Viewer operation.

Copy images (p. 82) are placed in a folder with a name ending in “CP.” When a new folder
is created, the first three digits in the folder name will be one greater than the largest
folder number on the card. When the index number in the image file name exceeds
9,999, a new folder will be created with a number one greater than the greatest folder
number on the memory card: e.g. from 100MLT24 to 101MLT24. 

The number in the image file name may not correspond to the frame number of the
image. As images are deleted in the camera, the frame counter will adjust itself to show
the number of images on the card and reassign the frame numbers accordingly. The
serial numbers used with image files will not change when an image is deleted. When a
new image is recorded, it will be assigned a number one greater than the largest serial
number in the folder. File serial numbers can be controlled with the file-number-memory
function in the custom 1 section of the setup menu (p. 84).

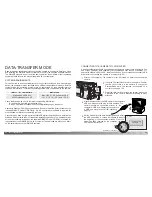
COMPACTFLASH CARD FOLDER ORGANIZATION

Image files contain exif tag data. This data includes the time and date the image was recorded

as well as the camera settings used. This data can be viewed with the camera or the DiMAGE
Viewer software. If a camera image is opened in a photo-retouching application that does not sup-
port exif tags, such as Adobe Photoshop, and then the image is saved overwriting the original
data, the exif tag information is erased. When using software other than the DiMAGE Viewer,
always make a backup copy of the image files to protect the exif tag data.

To view images correctly on your computer, the monitor’s color space may need to be adjusted.
Refer to your computer manual on how to calibrate the display to the following requirements:
sRGB, with a color temperature of 6500K, and a gamma of 2.2. Changes made to the captured
image with the camera’s contrast and color-saturation controls will affect any color-matching soft-

ware in use.

Camera Notes

PICT0001.THM

Drive Icon

Dcim

PICT0001.TIF

PICT0002.JPG

PICT0003.MOV

Fine, standard,

or economy

image

Movie clip

Misc

The misc. folder
contains DPOF
print files (p. 80).

PICT0002.WAV

PICT0002’s

voice-memo

audio file

100MLT24

10130801

TIFF image

102MLTCP

PICT0003.THM

Summary of Contents for DiMAGE S414

Page 1: ...INSTRUCTION MANUAL E...

Page 2: ...tery contacts to avoid short circuiting during disposal always follow local regulations for battery disposal WARNING Use only the specified AC adapter within the voltage range indicated on the adapter...

Page 3: ...regulations CE stands for Conformit Europ enne European Conformity Digital Camera Tested To Comply With FCC Standards FOR HOME OR OFFICE USE This device complies with Part 15 of the FCC Rules Operatio...

Page 4: ...rogram button 28 Flash modes 30 Flash range auto recording mode 31 Flash signals 31 Camera shake warning 31 Drive modes 32 Self timer 33 Remote control sold separately 34 Continuous advance 35 Bracket...

Page 5: ...t order 81 Copying images 82 Setup mode 84 Navigating the setup menu 84 LCD monitor brightness 86 Formatting CompactFlash cards 86 Auto power save 86 Language 87 Display mode 87 File number memory 88...

Page 6: ...d the card slot door Self timer Remote control lamp p 33 Flash p 30 Digital subject program button p 28 Strap eyelet p 15 Viewfinder p 12 LCD monitor p 14 Menu button Battery chamber lock p 16 Flash m...

Page 7: ...icator p 59 Image size display p 44 Image quality display p 44 Drive mode indicators p 32 Microphone indicator p 46 Exposure mode indicators p 56 Because the optical viewfinder and the lens are slight...

Page 8: ...ator p 30 e Contrast compensation display p 65 f Filter display p 65 g Exposure compensation display p 50 h White balance indicator p 60 n Camera sensitivity ISO display p 62 k Metering mode indicator...

Page 9: ...ll not release When replacing exhausted batteries wait thirty seconds between removing the old batteries and inserting the new ones Low battery warning battery power is very low The batteries should b...

Page 10: ...rd can now be pulled out Take care when removing the card as it becomes hot with use Insert the memory card into the card slot until the card eject lever pops out 3 Insert the card so the face is towa...

Page 11: ...custom 2 tab at the top of the menu Use the down key to highlight the date time set menu option Press the center of the controller to display the date time setting screen Use the left and right keys...

Page 12: ...ill reset when the mode dial is turned to another position Adjustments made with exposure compensation will be reset to 0 0 when the camera is turned off or changed to another mode This section covers...

Page 13: ...as wide angle the angle of view is larger than that of the human eye Above 50mm is referred to as telephoto and makes distant objects appear closer The effect of the optical zoom is visible in both t...

Page 14: ...lace the subject within the focus frame Press and hold the shutter release button partway down The focus signals will indicate that the focus is locked The shutter speed and aperture value will change...

Page 15: ...ght use a tripod to eliminate blurring from camera shake To take portraits with night scenes set the flash mode to fill flash p 30 Ask your subject not to move after the flash burst the shutter will s...

Page 16: ...The camera shake warning may appear when flash cancel is selected p 31 Red eye reduction the flash fires twice before the main flash burst to reduce red eye an effect caused by light reflected from t...

Page 17: ...t to blink and is accompanied by an audio signal A few seconds before the exposure the self timer lamp will blink rapidly The lamp will glow steadily just before the shutter fires To stop the countdow...

Page 18: ...combinations 34 35 AUTO RECORDING MODE BASIC OPERATION REMOTE CONTROL SOLD SEPARATELY The IR Remote Control RC 3 allows remote camera operation up to 5m 16 ft away The remote control unit can be used...

Page 19: ...ection of the menu p 54 Normal 1 2 36 37 AUTO RECORDING MODE BASIC OPERATION Number of frames in bracketing series Frame counter LCD monitor off The display button controls the LCD monitor display The...

Page 20: ...ew the histogram of the displayed still image press the up key The histogram shows the luminance distribution of the image from black left to white right The 224 vertical lines indicates the relative...

Page 21: ...rough to the next format full display image only index playback Image only DISPLAY BUTTON PLAYBACK 41 PLAYBACK BASIC OPERATION ENLARGED PLAYBACK In single frame playback a still image can be enlarged...

Page 22: ...rns off the menu after settings are made The four way keys of the controller 2 are used to move the cursor in the menu Pressing the center of the controller will enter a setting Use the up down keys o...

Page 23: ...le TIFF fine standard and economy files can be recorded as color or monochrome images p 64 in the multi function recording mode Image size and quality must be set before the picture is taken Changes a...

Page 24: ...the microphone The quality of the recording is proportional to the subject to microphone distance For best results hold the cam era approximately 20cm 8in from your mouth Recording Tips Recording aud...

Page 25: ...re three menu settings If the center of the controller is pressed during the instant playback the displayed image will immediately be saved and the playback canceled Delete this frame No Yes DIGITAL Z...

Page 26: ...isplayed may not change When set to any value other than 0 0 the exposure compensation indicator will remain on the data panel and LCD monitor as a warning WHAT IS AN EV WHAT IS A STOP Sometimes the c...

Page 27: ...area and the spot focus areas is simple Press and hold the controller until the wide focus area frame lines change to the spot focus area display Press and hold the controller again to return to the w...

Page 28: ...e a setting has been selected the cursor will return to the menu options and the new setting will be displayed Changes can continue to be made To return to the recording mode press the menu button Cha...

Page 29: ...cted p 30 Use the left right keys of the controller 1 to set the desired aperture value Press the shutter release button to activate the exposure system the corresponding shutter speed will be display...

Page 30: ...tance is displayed at the bottom of the monitor next to the frame counter All distances are measured from the CCD When the focus is set to the minimum focusing distance as the lens is zoomed the dista...

Page 31: ...ng appear neutral The effect is similar to selecting daylight or tungsten film or using color compensating filters in conventional photography An indicator is displayed on the monitor if a setting oth...

Page 32: ...arent at the bottom of a horizontal image The icons indicating the metering modes are displayed on the monitor The metering mode is set in the custom 1 section of the multi function recording mode men...

Page 33: ...han normal or off is selected an indicator will be displayed showing an increase or decrease in the quality selected Turning the camera off will not reset these functions Filter Contrast Sharpness To...

Page 34: ...d and background in focus and portraits use a shallow depth of field small aperture value to separate the subject from the background Depth of field also changes with focal length The wide angle posit...

Page 35: ...ecording Before recording the data panel and monitor frame counters show the maximum time in seconds can be recorded with the next movie clip A maximum of 60 seconds is displayed until the amount of r...

Page 36: ...back of a movie press the down key of the controller ADVANCED OPERATION PLAYING BACK VOICE MEMOS Voice memos p 46 can be played back in Quick View and the playback mode The voice memo indicator will b...

Page 37: ...menu options press the left key Press the controller to select the highlighted setting Once a setting has been selected the cursor will return to the menu options and the new setting will be displayed...

Page 38: ...etting can be checked and set in the custom 2 section of the setup menu p 84 2 3 Press the controller to complete the operation 1 Turn off the television and the camera 2 Insert the mini plug end of t...

Page 39: ...deleted Single multiple or all files in a folder can be locked A locked file cannot be deleted by either the playback mode menu functions or the QV delete button Important image files should be locked...

Page 40: ...the yellow border and press the down key the check icon will disappear Continue until all the images have been edited Press the controller to set the marked frames or press the menu button to cancel t...

Page 41: ...from digital cameras After the DPOF file is created the CompactFlash card is simply taken to a photofinishing service or inserted into the CompactFlash card slot of DPOF compatible printers When a DPO...

Page 42: ...image and press the down key the check icon will disappear Continue until all the images to be copied are marked Press the controller to continue or press the menu button to cancel the operation and r...

Page 43: ...s the right controller key the settings will be displayed with the current setting highlighted To return to the menu options press the left key Press the controller to select the highlighted setting U...

Page 44: ...OWER SAVE The camera will turn off the data panel to conserve battery power if no operation is made within a certain period The length of this period can be changed to 1 3 5 or 10 minutes The auto pow...

Page 45: ...rs refer to Minolta and the last two numbers indicate the camera used 24 indicates a DiMAGE S414 A date folder name also starts with the three digit serial number and is followed by one register for t...

Page 46: ...f 63 Display mode Standard focus frames only real time histogram live image only 87 Folder name Standard 88 Volume 2 89 78 78 Duration Slide Show Repeat Slide Show 5 seconds No DATE AND TIME SETTING I...

Page 47: ...and used as a mass storage device the computer must be equipped with a USB port as a standard interface Both the computer and the operating system must be guaranteed by their manufacturers to support...

Page 48: ...structions on the following page During installation if the operating system requests the Windows 98 CD ROM insert it into the CD ROM drive and follow the accompanying instructions on the screen No sp...

Page 49: ...operating system will detect the new device and the add new hardware wizard window will open Place the DiMAGE software CD ROM in the CD ROM drive Click Next The add new hardware wizard will confirm t...

Page 50: ...umber of images on the card and reassign the frame numbers accordingly The serial numbers used with image files will not change when an image is deleted When a new image is recorded it will be assigne...

Page 51: ...all window to stop the device The safe to remove hardware window will open Close the window turn the camera off and then disconnect the USB cable The hardware devices to be stopped will be displayed i...

Page 52: ...is red the data or memory card may permanently be damaged QUICKTIME SYSTEM REQUIREMENTS IBM PC AT Compatible Pentium based computer Windows 95 98 98SE NT Me or 2000 Professional 32MB or more of RAM S...

Page 53: ...ombination is extremely under or over exposing the live image Change the shutter speed or aperture value until an image appears on the monitor p 57 Shooting data is displayed but live image is entirel...

Page 54: ...amera Restart the computer REMOVING THE DRIVER SOFTWARE WINDOWS CAMERA CARE Do not subject the camera to shock or impact Turn off the camera when transporting This camera is neither waterproof nor spl...

Page 55: ...ns within the copyright laws BATTERIES Battery performance decreases with temperature In cold environments we recommend keeping spare batteries in a warm place such as the inside of a coat Batteries c...

Page 56: ...are based on the latest information available at the time of printing and are subject to change without notice Number of effective pixels 4 0 million CCD 1 1 8 type interline primary color CCD with a...

Page 57: ...0 Carrieres Sur Seine France Minolta UK Limited 7 Tanners Drive Blakelands Milton Keynes MK14 5BU England Minolta Austria Ges m b H Amalienstrasse 59 61 A 1131 Wien Austria Minolta Camera Benelux B V...

Page 58: ...de cargarlas Apague siempre la c mara antes de cambiar las pilas F r Digitalkameras ist der Einsatz von NiMH Akkus zu empfehlen Die m gliche Aufnahmezahl mit 1850 mAh NiMH Akkus ist ca 160 Bilder bei...

Page 59: ...lkaaliparistot niiden riittoisuus on hyvin rajallinen K yt alkaaliparistoja vain koekuviin tai kun Ni MH akkuja Minoltan ulkoista paristokoteloa tai AC adapteria ei ole k ytett viss Lataa Ni MH akut t...

Reviews: