L
OADING THE FILM HOLDERS
14
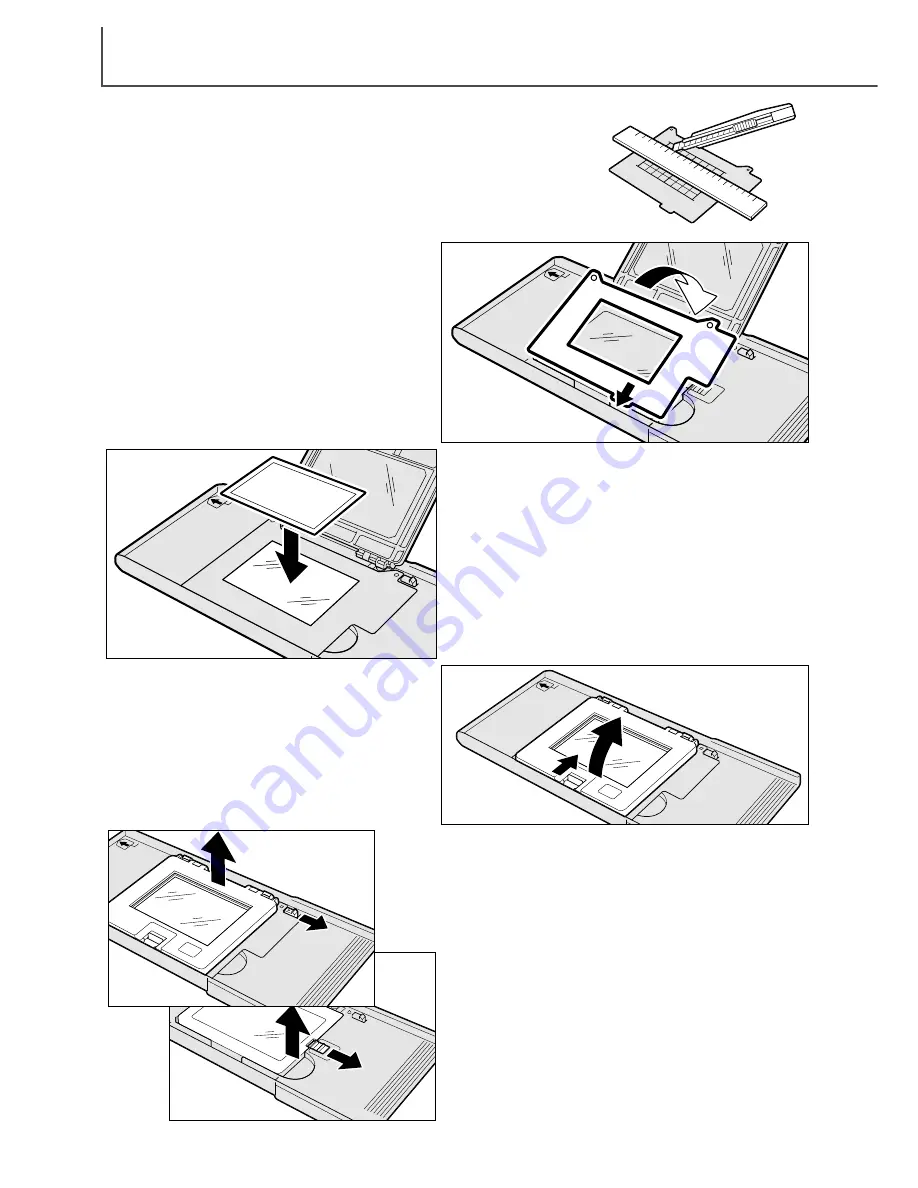
With a straight edge and sharp knife, cut the aperture for
the film from one of the masks. The aperture should be
the same dimensions as the image area, not the film size;
the mask should separate the film from the glass base of
the attachment to prevent newton rings, and the aperture
should only show the image area to eliminate flare from
the surrounding clear film.
Slide the tab of the mask into the slot
on the side of the Universal Holder.
Fit the holes on the other side of the
mask (2) over the registration pins on
the base of the the holder on each
side of the cover hinges.
With the emulsion down, place the film on the
mask. Align the image area with the mask aper-
ture.
Carefully close the cover until the latch clicks. See
page 15 for instructions on how to load the holder
into the scanner.
1
To remove the film, slide the latch toward the
center of the holder and lift the cover.
4
To remove the glass base of the attachment, slide
the latch on the Universal Holder (4) and lift the
base from the holder.
To remove the multi-format attachment from the
Universal Holder, slide the latch near the hinge (3)
to remove the cover.
3
2


