S
CANNER SETUP
8
Connecting the SCSI cable
The scanner is supplied with an ultra SCSI D-sub half-pitch 50-pin cable. Contact your dealer if a
different cable is required.
The computer and all peripheral devices must be off
before connecting the scanner.
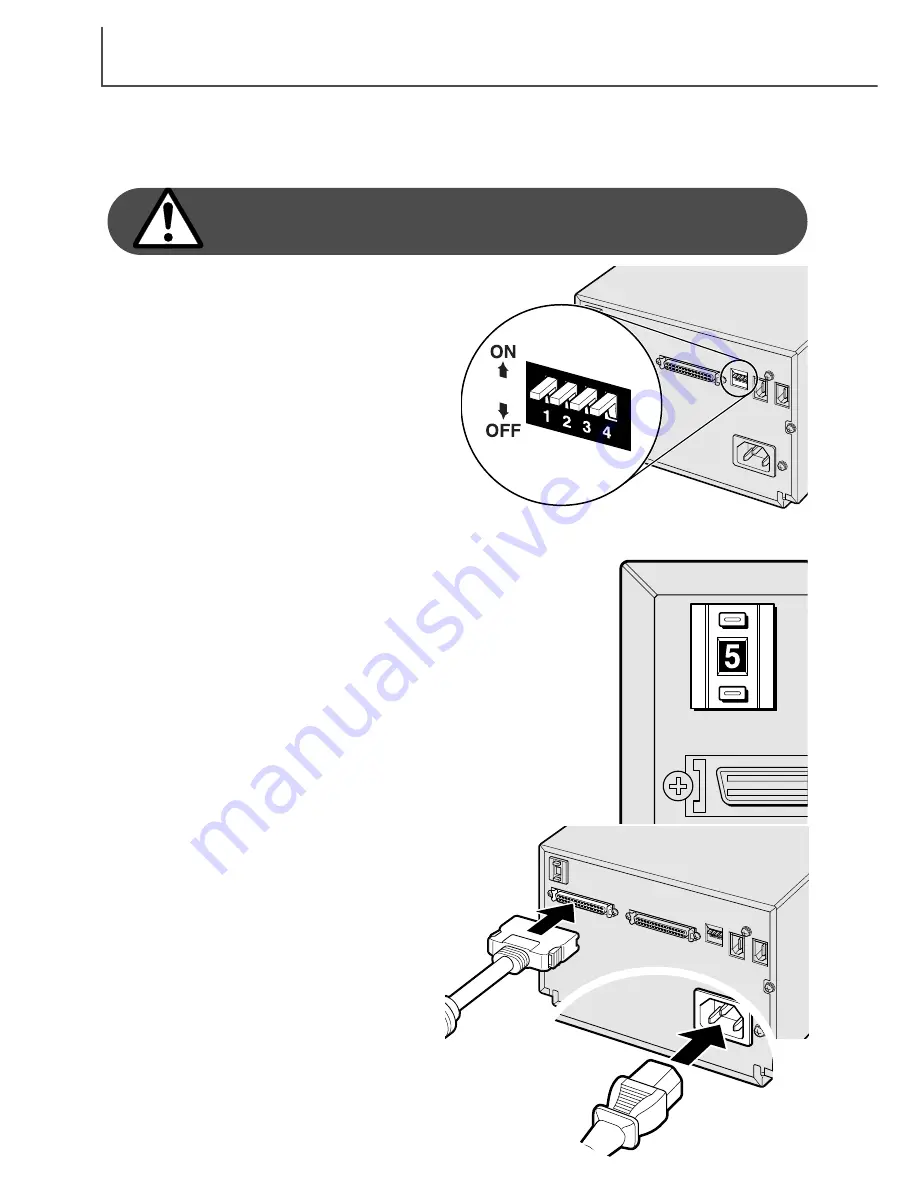
The terminator dip switch on the back of the
scanner eliminates the need for an external ter-
minator. If the scanner is to be the only SCSI
device connected to the computer or it is the last
device in a daisy chain, switch number 1 should
be in the on position; terminating the SCSI chain
helps to suppress noise, not terminating a chain
can cause slowdowns, data errors, and crashes.
If the scanner is to be connected somewhere
within a daisy chain, switch 1 should be in the
off position. The initial setting for all the switches
is on. Dip switch 4 must be in the on position to
use a SCSI interface.
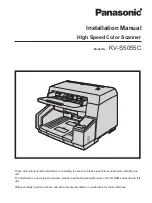
Connect the scanner to the computer or SCSI
chain with the cable. Either SCSI port can be
used for the connection.
Plug the power cord into the back of the unit.
The other end of the power cord should be
plugged into a grounded outlet.
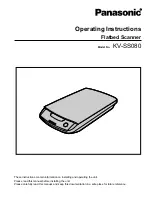
Set the SCSI ID for the scanner by pressing the buttons above and
below the ID number window. Devices in the same chain must have
unique ID numbers. Depending on the computer system, some SCSI
IDs may already be assigned:
IBM PC/AT
7 - SCSI host adapter
Macintosh
0 - internal hard drive
3 - internal CD-ROM drive
7 - operating system
IDE Macintosh systems do not use SCSI ID 0 for the hard drive. SCSI
ID 3 is available on the external bus on Macintosh systems with a
dual bus.


