background image

41

SUBJECT /

DRIVE

40

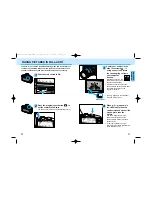
Press the subject-program
button

until the subject-

program indicator

points to

.

Landscape photography requires a large
depth-of-field to make sure the subject
and background are in focus. In
landscape mode, the camera is set to
obtain the greatest depth-of-field
possible, while maintaining a shutter
speed fast enough to prevent blurring
from camera shake.

• For best results zoom to a wide angle setting or use a wide angle lens.

Include a foreground subject or detail to create a feeling of depth in the
picture.

• Use flash when a subject in the foreground is backlit or has strong

shadows across the face. Without a foreground subject, the flash will have
no effect on the landscape. Please see page 36 for the camera’s flash
range.

• For best results, use a tripod.
• Use night portrait mode (p.44) with subjects or scenery at night.

Landscape 

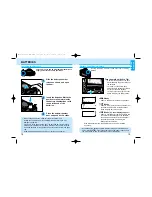
Press the subject-program
button

until the subject-

program indicator

points to

.

SUBJECT-PROGRAM SELECTION

Portrait 

• For best results use the telephoto setting of the lens.
• Use fill flash (p. 37) when your subject is backlit or has strong shadows

across the face.

• Focus on your subject’s eyes and be ready to capture the perfect

expression.

• Use night portrait mode (p.44) with subjects at night.

Portraits have the greatest impact when a
shallow depth-of-field* is used to separate
the subject from the background. In
portrait mode, the necessary settings are
made automatically, leaving you free to
capture the perfect expression.

*Depth-of-field is the area in front of and
behind the subject that appears sharp (p.
52).

9222-2163-11 MM-B108 (E).qxd  01.8.3  16:11  Page 40

Summary of Contents for DYNAX 5

Page 1: ...E INSTRUCTION MANUAL AUTOMATIC OPERATION SUBJECT DRIVE CREATIVE EXPOSURE DETAILED OPERATION CUSTOM FUNCTIONS APPENDIX GETTING STARTED 9222 2163 11 MM B108 E qxd 01 8 3 16 11 Page 1...

Page 2: ...BJECT PROGRAM DRIVE MODES The CREATIVE EXPOSURE MODE section introduces exposure control The DETAILED OPERATION section describes advanced functions within the camera The last section CUSTOM FUNCTIONS...

Page 3: ...E CONTROL 52 SHUTTER CONTROL 53 EXPOSURE MODES 54 A MODE APERTURE PRIORITY 55 Flash With A Mode 57 Depth of field Preview 58 S MODE SHUTTER PRIORITY 59 Flash With S Mode 60 M MODE MANUAL 61 Ev Scale i...

Page 4: ...of the FCC Rules These limits are designed to provide reasonable protection against harmful interference in a residential installation This equipment gen erates uses and can radiate radio frequency en...

Page 5: ...gh voltage circuit which may cause an electric shock resulting in injury The continued use of a damaged product or part may cause injuries Keep batteries or small parts that could be swallowed away fr...

Page 6: ...e focus frame If using a zoom lens rotate the zooming ring to frame your subject as desired With the eye start on the camera will focus and set exposure automatically Eye start is initially on when th...

Page 7: ...erminal1 49 Spot AF button 69 Viewfinder For information on specific parts refer to the page shown in parentheses Strap eyelet 17 Lens mount Mirror Strap eyelet 17 Eyepiece sensors 27 Film window 23 D...

Page 8: ...indicator 54 66 Shutter speed ISO display Wide focus frame 68 Local focus areas 70 Spot metering area 78 Spot focus area 69 Wireless Remote flash indicator 98 High speed sync indicator 97 Flash indic...

Page 9: ...Cap Push down the buckle to fix the strap 2 Take care not to catch the strap when closing the back cover Firmly press the eyepiece cap of the strap into the eyepiece The eyepiece cap is used to preve...

Page 10: ...ttery chamber door is closed without the batteries inserted The display will disappear after 5 minutes If the data panel is blank the batteries may be dead or installed incorrectly When changing batte...

Page 11: ...ces of fogging Never force the lens If it does not fit check its orientation with the index marks When removing make sure the lens release is pressed all the way down Do not touch the inside of the ca...

Page 12: ...h it with your fingers or the film tip FILM 4 Film chamber Lock Once the film is loaded the back cover release will lock until the film is rewound to prevent the camera from being opened accidentally...

Page 13: ...en Only use blunt objects Sharp objects may damage the camera will appear and will blink on the data panel when the film has rewound 1 2 Use manual rewind to rewind the film before the roll is finishe...

Page 14: ...systems Pressing all the down releases the shutter Holding the Camera Grip the camera firmly with your right hand while supporting the lens with your left Keep your elbows at your side and your feet s...

Page 15: ...utton With the delayed release button the signal will beep rapidly for 1 second and then sound a long tone just before the shutter releases Remote control is sold separately for owners of the remote c...

Page 16: ...y down to take the picture The audio signal confirms the camera has focused when the shutter release button is pressed partway down In low light conditions the AF illuminator will activate to determin...

Page 17: ...cusing Continuous AF The shutter is locked Focus cannot be confirmed The shutter is locked FOCUS The following signals appear in the viewfinder to indicate the focus status Focusing time can be longer...

Page 18: ...h is ready The flash exposure was confirmed Steady Steady Blinks Disappears After taking the picture Action Signal Indicated Flash Status Pressing the shutter release button partway down Composing the...

Page 19: ...be set in PA mode 2 or PS mode 3 p 111 Remove the lens hood before using the built in flash Lens shadowing may occur with the following lenses at the shorter focal lengths AF Zoom 28 70mm f 2 8G AF Zo...

Page 20: ...en you release the button the display will return to normal and only will remain on the data panel Warn your subject that the flash will fire a few short flash bursts just before the picture is taken...

Page 21: ...ease see page 36 for the camera s flash range For best results use a tripod Use night portrait mode p 44 with subjects or scenery at night Landscape Press the subject program button until the subject...

Page 22: ...gram button until the subject program indicator points to Use a tripod to reduce camera shake Use close up mode when photographing small objects like flowers or jewelry In close up mode the camera aut...

Page 23: ...the data panel Use a tripod to reduce camera shake Press the subject program button until the subject program indicator points to Photograping Night Scenes 2 SUBJECT PROGRAM SELECTION Press the subjec...

Page 24: ...o start the timer The self timer lamp on the front of the camera will blink then glow just before the shutter releases The audio signal beeps in unison with the self timer lamp p 29 Press the shutter...

Page 25: ...utton is held down The camera takes 3 frames per second when setting the shutter speed to above 1 125 second with flash cancel p 37 single shot autofocus or manual focus p 75 and new batteries For the...

Reviews: