FOR OWNERS OF THE QUARTZ-DATE MODEL
CARE AND STORAGE
TECHNICAL SPECIFICATIONS
SETTING THE DATE OR TIME
CHANGING THE DATE FORMAT
This device complies with Part 15 of the FCC Rules. Operation is subject to the following two conditions:
(1) This device may not cause harmful interference, and (2) this device must accept any interference
received, including interference that may cause undesired operation. Changes or modifications not
approved by the party responsible for compliance could void the user's authority to operate the equip-
ment. This equipment has been tested and found to comply with the limits for a Class B digital device,
pursuant to Part 15 of the FCC Rules. These limits are designed to provide reasonable protection against
harmful interference in a residential installation. This equipment generates, uses and can radiate radio
frequency energy and, if not installed and used in accordance with the instructions, may cause harmful
interference to radio communications. However, there is no guarantee that interference will not occur in a
particular installation. If this equipment does cause harmful interference to radio or television reception,
which can be determined by turning the equipment off and on, the user is encouraged to try to correct the
interference by one or more of the following measures:
• Reorient or relocate the receiving antenna.
• Increase the separation between the equipment and the receiver.
• Connect the equipment to an outlet on a circuit different from that to which the receiver is connected.
• Consult the dealer or an experienced radio/TV technician for help.
This Class B digital apparatus meets all requirements of the Canadian Interference-Causing Equipment
Regulations.
This mark on your camera certifies that this camera meets the requirements of the EU (European Union)
concerning interference causing equipment regulations. CE stands for conformité Européenne (European
Conformity).
The imprinting feature enables the date or time to be printed onto the lower-right
portion of the picture. The calendar is programmed through the year 2099.
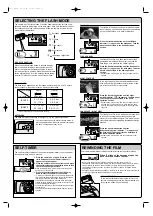
Date button
Select button
Adjust button
Date imprinting
Day/Time
Imprinting
(No imprinting)
Set mode
Turn the camera on, then
press the date button to
choose the date imprinting
mode.
• If the date-time display blinks, the clock and calendar must be set. Only the no imprinting
and set mode options are available.
• Since the date is recorded when the film is advanced to the next frame, the last frame of
the roll may not have the date or time imprinted.
IMPRINTING THE DATE OR TIME
1. Turn the camera on. Press the date button until
“SEt” appears on the data panel.
The date and time must be reset each time the battery is replaced.
2. Press the select button until the item to be adjusted
blinks.
• The clock and calendar items cycle in the following order:
stops
blinking
YEAR
MONTH
HOURS
MINUTES
DATE
3. Press the adjust button or zoom lever to change the
blinking item.
• The numerals continues to change as long as the button is held
down.
• Pressing the W side of the zoom lever counts
down, the T side counts up.
4. Repeat steps 2 and 3 until the clock and calendar
display is correct.
5. Press the date button until the display stops
blinking to set the clock and calendar.
• The camera will return to the shooting mode automatically after
five seconds. Pressing the select button again or pressing the
shutter-release button partway down will also return the camera
to the shooting mode.
• Pressing the select button until the date/time display stops
blinking will also set the calendar and clock.
The order of year, month, and day can be changed.
2. Press the date button until “SEt” appears on the
data panel.
1. Turn the camera on.
3. Press and hold the select button for more than 2
seconds until the entire display
blinks.
4. Press the adjust button or zoom lever to change the
display format.
The format cycle in the following order:
D M`Y
`Y M D
M D`Y
5. Press the date button to set the date format.
• The camera will return to the shooting mode automatically after
five seconds. Pressing the date button again or pressing the
shutter-release button partway down will also return the camera
to the shooting mode.
• Pressing the select button until the date/time display stops
blinking will also set the date format.
OPERATING TEMPERATURE AND CONDITIONS
• This camera is designed for use from -10° to 40 °C (14 to 104 °F).
• Never leave the camera where it may be subjected to extreme temperatures such as in
the glove compartment of a car.
• At colder temperatures, the data panel response time will be slow. At higher temperatures,
the display will temporarily darken, but will be restored when the temperature normalizes.
• Never subject the camera to extreme humidity.
• To prevent condensation from forming, place the camera in a sealed plastic bag when
bringing it from a cold environment into a warm one. Allow it to come to room temperature
before removing it from the bag.
• When photographing in cold weather, keep the camera and spare batteries inside your
coat to keep them warm when you are not shooting. Cold batteries will regain some of
their charge when they warm up.
• This camera is not waterproof, dust-proof, or sand-proof. When using this camera near
water or on the beach, water, dust, or sand may cause damage. Protect the camera from
moisture and splashes, especially saltwater spray. Be extremely careful to keep sand from
both the interior and exterior of the camera and its accessories.
CLEANING
• Keep the AF windows clean to ensure accurate focusing.
• If the camera body is dirty, gently wipe it clean with a soft, clean, dry cloth.
• To clean the lens surface, first brush away any dust or sand. Then, if necessary, moisten a
lens tissue with lens cleaning fluid and gently wipe the lens in a circular motion, starting
from the center.
• Never place lens fluid directly on the lens.
• Never touch the lens surface with your fingers.
• Never use alcohol or solvents to clean the camera.
STORAGE
• Store the camera in a cool, dry, well-ventilated area away from dust and chemicals. For
very long periods, place the camera in an airtight container with a silica gel drying agent.
• Before using after prolonged storage, always check the camera’s operation to make sure it
is functioning properly.
BEFORE IMPORTANT EVENTS
• Check camera operation and take test photographs.
• Minolta is not responsible for any loss which may occur due to equipment malfunction.
QUESTIONS AND SERVICE
• If you have questions about your camera, contact your local camera dealer or write to the
Minolta distributor in your area.
• Before shipping your camera for repair, please contact an authorized Minolta service facili-
ty for instructions.
CAMERA ERROR
• If all the indicators on the data panel blink, or the data panel is blank and the camera will
not function with fresh batteries, remove and reinsert the batteries. If the camera does not
resume normal operation, or the camera malfunctions repeatedly, contact an authorized
Minolta service facility.
Camera Type:
35mm lens-shutter camera
Lens:
38-110mm f/5.4 - 10.5 zoom lens
4 elements in 4 groups
Viewfinder:
Magnification: 0.4X - 1.02X
Field of View : 86% at 3m (9.8ft.)
Eye-relief: 20.3mm from the eyepiece
18mm from the eyepiece frame
Focusing Range: (W): 0.7m -
∞
(2.3ft. -
∞
)
(T): 0.8m -
∞
(2.6ft. -
∞
)
Film Speed: Settings
Automatic for DX-coded negative film
Non-DX coded film set to ISO100.
Range
ISO 25 to 3200
Metering Range (ISO 100):Ev 6 - 16
Shutter Speed range:
4 - 1/500 s.
Battery:
One 3V CR123A lithium battery
Battery performance: approx. 13 rolls based on
Minolta's standard test method using 24-exposure
rolls with flash for 50% of the exposures.
Dimensions(WxHxD):
114 x 62.5 x 46mm (4.5 x 2.5 x 1.8in)
Weight:
185g (6.5oz.) without batteries
Specifications are based on the latest information available at the time of printing and
are subject to change without notice.
2477_E.qxd 02.11.20 14:49 Page 5


