background image

18 


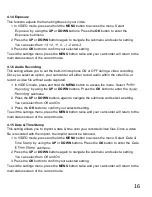
4.1.9 Watermark


This setting allows you to imprint a custom watermark, like your vehicle license plate number, 
onto your recorded video files. Once a video file is recorded with the imprint, the imprint 
cannot be removed. 

1. In VIDEO mode, press and hold the 

MENU

 button to access the menu. Select 

Watermark

 by using the 

UP

 or 

DOWN

 buttons. Press the 

OK 

button


to enter the


Watermark

 submenu. 

2. Press the 

UP

 or 

DOWN

 buttons again to navigate the submenu and select a setting. 

You can select from 

Off

 and 

On

3. When ON is selected, a new screen will show allowing you to set the watermark value. 
4. Press the 

UP

 or 

DOWN

 buttons to change the highlighted value. Press the 

OK

 button 

to change the highlighted value. 

5. Press the 

MENU 

button to confirm your selected setting. 

To exit the settings menu, press the 

MENU

 button twice and your camcorder will return to the 

main status screen of the current mode. 

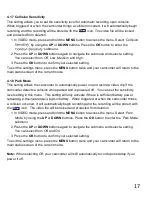
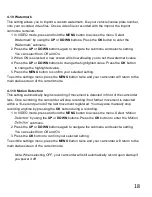
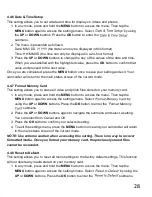
4.1.10 Motion Detection  

This setting automatically begins recording if movement is detected in front of the camcorder 
lens. Once recording, the camcorder will stop recording if not further movement is detected 
within a 10-second period of the last movement registered. You may also manually stop 
recording anytime by pressing the 

OK 

button during a recording. 

1. In VIDEO mode, press and hold the 

MENU

 button to access the menu. Select 

Motion 

 by using the 

UP

 or 

DOWN

 buttons. Press the 

OK 

button


to enter the


Motion 

 submenu. 

2. Press the 

UP

 or 

DOWN

 buttons again to navigate the submenu and select a setting. 

You can select from 

Off

 and 

On

3. Press the 

OK 

button to confirm your selected setting. 

To exit the settings menu, press the 

MENU

 button twice and your camcorder will return to the 

main status screen of the current mode. 


Note:

 When selecting 

OFF

, your camcorder will still automatically record upon startup if 

you power it off. 


Summary of Contents for MNCD410T

Page 1: ...MNCD410T User Manual ...

Page 2: ...of evidence for driving accidents daily life traveling and outdoor activities The Minolta MNCD410T allows you large angle This quick guide explains how to use your camcorder and provides additional information including precautions and technical specifications Please read through it carefully and understand this quick guide before use Keep it properly stored away for reference Safety and Handling ...

Page 3: ...TTING STARTED 1 1 Overview 1 Mount Port 2 Memory Card Slot 3 USB Port 4 Rear Camera Port 5 Mode Menu 6 Down 7 Power 8 Ok 9 Reset 10 Microphone 11 Lens 12 Up 13 Display 14 Lens 9 10 11 12 5 6 7 8 1 2 3 4 13 14 ...

Page 4: ...p to change the camera views on the LCD Display OK Record OK button in menus Record button in shooting modes Down Button used during menu navigation and playback use Tap to turn audio recording on and off Microphone Built in microphone for audio capture during video recording USB Port Power port and data transfer port for transferring media to your computer Mount Port Mount port for attaching the ...

Page 5: ...uded windshield mount is included for mounting your camcorder to your windshield The mount can only be insert in one way Simply attach the smaller plastic end of the mount to the front of your camcorder and the suction cup side to the top of your windshield Before applying to your windshield make sure that your windshield is clean and free of any dirt or debris NOTE If the suction cup loses its gr...

Page 6: ...rea before installing your camcorder Certain restrictions and limitations may apply to the placement of objects on the windshield of your vehicle 1 6 Rear Camera Mounting A certified professional should be used to install and ensure that the rear camera is installed properly The rear camera can be mounted in two different locations 1 At the top of the rear windshield for an outward view of the roa...

Page 7: ...ling through the camera views When mounting the rear camera the camera should always be mounted with the metal bracket at the top like below If the metal bracket is on the bottom the image will appear upside down when viewed on the camcorder There are three options you can use to mount the rear camera 1 With double sided tape 2 with screws or 3 using both double sided tape and screws ...

Page 8: ...ra like below Then peel off the white paper on the other side and press the bracket firmly to the mounting surface To use screws simply place the screws through the holes on the bottom of the metal bracket and use a Philips head screwdriver to fasten the screws To use both double sided tape and screws you first need to mount the camera using the double sided tape then place the screws Before attac...

Page 9: ...nterior Camera Rear Camera Display Views The dashcam comes with a second built in camera for recording the interior view of your car This camera is used to record the interior of your vehicle while the front main camera is recording the road in front of you The third included camera is for rear mounting options and is not required for use Display Views Your dashcam allows you to display a variatio...

Page 10: ...ugged In When the rear camera is also plugged in you can cycle through the modes listed below by pressing the UP button NOTE If the rear camera is plugged in it will record video even if the rear camera view is not being Interior Only Display Mode and the rear camera is plugged in video will still record even if it is not being displayed on the screen CAMERAS LENSES AVAILABLE DISPLAY MODES FRONT I...

Page 11: ...NS SUFFIX The diagram below shows a sample folder structure of how named when accessing from a PC by USB cable Front Camera Files Interior Camera Files Rear Camera Files 1 7 4 USB Cord Computer Use Connect the included USB cable to a free USB port on your computer and connect the other end of the cable The battery may be charged while the camcorder is powered on or off While charging the Camcorder...

Page 12: ...into the camcorder The camcorder will automatically power on and begin recording a video file To start or stop recording at any time press the OK button You may also remove the auxiliary DC power adaptor at any time to automatically save a recording and power the camcorder off Just mount it to your windshield plug in the power and drive ...

Page 13: ...sing the MODE button until a camera icon is show in the upper left corner of the screen Press the OK button to instantly capture a photo To cycle between the front interior and rear lenses press the UP button NOTE Your dashcam will capture only from the lens displayed on your screen If only the interior lens is displayed then the dashcam will only capture a photo from the interior lens 3 3 Playbac...

Page 14: ... Time 11 Current Image Quality 12 Automatic ISO Enabled 13 Automatic White Balance 14 Exposure Value 12 11 17 16 15 14 13 8 9 10 1 2 3 4 5 6 7 1 VIDEO Mode 2 Recording Active 3 File Protection Enabled 4 High Dynamic Range HDR 5 Collision Sensitivity 6 Video Size Resolution 7 Recording Time Elapsed 8 Parking Guard 9 Memory Card Inserted 10 Power Status 11 Current Date 12 Current Time 13 Microphone ...

Page 15: ...cording a file you must stop recording before the settings menu can be accessed To stop recording at any time press the OK button 4 1 1 Video Resolution Your camcorder has a number of preset resolution and frames per second rates A higher resolution will produce a higher quality and lager video file 1 In VIDEO mode press and hold the MENU button to access the menu Select by using the UP or DOWN bu...

Page 16: ...Minutes 3 Press the OK button to confirm your selected setting To exit the settings menu press the MENU button twice and your camcorder will return to the main status screen of the current mode NOTE Locked files will not be deleted or overwritten To manually delete locked files follow the instructions in section 4 3 4 1 3 High Dynamic Range This setting allows you to turn High Dynamic Range on and...

Page 17: ...tton to access the menu Select by using the UP or DOWN buttons Press the OK button to enter the submenu 2 Press the UP or DOWN buttons again to navigate the submenu and select a setting You can select from Off and On 3 Press the OK button to confirm your selected setting To exit the settings menu press the MENU button twice and your camcorder will return to the main status screen of the current mo...

Page 18: ...camcorder to automatically power on and record a video clip if the camcorder detects a collision while parked and is powered off You can set the sensitivity level setting in this menu This setting will only activate if there is sufficient battery power in battery When triggered or when the camcorder thinks a collision occurred it will automatically begin recording and the recording will be stored ...

Page 19: ...n twice and your camcorder will return to the main status screen of the current mode 4 1 10 Motion Detection This setting automatically begins recording if movement is detected in front of the camcorder lens Once recording the camcorder will stop recording if not further movement is detected within a 10 second period of the last movement registered You may also manually stop recording anytime by p...

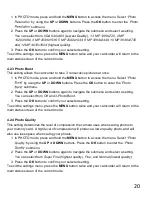
Page 20: ... can be accessed To stop recording at any time press the OK button 4 2 1 Self Timer This setting enables the camcorder to capture a photo using a preset count down 1 In PHOTO mode press and hold the MENU button to access the menu Select Self by using the UP or DOWN buttons Press the OK button to enter the Self submenu 2 Press the UP or DOWN buttons again to navigate the submenu and select a settin...

Page 21: ... 2 Press the UP or DOWN buttons again to navigate the submenu and select a setting You can select from Off and 3 Photo Burst 3 Press the OK button to confirm your selected setting To exit the settings menu press the MENU button twice and your camcorder will return to the main status screen of the current mode 4 2 4 Photo Quality This setting determines the level of compression the camera uses when...

Page 22: ...Select White by using the UP or DOWN buttons Press the OK button to enter the White submenu 2 Press the UP or DOWN buttons again to navigate the submenu and select a setting You can select from Auto Daylight Cloudy Tungsten and Fluorescent 3 Press the OK button to confirm your selected setting To exit the settings menu press the MENU button twice and your camcorder will return to the main status s...

Page 23: ...button to enter the Exposure submenu 2 Press the UP or DOWN buttons again to navigate the submenu and select a setting You can select from 3 2 1 0 1 2 and 3 3 Press the OK button to confirm your selected setting To exit the settings menu press the MENU button twice and your camcorder will return to the main status screen of the current mode 4 2 10 Image Stabilization This setting enables image cap...

Page 24: ...ENU button to access the menu Select by using the UP or DOWN buttons Press the OK button to enter the submenu 2 Press the UP or DOWN buttons again to navigate the submenu and select a setting You can select from Off and On 3 Press the OK button to confirm your selected setting To exit the settings menu press the MENU button twice and your camcorder will return to the main status screen of the curr...

Page 25: ...NU button twice and your camcorder will return to the main status screen of the current mode NOTE There is no way to recover deleted media Once you delete a single file or all files they cannot be recovered Only files that are locked are protected from deletion in PLAYBACK mode 4 3 2 Protect Your camcorder gives you the option of protecting your recording video and photo files right from your camc...

Page 26: ... enter the submenu 2 Press the UP or DOWN buttons again to navigate the submenu and select a setting You can select from 2 Seconds 5 Seconds and 8 Seconds 3 Press the OK button to confirm your selected setting 4 Press the MENU button to exit the menu without making a selection To exit the settings menu press the MENU button twice and your camcorder will return to the main status screen of the curr...

Page 27: ...n select from Off 30 Seconds 1 Minute and 2 Minutes 3 Press the OK button to confirm your selected setting 4 After the selected amount of time without any input the screen will power off To wake the screen back on press any button To exit the settings menu press the MENU button once and your camcorder will return to the main status screen of the current mode 4 4 2 Auto Power Off Delay This setting...

Page 28: ...ble the sound when pressing a button 1 In any mode press and hold the MENU button to access the menu Then tap the MENU button again to access the settings menu Select by using the UP or DOWN buttons Press the OK button to enter the submenu 2 Press the UP or DOWN buttons again to navigate the submenu and select a setting You can select from Off and On 3 Press the OK button to confirm your selected ...

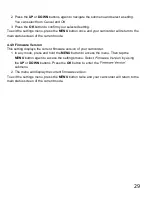
Page 29: ...o files stored on your memory card 1 In any mode press and hold the MENU button to access the menu Then tap the MENU button again to access the settings menu Select by using the UP or DOWN buttons Press the OK button to enter the Format Memory submenu 2 Press the UP or DOWN buttons again to navigate the submenu and select a setting You can select from Cancel and OK 3 Press the OK button to confirm...

Page 30: ... current mode 4 4 9 Firmware Version This setting displays the current firmware version of your camcorder 1 In any mode press and hold the MENU button to access the menu Then tap the MENU button again to access the settings menu Select by using the UP or DOWN buttons Press the OK button to enter the submenu 2 The menu will display the current firmware version To exit the settings menu press the ME...

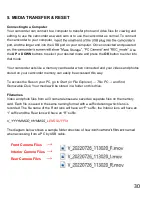
Page 31: ...s and photos stored on your camcorder memory can easily be accessed this way To access the files on your PC go to Start or File Explorer This PC and find Removable Disk Your media will be stored in a folder on this drive Filenames Video and photo files from all 3 camera lenses are saved as separate files on the memory card Each file is saved in the same naming format with a suffix denoting which l...

Page 32: ...le 90 Degrees Rear Lens Super wide angle 90 Degrees Video Resolution 1080P 720P 480P Photo Resolutions 12 Mega Pixels 10 Mega Pixels 8 Mega Pixels 5 Mega Pixels 3 Mega Pixels 2 Mega Pixels 1 3 Mega Pixels VGA File Format Picture JPEG Video AVI Loop Recording Support Collision Auto Recording Support Motion Detection Recording Support Time Date Stamp Support External Storage MicroSD Card 128GB max C...

Page 33: ...ties LLC and is used in the United States by Elite Brands Inc under license 40 Wall Street 6 441 1100 Copyright 2022 Elite Brands Inc please call our toll free technical support hotline at 800 441 1100 Please be sure to have your camera handy when calling ...

Page 34: ......
Reviews: