background image

107

107

'HVLJQDQGVSHFL¿FDWLRQVDUHVXEMHFWWRFKDQJHZLWKRXWQRWLFH

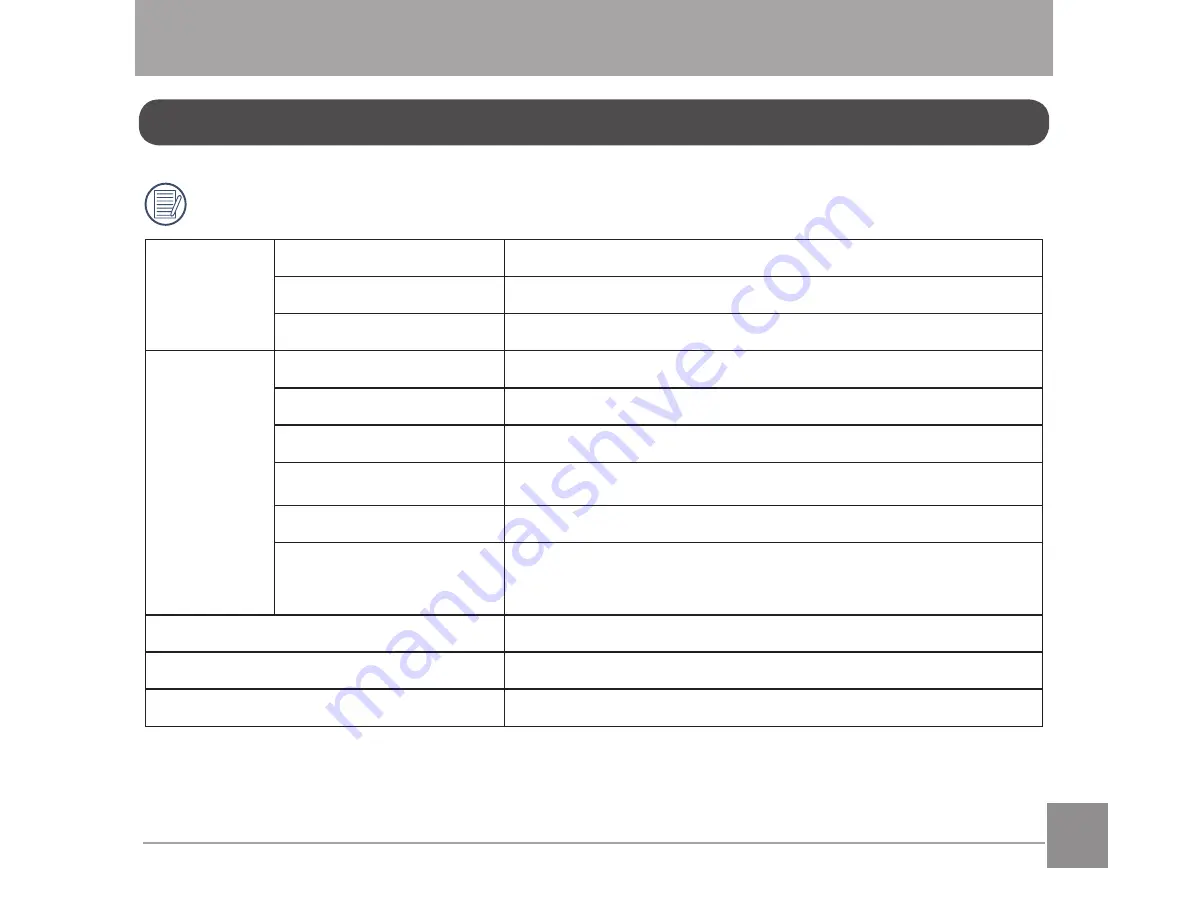
Image 
Sensor

Type

´%6,&026

Effective Pixels

16.35 Megapixels

Total Pixels

16.76 Megapixels

Lens

Focal Length

4.25mm (Wide) — 225.25mm (Tele)

PP¿OPHTXLYDOHQW

23.7mm (Wide) — 1255.9mm (Tele)

F number

F2.8 (Wide) ~ F5.6 (Tele)

Lens Construction

13 groups 15 elements

Optical Zoom

53x

Optical Zoom

Normal: (Wide) 60cm ~ 

ɲ

, (Tele) 300cm ~ 

ɲ

;

Macro: 1cm ~ 

ɲ

 (Wide Only)

Autofocus System

TTL Autofocus

Anti-Handshake

2SWLFDO,PDJH6WDELOL]DWLRQ

Digital Zoom

4x Digital Zoom (Combined Zoom: 212x)

APPENDICES

3URGXFW6SHFL¿FDWLRQV

Summary of Contents for ProShot MN53Z

Page 1: ......

Page 2: ...om For Customers in the U S A Federal Communication Commission Interference Statement This device complies with Part 15 of the FCC Rules Operation is subject to the following two conditions 1 This dev...

Page 3: ...one of the following measures Reorient or relocate the receiving antenna Increase the separation between the equipment and receiver Connect the equipment into an outlet on a circuit different from tha...

Page 4: ...LV PDQXDO DUH XVHG IRU LGHQWL FDWLRQ SXUSRVHV RQO DQG DUH properties of their respective owners This manual provides you with instructions on how to use your new Digital Camera Every effort has been m...

Page 5: ...mes in contact with the camera turn the camera off remove the battery and the memory card and dry it completely within 24 hours When you take the camera from a cold environment to a warmer environment...

Page 6: ...discharging excessive heat or possible leakage Do not attempt to disassemble the battery Do not expose the battery to water Always keep the battery contacts dry R QRW KHDW WKH EDWWHU RU WKURZ LW LQWR...

Page 7: ...memory card Copy the data to your computer before you edit them When the camera is stored for a long period of time be sure to download your photos and remove the memory card Store the memory card in...

Page 8: ...wipe it with a soft and dry cleaning cloth If the LCD screen is damaged pay particular attention to the liquid crystal in the screen If any of the following situations arise immediately take the step...

Page 9: ...ery 19 Turning Camera On and Off 21 Set your Language Date Time 22 Set your Language Date Time after the First Power On 22 Resetting your Language 23 Resetting Date Time 24 MODE OVERVIEW 25 Display Se...

Page 10: ...stom Settings 48 BASIC OPERATION 50 Using the Zoom Function 50 Focus Setting 51 Macro Mode 52 Self Timer Setting 53 Flash Mode 54 White Balance Setting 55 Continuous Shot 56 EV Settings 57 Using Quick...

Page 11: ...anorama Play 67 USING THE MENUS 68 Photo Setup Menu 68 Expo Metering 68 PDJH 6L H 69 2 6 2SWLFDO PDJH 6WDELOL DWLRQ 70 Cont AF Continuous Auto Focus 70 HDR High Dynamic Range 71 HDXWL HU 71 Scene 72 P...

Page 12: ...nu 80 Digital Zoom 81 Custom Settings 81 Playback Menu 82 Playback Mode 82 HDR High Dynamic Range 83 Touch Up 83 Rotate 84 5HVL H 84 Color 85 Playback Settings Menu 86 Protect 87 Delete 88 DPOF Digita...

Page 13: ...ng 95 Reset 95 FW Version 96 CONNECTION SETTINGS 97 Connecting to a Computer 98 Setting the USB Mode 98 7UDQVIHUULQJ OHV WR RXU FRPSXWHU 99 Connecting to a PICTBRIDGE Compatible Printer 100 Video Syst...

Page 14: ...U UVW or our customer service center The battery chargers may be a little different in shape due to the different countries or regions this camera is sold to The illustration may not match the actual...

Page 15: ...14 Install Lens Cap and Neck Strap...

Page 16: ...15 Part Names 1 Micro USB Port 2 Zoom Lever 3 Shutter Button 4 Strap Eyelet 5 Exposure Compensation Button 6 Continuous Shot Button 7 Power Button 8 AF Assist Beam Self Timer Lamp 9 Flash Lamp 10 Lens...

Page 17: ...16 Menu Button 17 A C AF Button Up Button 18 A C Macro Button Left Button 19 C A Flash Button Right Button 20 C A Delete Button Self Timer Button Down Button 21 Display Button 22 Playback Button 23 S...

Page 18: ...ection of arrow 1 2 2 Insert the battery into the battery compartment according to the negative and positive directions as illustrated in the picture Push the battery down until it locks in place Inst...

Page 19: ...to be purchased separately This camera takes a standard SD SDHC memory card We rec ommend using a name brand memory card that is Class 4 or higher and has a capacity of 4GB to 32GB The camera is not c...

Page 20: ...g of the power charger into the power outlet to charge the battery After the battery is stored for a long period of time use the supplied power charger to charge the battery prior to use To have maxim...

Page 21: ...20 20 3 When the camera is turned off you can also connect the camera to your PC using a USB cable to charge the battery 3 Please charge the battery indoors between 0 C and 40 C 32 F and 104 F...

Page 22: ...e power button to turn the camera on To turn the camera off press the power button again When the power is off press and hold the button to power on and enter playback mode Turning Camera On and Off P...

Page 23: ...UP WKH selection the Date Time settings screen appears 4 Press the A C C A button to select the Date Time to be adjusted Time is displayed in YYYY MM DD HH MM 5 Press the A C C A button to adjust the...

Page 24: ...to enter the menu 4 Press the A C C A A C C A buttons to select your desired language and press the EXWWRQ WR FRQ UP 5 Press the button and the shooting screen appears 2021 06 01 00 00 Sound Settings...

Page 25: ...to select the Date Time to be adjusted Time is displayed in YYYY MM DD HH MM 5 Press the A C C A button to press the YDOXH IRU RXU VHOHFWHG EORFN IWHU RX QLVK your settings press the EXWWRQ WR FRQ UP...

Page 26: ...VERVIEW Press the button to display the settings Classic Full Off Classic Displays the camera parameters on screen x3 5 0 3 EV 15 F2 9 400 ISO 1234 00 56 00 Full Camera parameters with Grid and Histog...

Page 27: ...ime 15 Exposure Compensation 16 Shutter Speed 17 Histogram 18 Aperture Value 2 6 2SWLFDO PDJH 6WDELOL DWLRQ 20 HDR 21 Expo Metering 22 Continuous Shot 23 AF Mode 24 Flash Mode x3 5 0 3 EV 1 60 F2 9 40...

Page 28: ...Effect 8 Video Quality 9 Remaining Recording Time 10 Exposure Compensation 2 6 2SWLFDO PDJH 6WDELOL DWLRQ 12 Focus Frame 13 Expo Metering 14 AF Mode For optimal video shooting it is recommended that a...

Page 29: ...he current number of photos and total number of photos 4 SD Memory Card Built in Memory 5 Battery Status RRP 0DJQL FDWLRQ UHD 7 Image Zoom Ratios 8 Image Zone 9 Shooting Date 10 Continuous Capture Gro...

Page 30: ...object you want to take a picture of 8VH WKH RRP OHYHU WR VHOHFW 7HOH RU LGH SRVLWLRQ WR RRP LQ RU RXW RQ RXU subject 4 Press the shutter button down half way to allow the camera to focus on your subj...

Page 31: ...er can switch the ISO and EV value according to personal preference the camera can automatically set the shutter speed and aperture value Shutter priority Setting allows you to adjust the shutter spee...

Page 32: ...s and eye brightening capabilities Wireless Mode Enable image transmission and remote control by connecting smart device with Wireless network Scene Mode Choose from 13 different pre set scene types a...

Page 33: ...Press the A C C A button to adjust the parameters 4 Press the EXWWRQ WR FRQ UP WKH VHWWLQJV DQG HQWHU WKH VKRRWLQJ VFUHHQ Please refer to the table below for any nonadjustable options in mode O Availa...

Page 34: ...ct the most suitable scene to capture the best pictures Auto Mode The camera automatically adjusts the exposure and focus to ensure the best possible pictures Landscape Mode For landscapes automatical...

Page 35: ...e and night scenes Backlit Portrait When the sun or any other light source is behind you automatically adjusts the foreground exposure to produce the best pictures possible Night Mode For night scenes...

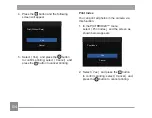
Page 36: ...PRGH GLDO WR VHOHFW IDFH EHDXWL HU PRGH 2 Press the button and press the A C C A button to select 3 Press the A C C A button to select an option and press the EXWWRQ WR FRQ UP DQG return to photo shoo...

Page 37: ...e failure in receiving signals To maintain a connection please keep the camera within 10 meters 32 8 feet without signal shielding interference Please do not use Wireless connection functionality on a...

Page 38: ...XXXXXXX KDQJH 3DVVZRUG QWHU WKH 3 36 SDVVZRUG refresh interface HV UHDWH D QHZ 3 36 SDVVZRUG 1R DFN WR SUHYLRXV SDJH DQFHO DFN WR SUHYLRXV SDJH Rotate the mode dial to and then enter WKH LUHOHVV VHOHF...

Page 39: ...ireless password WKDW LV UDQGRPL HG DQG XQLTXH WR WKDW FDPHUD DQG ZLOO QRW FKDQJH XQOHVV RX ZLVK WR reset the password with a new randomly generated password If you wish to change the Wireless passwor...

Page 40: ...and App is enabled Connected with APP XXXXX Disconnect U OYIUTTKIZ LXUS OXKRKYY Disconnect from device No Yes Wireless Mode 1R HHS LUHOHVV FRQQHFWHG DQG back to previous page HV LVFRQQHFW DQG EDFN WR...

Page 41: ...and then press the button to enter the menu DSC Device MINOLTA MN53Z_XXXX MAC Address 00 00 00 00 00 00 4 Press the EXWWRQ WR FRQ UP VHWWLQJV and then skip the menu DSC Device The default name of DSC...

Page 42: ...41 https www minoltadigital com Americas MAC Address Check the wireless MAC Address of this camera App Operating Instructions Refer to the 3OTURZG 6XU9NUZ User Manual located on the web...

Page 43: ...D WKHQ FRQ JXUHV WKH PRVW DSSURSULDWH VHWWLQJV for the best possible photos 1 Rotate the mode dial to select 2 Press the A C C A A C C A buttons to select a scene and press the EXWWRQ WR FRQ UP Panora...

Page 44: ...nowy scenes Reproduces natural clear white scenes Party Suitable for taking indoor party photos even under complicated lighting conditions Sport For fast moving subjects Capture sharp action shots wit...

Page 45: ...ures You can also press the button or press the Shutter button halfway down to be ready to take pictures 3 Compose your shot on the LCD and half press the shutter button to focus on the subject IWHU I...

Page 46: ...able at this time During panorama mode shooting press the button to interrupt shooting and save the current pictures taken Press the C A button to cancel shooting and not to save the previously taken...

Page 47: ...rame if not there is an orange frame At most 10 dog cat faces can be detected at one time Multi Exposure Keep camera steady before shooting Press and hold the Shutter button to take 7 photos continuou...

Page 48: ...the movie screen 2 Press the button or the Shutter button to start recording x3 5 00 56 00 00 00 06 3 Press the button or the Shutter button again to stop recording save it automatically and then the...

Page 49: ...the button to enter the shooting screen 3 As shown in the picture press the EXWWRQ WR FRQ UP VHWWLQJ RU WR H LW ZLWKRXW setting by turning the mode dial Or Rotate the mode dial to skip Go to setting C...

Page 50: ...mode If you want to remove the parameter setting of Custom Settings please see the reset function on page 95 to operate 3 Press the button and then the A C C A button to select and press the button t...

Page 51: ...LWDO RRP 7RJJOH WKH RRP HYHU RI WKH FDPHUD WR RRP LQ RU RXW RQ WKH VXEMHFW ZKLOH WDNLQJ SLFWXUHV Zoom Lever When the Optical Zoom reaches the threshold as Digital Zoom release and turn the Zoom Lever...

Page 52: ...es Single AF The focus frame appears on the center of the LCD to focus on the subject Multi AF 7KH FDPHUD DXWRPDWLFDOO IRFXVHV WKH VXEMHFW LQ D ZLGH DUHD WR QG WKH IRFXV point Object Tracking Smart tr...

Page 53: ...Z WR FRQ JXUH WKH settings 1 Press the A C button to enter the Macro menu Macro Off 2 Press the A C C A button to select the following 2 modes Macro Off Select this option to disable Macro Macro On Se...

Page 54: ...Button is pressed Self timer 10 sec A single picture is shot 10 seconds after the Shutter Button is pressed Self timer Smile Press the Shutter Button and a picture will be taken immediately after a s...

Page 55: ...sh is turned off Flash Auto DPHUD DVK JRHV RII DXWRPDWLFDOO based on existing light conditions Fill Flash 7KH DVK JRHV RII ZKHQ D SLFWXUH LV WDNHQ supplementing the existing light in a scene and helpi...

Page 56: ...White Balance menu AWB 2 Press the A C C A button to select the following 8 modes AWB Daylight Cloudy Fluorescent Fluorescent CWF Incandescent Manual WB Fully press the Shutter button to detect the wh...

Page 57: ...Take several pictures at a time Cont Shot High Speed VGA For continuous shot with VGA pixel Cont Shot Fast 4M For continuous shot with 4M pixels Time Lapse Take pictures based on the preset interval...

Page 58: ...3 0 to EV 3 0 The EV function menu of the camera includes functions such as EV Exposure Value Adjustment ISO Shutter Adjust ment Aperture Adjustment etc Using the appropriate function settings can im...

Page 59: ...800 1600 and 3200 Shutter Adjustment For shutter speed the camera may automatically set the aperture value corresponding to the manually set shutter speed so as to obtain a most suitable exposure val...

Page 60: ...ground A small aperture opening will keep both the background and main object in clear focus Adjustable in Mode 0 3 EV F2 9 400 ISO 1 60 In shooting mode press the button to begin recording video Afte...

Page 61: ...C C A button to select the Image Color Setting options represents options that are available in Movie mode There are 20 Image Color options in photo shooting mode Normal Sepia Vignetting Vivid Partia...

Page 62: ...elected video clip press the button to enter the Movie Playback mode An operation guide appears on the screen when playing back a video Press the appropriate buttons to enable the corresponding functi...

Page 63: ...photos and videos on the screen W Zoom Out T Zoom Out 1 Slide the Zoom Lever to switch between 3x3 and 4x4 thumbnails 2 Press the A C C A A C C A buttons to select a picture or video clip to view and...

Page 64: ...EH RRPHG LQ RQ 3 Rotate the Zoom Lever clockwise to WR RRP LQ 4 The screen will display the number of times and DUHD RI WKH SKRWR RRPLQJ RSHUDWLRQ 5 Press the A C C A A C C A buttons to navigate and...

Page 65: ...tton to select the photos and videos to be deleted 3 Press the C A button and the deletion screen is displayed Exit Delete One 4 Press the A C C A button to select Delete One or Exit and press the EXW...

Page 66: ...slide option 3 Press the A C C A button to select the slideshow playing option or Cancel to return to the playback screen Cancel 4 Press the EXWWRQ WR FRQ UP WKH VHWWLQJ The Continuous Capture Group P...

Page 67: ...hot Fast 4M can make continuous capture for group image playback 1 Press button to enter playback screen 2 Press the A C C A button to select Cont Group 3 Press to start playback 30 45 10 25 15 37 25...

Page 68: ...return to the initial panorama screen 1 Press the button to enter Playback Screen 2 Press the A C C A button to select animated panoramic photos 3 Press the button to play in selected shooting directi...

Page 69: ...ages for more details about each setting Expo Metering 8VH WKLV VHWWLQJ WR VHOHFW WKH WDUJHW VL H RI WKH FDPHUD V HOG RI YLHZ WR EH PHWHUHG L UWL FLDO QWHOOLJHQFH Evaluates the light intensity at mult...

Page 70: ...QW WKDW LPDJH LQ ODUJHU VL HV ZLWKRXW VDFUL FLQJ WKH LPDJH TXDOLW 6L H LJK TXDOLW SULQWLQJ 6L H XOO VL H SULQWLQJ 6L H GLVSOD 6L H 3RVWHU SULQWLQJ 6L H SULQWLQJ 6L H SULQWLQJ 6L H SULQWLQJ 6L H 0DLO T...

Page 71: ...LPDJH VWDELOL DWLRQ PRGH LQ dark environments Shooting in a windy or unstable environment such as a moving vehicle may cause blurry images It is recommended to turn off OIS when using a tripod Cont AF...

Page 72: ...ed instructions HDR High Dynamic Range Use this setting to control wide dynamic image range when taking static pictures Photos with extreme contrast of bright and dark areas will still maintain distin...

Page 73: ...et Mode Press SET To Select Scene Please refer to P42 for more detailed instructions Shooting menu in the Photo Shooting Mode O Available X Not Available Options Photo Shooting Modes O O O O O O O O O...

Page 74: ...n to enter the menu 3 Press the A C C A button to select and press the C A button to enter the menu 4 Press the A C C A button to select the item to be set and press the C A button to enter the menu 5...

Page 75: ...ssion ratio Quality Best Fine Normal There are three options for picture quality HVW LQH 1RUPDO AF Assist Beam In a darker environment AF Assist Beam can be turned on for better focus AF Assist Beam O...

Page 76: ...diately after they are taken Each photo is displayed on the LCD based on the selected time Quick Review Off 1 sec 2 sec 3 sec There are 4 options 2II VHF VHF VHF Date Imprint Include a Date Time stamp...

Page 77: ...arameters The stored mode and parameters are retrieved in mode Reset camera settings to custom settings mode Custom Settings No Yes There are 2 options 1R HV In mode select Custom Settings the camera...

Page 78: ...he button to FRQ UP Expo Metering Exposure Metering 8VH WKLV VHWWLQJ WR VHOHFW WKH WDUJHW VL H RI WKH FDPHUD V HOG RI YLHZ WR EH PHWHUHG Expo Metering AiAE L UWL FLDO QWHOOLJHQFH Evaluates the light i...

Page 79: ...image pixel images to SD card are as follows No Image Pixel Frame Recommendation Recording time 4GB About 1 1920x1080 30 Class 6 30 minutes 2 1280x720 60 Class 6 32 minutes 3 1280x720 30 Class 4 59 m...

Page 80: ...ps shooting time is 30 seconds playback time is 2 minutes Sound recording is disabled when 640x480 120fps is chosen OIS Optical Image Stabilization This mode can help reduce photo blur caused by unste...

Page 81: ...C C A button to select and press the button to enter the Movie Setting menu Menu Press SET To Enter 3 Press the A C C A button to select and press the C A button to enter the menu 4 Select the item to...

Page 82: ...s the current movie mode and its parameters The stored mode and parameters can be retrieved directly in mode Reset camera settings to custom settings mode Custom Settings No Yes Digital Zoom Turn the...

Page 83: ...rmal Mode Press SET To Confirm Refer to the following pages for more details about each setting Playback Mode Select and press the button to enter the settings screen Normal Mode Display all images No...

Page 84: ...DR Cancel After using the HDR function the LPDJH ZLOO EH VDYHG DV D QHZ OH DQG WKH RULJLQDO OH LV VWLOO VWRUHG LQ WKH memory Touch Up The playback beauty feature allows for EHDXWL FDWLRQ XVLQJ WKUHH L...

Page 85: ...tated 7KH URWDWHG SLFWXUH OH ZLOO UHSODFH WKH original photo Resize 7KLV VHWWLQJ DOORZV RX WR UHVL H D SLFWXUH WR D SDUWLFXODU UHVROXWLRQ DQG VDYHV LW DV D QHZ picture Select and press the button to e...

Page 86: ...iginal photo Press the button to enter the settings screen Cancel There are 19 options available Cancel Sepia Vignetting Vivid Partial Color Red Salon Japan Style 8M Partial Color Blue Fish Eye Italia...

Page 87: ...A C C A button to select and press the C A button to enter the menu Protect Delete DPOF Trim 3 Press the A C C A button to select the item to be set and press the C A button to enter the menu 4 Press...

Page 88: ...ne Date Folder Cont Group All Reset There are 5 options available 2QH RFN WKH VHOHFWHG SKRWR RU YLGHR LI LW LV XQSURWHFWHG XQORFN WKH VHOHFWHG photo or video if it is protected DWH ROGHU 3URWHFW DOO S...

Page 89: ...SKRWRV LQ WKH DWH ROGHU RQW URXS HOHWH DOO SKRWRV LQ WKH RQW 3KRWR ROGHU OO HOHWH DOO SKRWRV RU YLGHRV 7KH LQGLFDWRU PHDQV D OH LV SURWHFWHG LOH SURWHFWLRQ PXVW EH UHPRYHG UVW EHIRUH D OH FDQ EH GHOH...

Page 90: ...ncel changes and return to the trim prompt screen The image cannot be clipped trimmed again once it has been clipped to 640X480 A trimmed picture cannot be trimmed again DPOF Digital Print Order Forma...

Page 91: ...to enter the menu Sound Settings Power Saver Auto Language English World Time Home Date Time 2021 06 01 00 00 3 Press the A C C A button to select the item to be set and press the C A button to enter...

Page 92: ...ally after a certain period of inactivity Power Saver Auto Normal Best XWR 1RUPDO HVW Power Saver LCD power off time Turn off time Auto 3 min 5 min Normal 1 min 3 min Best 30 sec 1 min Sound Settings...

Page 93: ...utton to select the departure place and destination HOGV 2 Press the A C C A button to select D FLW ORFDWHG LQ WKH VDPH WLPH RQH DV WKDW RI WKH HOG 3UHVV WKH button to FRQ UP VHWWLQJV Date Time 5HIHU...

Page 94: ...the C A button to enter the menu 3 Press the A C C A button to select the item to be set and press the C A button to enter the menu Format Copy to Card File Numbering Reset FW Version V000000 4 Press...

Page 95: ...camera will format its memory If there is no memory card in the camera the built in memory will be formatted if there is a memory card only the card will be formatted Copy to Card 8VH WKLV VHWWLQJ WR...

Page 96: ...gs Reset Reset camera settings to factory defaults No Yes File Numbering After you take a picture or video clip the camera will save it with a sequential number RX FDQ XVH WKLV WR UHVHW WKH OH QXPEHUL...

Page 97: ...ing to view the current camera UPZDUH YHUVLRQ FW Version Back Current Ver VXXXXXX KHQ WKHUH LV D QHZ UPZDUH YHUVLRQ LQ WKH memory card select Yes WR XSGDWH FW Version Current Ver V1XXXXX New Ver V2XXX...

Page 98: ...A C C A button to select and press the C A button to enter the menu 3 Press the A C C A button to select the item to be set and press the C A button to enter the menu USB PC TV System NTSC 4 Press th...

Page 99: ...port can be set to connect with either a computer or a printer The IROORZLQJ VWHSV ZLOO DOORZ RX WR HQVXUH WKDW WKH FDPHUD LV FRUUHFWO FRQ JXUHG WR FRQQHFW ZLWK a PC 1 Press the A C C A button to sele...

Page 100: ...3 DV RX ZRXOG FRS DQ W SLFDO IROGHU RU OH Follow the steps below to connect the camera to a computer 1 Make sure the computer is turned on 2 Connect one end of the supplied Micro USB cable to the Mic...

Page 101: ...t can be set to connect with either a PC or a Printer the following steps will ensure that the camera LV FRUUHFWO FRQ JXUHG WR FRQQHFW ZLWK D Printer 1 Press the A C C A button to select USB and press...

Page 102: ...et incorrectly in which case you should disconnect the Micro USB cable check the USB mode settings ensure that the printer is turned on and then try connecting the Micro USB cable again 1 Make sure th...

Page 103: ...A button to enter the item Refer to the following sections for more detailed information on each setting Using the PICTBRIDGE Menu Print with Date If you have set the date and time on your camera the...

Page 104: ...he button WR FRQ UP SULQWLQJ VHOHFW Cancel GTJ press the button to cancel printing Print without Date Use this setting to print the photos without dates on them 1 In the PICTBRIDGE menu select Print w...

Page 105: ...LQJ VHOHFW Cancel GTJ press the button to cancel printing Print Index You can print all photos in the camera via this function 1 In the PICTBRIDGE menu select Print Index and the screen as shown below...

Page 106: ...Print DPOF Images and the screen as shown below appears Print DPOF Images Cancel Yes 2 Select Yes and press the button WR FRQ UP SULQWLQJ VHOHFW Cancel GTJ press the button to cancel printing Exit Sel...

Page 107: ...t system according to your requirements and the steps are as follows 1 Press the A C C A button to select TV System and press the C A button to enter the menu 2 Press the A C C A button to select NTSC...

Page 108: ...th 4 25mm Wide 225 25mm Tele PP OP HTXLYDOHQW 23 7mm Wide 1255 9mm Tele F number F2 8 Wide F5 6 Tele Lens Construction 13 groups 15 elements Optical Zoom 53x Optical Zoom Normal Wide 60cm Tele 300cm M...

Page 109: ...DPOF Ver1 1 Support Yes File Format Still Image Exif 2 3 JPEG Movie MOV Image H 264 Audio Linear PCM Stereo Shooting Modes Auto Mode Program AE Shutter priority Aperture priority Manual 0RGH DFH HDXWL...

Page 110: ...Program AE AE Lock Available Shutter Prior AE Aperture Prior AE Exposure Compensation r3 EV in 1 3 Step Increments Shutter Speed 1 2000 30 Seconds Continuous Shot Yes Playback Modes Single Index 9 16...

Page 111: ...n USB Wireless Yes Remote Control Yes via iOS Android Device Power Rechargeable Li ion Battery LB 060 3 7V 1100mAh In Camera Charging Shooting Capability Battery Performance Approx 240 Shots Based on...

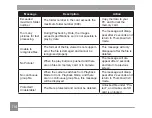
Page 112: ...t using tripod When continuous exposure is enabled this prompt message is displayed when the photo shooting VFUHHQ LV GLVSOD HG IRU WKH UVW WLPH The message will disappear after 2 seconds Built in mem...

Page 113: ...em Remove cable reinsert cable and retry connection Write Protect The SD card is locked Turn off camera and remove SD card Slide tab on the side of card to unlock Card Full The memory of the SD card i...

Page 114: ...and the recording will not continue Replace SD card with a Class 4 or higher card Cannot write to SD card The camera cannot write to the SD card Turn off the camera Remove and reinsert the SD card an...

Page 115: ...QRW VXSSRUW HG RU WKH OH LV GDPDJHG DQG FDQQRW EH UHFRJQL HG SURSHUO This message will only GLVDSSHDU DIWHU WKH OH LV deleted No Picture When the play button is pushed and there DUH QR OHV RQ PHPRU F...

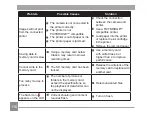
Page 116: ...the camera is actually shutting off and not entering Power Save Mode where the LCD will turn off after the camera has been idle for a period of time The picture is blurry Camera shakes while taking a...

Page 117: ...move the jammed paper Saving data to memory card is slow Using a memory card below Class 4 may result in slower recording times Use a memory card with write Class 4 or higher than 4 to improve perform...

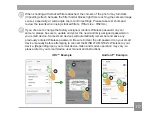
Page 118: ...V LOWHU VL H PP If you choose to change the factory assigned random Wireless password on your camera please be sure to update and enter the new randomly assigned password on your smart device Some sma...

Page 119: ...TB Compati bility X X X X It indicates that the writing speed class will be displayed on the memory card Use a memory card with the appropriate writing speed for the video recording mode to be recorde...

Page 120: ...Street 61st Floor New York NY 10005 USA Tel 800 441 1100 www minoltadigital com www elitebrands com Copyright 2021 Elite Brands Inc If you re having difficulties with your camera or would like furthe...

Reviews: