background image

Performing an Internet Fax/IP Address FAX Operation

8

Scanner Mode

8-33

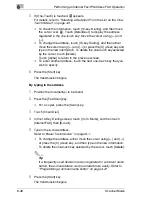
Specifying using a fax program

1

Position the document(s).

2

Press the [Fax/Scan] key.

For a copier, press the [Scan] key.

3

From the list of one-touch keys, select the fax program.

4

Press the [Start] key.

Tip

You can specify whether or not a screen asking for confirmation of the 
settings is displayed before a broadcast transmission. 

 Refer to 

page 13-47.

Summary of Contents for Scanner Mode

Page 1: ...User Manual 4514 7706 01 Scanner Mode ...

Page 2: ...egulation s countries 1 4 Precautions for using network applications 1 5 Functions that cannot use network applications 1 5 1 3 Check for Enclosed Accessories 1 7 2 Overview 2 1 Scan to E mail 2 1 2 2 Scan to Server FTP 2 2 2 3 Scan to PC FTP 2 4 2 4 Scan to HDD 2 5 2 5 Internet Faxing 2 6 2 6 IP Address FAX LAN FAX 2 7 2 7 Scan to PC SMTP 2 8 2 8 IP Scanner 2 9 2 9 Document Forwording Archive Dis...

Page 3: ... mail Mode screen 3 13 Mail Scan Setting Scan Mode screen 3 14 Scanner Settings screen 3 16 Registering an FTP site 3 18 Specifying a proxy 3 22 Frame Type Setting 3 23 Ping 3 23 3 2 3 Using PageScope Light 3 25 Accessing PageScope Light 3 25 Operation 3 25 Logging in Administrator mode 3 25 Selecting the Display Language 3 27 3 2 4 Using the Domain Name Buttons 3 27 Programming a domain name butt...

Page 4: ...nging Deleting Recipients 4 15 4 7 Copying a One Touch Key 4 16 4 8 Specifying the Scanning Options 4 18 4 8 1 Quality Reduction Screen 4 18 Quality tab 4 18 Contrast tab 4 18 Reduction Area tab 4 19 4 8 2 FAX Menu Screen 4 20 Network tab 4 20 4 9 Inserting Text Into a Transmission Document 4 22 5 Performing a Scan to Server FTP Operation 5 1 Basic Transmission 5 1 5 2 Registering a Recipient 5 3 ...

Page 5: ...ght 7 2 7 3 Changing Deleting Recipients 7 6 7 4 Specifying the Scanning Options 7 7 7 4 1 Quality Reduction Screen 7 7 Quality tab 7 7 Contrast tab 7 7 Reduction Area tab 7 8 7 4 2 FAX Menu Screen 7 9 Network tab 7 9 7 4 3 Specifying the File Storage Life 7 10 7 5 Retrieving Scan Data Using PageScope Light 7 11 7 6 URL Report 7 13 8 Performing an Internet Fax IP Address FAX Operation 8 1 Basic Tr...

Page 6: ...nal 8 29 Specifying the Subject setting 8 29 Specifying the Reply setting 8 30 Specifying the file name setting 8 31 8 6 Transmitting to Multiple Recipients Broadcast Transmission 8 32 Specifying using the one touch keys 8 32 Specifying using 10 key Dialing screen 8 32 Specifying using a fax program 8 33 Checking the results of the broadcast transmission 8 34 8 7 Transmitting Using a Combination o...

Page 7: ...reen 9 6 Quality tab 9 6 Contrast tab 9 7 Reduction Area tab 9 7 9 4 2 FAX Menu Screen 9 9 Network tab 9 9 10 Using IP Scanner 10 1 IP Scanner 10 1 Using a dial up router 10 2 Using a modem or terminal adapter 10 2 10 2 IP Scanner Window and Dialog Boxes 10 3 Main window 10 3 Main window menu bar 10 5 Scanner Settings dialog box 10 8 Sort Settings dialog box 10 11 Divided Settings dialog box 10 14...

Page 8: ... 13 9 Viewing counters 13 10 13 4 Displaying the Administrator Management screen 13 11 Displaying the Administrator Management screen 13 11 13 5 Specifying the Date and Time 13 12 Setting the date and time 13 12 Setting the time zone 13 13 Setting the Daylight Saving Time 13 15 13 6 Specifying the Language of the Reports and the Transmission Source Name 13 16 Specifying the setting 13 16 13 7 Prog...

Page 9: ...Output Settings 13 41 Report settings 13 41 Specifying the setting for the TX Report parameter 13 41 Specifying the setting for the Activity Report parameter 13 42 13 13 Specifying Software Switch Settings Machine Functions 13 43 13 13 1 Specifying Software Switch Settings 13 44 Specifying functions with Bit Selection 13 44 Specifying functions with HEX Selection 13 45 13 13 2 Specifying Settings ...

Page 10: ...vided E Mail Messages Mode 372 13 55 Setting during production 13 55 Specifying the setting 13 55 13 13 11 Specifies Settings Concerning Full Mode Functions With Internet Faxing Mode 373 13 56 Setting during production 13 56 Specifying the setting 13 56 14 Reports and lists 14 1 Checking the Transmission Status Activity Report TX 14 1 Outputting the Transmission Activity Report 14 1 14 2 Checking ...

Page 11: ... 15 3 Scan to Server FTP transmissions 15 3 Scan to PC FTP transmissions 15 4 Scan to HDD transmissions 15 4 URL notification with Scan to Server FTP and Scan to HDD transmissions 15 4 Internet fax transmissions Scan to E mail transmissions 15 5 Internet fax receptions 15 6 Scan to PC SMTP transmissions 15 7 IP Scanner 15 8 Network FAX Gateway TX 15 8 15 3 Troubleshooting 15 9 Internet fax transmi...

Page 12: ...ted States and other countries Ethernet is a registered trademark of Xerox Corporation Netscape Navigator is a trademark of Netscape Communications Corporation Adobe and Acrobat are trademarks of Adobe Systems Incorporated Network FAX is a registered trademark of Comuse Co Ltd Minolta PageScope Light and DiALTA are registered trademarks of Minolta Co Ltd All other company names and product names m...

Page 13: ...nt of network application functions differs depending on the customer the configuration of specific products and the suitability of the application software should be determined specifically for the customer 6 We assume no responsibility for consequences arising from use regardless of items 4 and 5 mentioned above 7 The software provided with the device the software included on the CD ROM and info...

Page 14: ...radiate radio frequency energy and if not installed and used in accordance with the instruction manual may cause harmful interference to radio communications Operation of this equipment in a residential area is likely to cause harmful interference in which case the user will be required to correct the interference at his own expense WARNING The design and production of this unit conform to FCC Reg...

Page 15: ...t in interference with radio communications and is prohibited under EU directives This device must be used with shielded interface cables The use of non shielded cables is likely to result in interference with radio communications and is prohibited under CISPR 22 rules and local rules WARNING This is a Class A product In a domestic environment this product may cause radio interference in which cas...

Page 16: ... of transmissions through the Internet or an intranet is limited we recommend sending important documents directly to the recipient through a common telephone line G Telephones on a LAN cannot be used G It may take some time for a transmission to be sent due to Internet intranet traffic G Depending on the mail servers it may not be possible to send documents with a large number of pages or a large...

Page 17: ...ality specification G Density specification G Non reduction mode G Scan area specification G 2in1 G 2 sided transmission G TX marker stamp optional G TSI G Destination insert G Forward the received facsimile ducuments Document Management G Priority transmission G Timer transmission G Rotation transmission ...

Page 18: ...tains the Scanner Mode User Manual and the PageScope Light User Manual G Utility Disk CD ROM The Utility Disk contains the utilities e g IP Scanner and Network FAX and the Network FAX User Manual Tip In order to use the scanning operations the Network Interface Card NC 4 and the Network Scan Kit SU 2 or the Internet Fax Network Scan Kit SU 3 must be installed Note The LAN cable cable for Fast Ethe...

Page 19: ...1 Introduction 1 8 Scanner Mode ...

Page 20: ... or a PDF file The scanned image can be sent using any of the following methods Choose the appropriate method according on the network environment and purpose 2 1 Scan to E mail G Scan data is attached to an e mail message as a TIFF or PDF file then sent to a computer through an intranet or the Internet G A network environment that includes a mail server is required Mail server Intranet Mail serve...

Page 21: ...directory on an FTP server G A network environment that includes an FTP server is required G An FTP server on the Internet can be accessed through a proxy server G A maximum of five FTP server can be registered and a maximum of five directories can be set up on each FTP server Intranet Internet FTP server FTP server ...

Page 22: ...eport function a notification of the URL where the scan data is saved can be sent by e mail If the URL Report function is used a mail server is required Intranet Internet FTP server FTP server Internet Mail server Client computer Client computer ...

Page 23: ...TP G The FTP server application must be running on the client computers G The forwarding destination on the client computer is the root folder specified with the FTP server application This setting cannot be specified from the copier s control panel or from PageScope Light FTP server Client computer application Intranet ...

Page 24: ...disk as TIFF or PDF files The saved files can be retrieved with PageScope Light G With the URL Report function a notification of the URL where the scan data is saved can be sent by e mail If the URL Report function is used a mail server is required Intranet Client computer Scan data HDD ...

Page 25: ...il message as a TIFF F file then sent to the recipient s Internet fax terminal The file attached to the received e mail message is printed by the Internet fax terminal on the receiving end In addition since e mail is used the fax can be sent to an individual e mail address not just an Internet fax terminal In this case the fax image arrives at the receiving end as an attachment to an e mail messag...

Page 26: ...g though a mail server 1 Program a one touch key with the IP address or the host name of the recipient 2 Use the one touch key to specify the recipient and then specify the settings for sending the data IP address fax transmission 3 The recipient receives the fax image IP address fax reception Intranet Internet fax terminal Same type of unit as copier ...

Page 27: ...nclosed utilities IP Scanner and Image Receiver are required G If there is a DHCP server on the network this function may not operate correctly since IP addresses are automatically distributed to each computer In this case specify a fixed IP address for the computer or use IP Scanner 1 Program a one touch key with the IP address of the computer receiving the data 2 Using the same procedure for sen...

Page 28: ...er to receive the data at a client computer and save it as an image file the enclosed utilities IP Scanner and Image Receiver are required G This function can be used in a network without a LAN if a crossover cable is used to connect the copier to a client computer Network settings are required 1 From the computer program a button recipient of the scan data 2 Touch the programmed button to send th...

Page 29: ...quired G The fax document can be be received at your own computer G Received fax documents can be classified as F Code Port or Public Document and the distribution destinations for each type of document can be specified 1 From the copier select a Doc Manage setting to classify the fax image 2 The fax image is sent to the computer specified as the recipient 3 The fax image is received by the recipi...

Page 30: ...the document In addition the result of the fax transmission can be checked from the computer G An e mail address or a telephone fax number can be specified for the recipient G In order to perform direct faxing operations using a mail server the DNS settings must be specified 1 Specify the fax number of the destination specify the recipient after specifying printing from the application 2 The image...

Page 31: ...alled All scanning operations can only be used in a TCP IP network Required environment Operations that can be performed if the Network Scan Kit is installed Scan to E mail Scan to Server FTP Scan to PC FTP Scan to HDD Required options Hard Disk Drive Kit Required environment for image data transmission Mail server FTP server FTP client computer FTP server application Required environment for imag...

Page 32: ...Required options Only with the Di2010f 1 Di2510f Di3010f or Di3510f Only with the Di2010f 1 Di2510f Di3010f or Di3510f Required environment for image data transmission IP Scanner and Image Receiver utilities Mail server The recipient must be the same type of unit as the copier IP Scanner and Image Receiver utilities Environmen t required for the scan function selected as the distribution method Ne...

Page 33: ...2 Overview 2 14 Scanner Mode ...

Page 34: ...nsert one plug on the LAN cable into the connector marked LAN at the back of the machine and then insert the other plug into the hub Tip The connector is at the back of the machine The LAN cable should be a cable for Fast Ethernet 100BASE TX Category 5 The LAN cable is not included as an accessory Connector for LAN cable USB printer connector optional For more details refer to the manual for the P...

Page 35: ...ators LED Color Condition Meaning Green Lit The LAN is connected correctly Off The copier has not been turned on The LAN is not connected correctly Flashing Data is being sent or received Red Lit Operating at 100 Mbps Off Operating at 10 Mbps ...

Page 36: ...ier s control panel is described below For details on specifying PageScope Light settings refer to the PageScope Light User Manual 3 2 1 List of Network Settings Required 2 Available Necessary depending on environment Unnecessary Operation Scan to E mail Scan to Server FTP Scan to PC FTP Scan to PC SMTP Scan to HDD IP Scanner Internet Faxing IP Address Faxing Distribution of Fax Documents fax rece...

Page 37: ... Parameter Equipment Name Equipment Name 2 2 2 2 2 2 SMTP Settings screen SMTP Server Address 1 1 Port Number 1 1 E mail Address 1 1 POP3 Settings screen POP3 Server Address Port Number POP3 User Name POP3 Password Auto RX Check Mail Scan Settings screen E mail Mode 2 2 2 Scan Mode 2 2 2 2 2 Scanner Settings screen Activity Report 2 RX Doc Header Print 2 TX Doc Text Insert 2 2 2 Gateway Send Subje...

Page 38: ...g Distribution of Fax Documents fax reception Network FAX Parameter Devide Setting 2 2 File Destination Memory Input File Destination Memory Input Ping This function is used to check if the network connection LAN connection is correctly connected The ping can be sent with an SMTP server or POP3 server specified In addition a ping can be sent with any IP address specified Frame Type Setting When co...

Page 39: ...twork settings check with the network administrator for the necessary information Displaying the Network Settings screen 1 Press the Utility key on the copier control panel 2 Touch Admin Management 3 Use the keypad to type in the administrator access code and then touch Enter 4 Touch Admin 2 ...

Page 40: ...ng pages 7 Continue touching Enter to return to the Utility screen and then touch Exit to return to the Basics screen Note After changing the setting of a parameter marked with the copier must be turned off then on again Note The list of the settings specified for each function can be printed For details on printing the list of settings refer to Checking the Settings For Each Function Settings Lis...

Page 41: ...unit Type in the IP address only if the DHCP parameter is set to IP Input Subnet Mask Type in the subnet mask of the connected network Type in the subnet mask only if the DHCP parameter is set to IP Input Gateway Type in the default gateway address of the connected network Type in the default gateway address only if the DHCP parameter is set to IP Input Self domain Name Type in the domain name of ...

Page 42: ...0 Mbps 10 Mbps and duplex mode Half Duplex Full Duplex The Network Board Speed parameter is normally set to Auto This automatically selects the transmission speed through auto negociation The Duplex parameter is only available if the Network Board Speed parameter is set to 100M or 10M Parameter Description Parameter Description DNS Setting Specify whether or not the DNS Domain Name System function...

Page 43: ...smissions In addition it is used as a part of the subject with Internet fax transmissions and Scan to E mail transmissions 1 In the Network Settings screen touch Equipment Name 2 Type the name of the device 16 characters or less and then touch Enter Domain Name Type in the domain name for the DNS server Type in the server address only if the DNS Setting parameter is set to Yes DNS Server Address T...

Page 44: ...e Network Settings screen touch SMTP Settings 2 Specify the necessary settings for the parameters in the page that appeared 3 Touch Enter Parameter Description SMTP Server Address Type in the IP address or host name for the SMTP server Both the host name and the IP address can be typed in if the DNS Setting parameter is set to Yes If No is selected only the IP address can be typed in If necessary ...

Page 45: ...OP3 Server Address Type in the IP address or host name for the POP3 server Both the host name and the IP address can be typed in if the DNS Setting parameter is set to Yes If No is selected only the IP address can be typed in If necessary change the port number of the POP3 server POP3 User Name Type in the login name account name for the POP3 server POP3 Password Type in the password for logging i...

Page 46: ...ossible for the recipient to view the received data During transmission the maximum values for the receiving device must be entered in the E mail Mode screen If the maximum values are correctly specified the data is sent with the maximum settings previously specified even if settings that are not supported by the receiving device are specified during transmission The following parameters can be se...

Page 47: ...ter Mail Scan Setting Scan Mode screen Specify the file format and coding method that is given priority with Scan to E mail Scan to Server Scan to PC FTP Scan to PC SMTP or Scan to HDD transmissions The file format specified here is the default file format when new one touch keys are registered Parameter Description File Type Select the file format for scan data that is to be transmitted TIFF PDF ...

Page 48: ...tings screen touch Mail Scan Setting 2 Touch Scan Mode 3 Specify the necessary settings for the parameters in the page that appeared 4 Touch Enter Coding Method Select the coding method for scan data that is to be transmitted MH MMR Parameter Description ...

Page 49: ... 56 RX Doc Header Print Select whether ON or not OFF to print the e mail header information when printing received Internet fax documents E mail Header Text Select whether or not to insert text explaining that a file is attached with Internet faxing and Scan to E mail transmissions With a Scan to E mail transmission the fixed text is inserted even if OFF was selected Fixed Text Custom Text OFF If ...

Page 50: ...tration Specify subject text for Internet fax and Scan to E mail transmissions A maximum of four can be registered Devide Settings Select whether Yes or not No the file is divided and sent in separate sections with Internet fax and Scan to E mail transmissions Page Division Size Division Divide Size With Internet fax transmissions the document can be divided into its separate pages and sent Page D...

Page 51: ...mory Input 2 Touch Input and then touch where an FTP site has not yet been registered A maximum of five FTP serverscanberegistered and a maximum of five directories can be set up on each FTP server Tip Touch Check to check or change the settings for a registered FTP site or touch Delete to delete a registered FTP site and then touch the button for the FTP site 3 Type in the name of the FTP server ...

Page 52: ...tion 3 Scanner Mode 3 19 4 Type in the address of the FTP server and then touch Next 5 Select whether or not a proxy is used and then touch Next 6 Type in the port number of the FTP server and then touch Next ...

Page 53: ...k and then touch Next If Private Site was selected type in the user name and the password 8 The Directory Memory Input screen appears Touch Input and then touch where a directory has not yet been registered 9 Type in the name of the directory and then touch Enter Tip By typing in period the root directory can be specified ...

Page 54: ...en specifying multiple directories up to five repeat steps 8 through 10 12 Check the specified settings in the File Destination Memory Check screen and then touch Enter Note Enabling or disabling the Passive Mode is set from PageScope Light Refer to page 3 56 of the PageScope Light User Manual ...

Page 55: ...e Light in Administrator mode 3 Click FTP Configuration in the sub menu that appeared after clicking FTP Server in the menu on the Network tab 4 Specify the necessary settings for the parameters in the page that appeared 5 Click the Apply button Parameter Description IP Address Type in the IP address or host name for the proxy server The host name can only be typed in if the DNS Setting parameter ...

Page 56: ...en touch Enter Select a type from Auto Ethernet II 802 2 802 3 or SNAP These settings are available when this copier is connected to a Netware server and is used for PC print functions Ping Use this feature to check if the network is correctly connected 1 In the Network Settings screen touch Ping 2 Select the recipient where the ping is to be sent and then press the Start key The message Pinging a...

Page 57: ...3 Preparation 3 24 Scanner Mode 3 Check the displayed results and then touch Enter 4 Touch Enter ...

Page 58: ...ccessed through a Web browser 1 Start up the Web browser 2 In the Address bar type the IP address of this copier in the format shown below and then press the computer keyboard s Enter key http controller_IP_address Example If the copier s IP address is 192 168 0 10 http 192 168 0 10 3 The initial page of PageScope Light appears Operation PageScope Light is used in the same way that Internet Web pa...

Page 59: ...d use the administrator access code for the copier For details contact the administrator for your copier If no operation is performed for 10 minutes after logging into PageScope Light in Administrator mode the user is automatically logged out While logged into PageScope Light in Administrator mode not all operations can be performed from the copier s control panel ...

Page 60: ... menu on the System tab 3 Select the desired language for PageScope Light 4 Click the Apply button 3 2 4 Using the Domain Name Buttons If domain names characters after at the end of the e mail address such as xyz com are registered in the domain name buttons recipient e mail addresses can quickly and correctly be specified Programming a domain name button 1 Press the Utility key on the copier cont...

Page 61: ... button that you wish to program 6 Type the characters that you wish to register 64 characters or less and then touch Enter 7 Continue touching Enter to return to the Utility screen and then touch Exit to return to the Basics screen To program more buttons repeat steps 5 and 6 ...

Page 62: ...ame procedure 1 Type in the e mail address and then touch Domain Name 2 Touch the button programmed with the desired domain name To return to the text input screen touch Alpha 3 2 5 Installing the Utilities The procedure for installing IP Scanner is described below Precautions G For details on installing the Network FAX refer to the Network FAX User s Manual ...

Page 63: ... 0 1 Start up Windows and then insert the utilities disk CD ROM into the CD ROM drive The DiALTA Installer starts up and the DiALTA Installer dialog box appears Tip If the installer does not start up automatically double click My Computer on the desktop and then double click the icon for the CD ROM drive containing the CD ROM Double click setup exe on the CD ROM to start up the installer 2 Click t...

Page 64: ...dialog box and then click the Next button 4 Check the contents of the dialog box and then click the Yes button Note If you do not agree with the license agreement IP Scanner cannot be installed Check the provisions of the agreement and then click the Yes button ...

Page 65: ...ick the Browse button and then select the desired folder While specifying settings in the installer dialog boxes if you choose the wrong setting or want to change a setting click the Back button to return to the previous dialog box and specify the settings as desired 6 Select the folder where IP Scanner will be registered and then click the Next button The installation begins ...

Page 66: ...er Mode 3 33 7 Click the Finish button A message may appear informing you that the computer should be restarted Restart the computer to complete the installation 8 In the DiALTA Installer dialog box click the Close button ...

Page 67: ...3 Preparation 3 34 Scanner Mode 9 Restart the computer Click the Yes button to restart the computer ...

Page 68: ...before uninstalling IP Scanner 1 In Windows click the Start button point to Settings and then click Control Panel to display the Control Panel window 2 Double click the Add or Remove Programs icon 3 Select IP Scanner and then click the Add Remove button 4 Click the Yes button 5 Restart the computer ...

Page 69: ...ner 1 In Windows click the Start button point to Settings and then click Control Panel to display the Control Panel window 2 Double click the Add Remove Programs icon the Add or Remove Programs icon in Windows XP 3 Select IP Scanner and then click the Change Remove button 4 Click the Yes button 5 Restart the computer ...

Page 70: ... Fax Scan key For a copier press the Scan key 3 Touch 10 Key Dialing Specify the recipient in any of the following ways For a copier touch Addr Input Select a recipient from the list on the One Touch screen Refer to page 4 5 Select a recipient by searching for it by name Refer to page 4 6 Type in the number of the one touch key for the desired recipient Refer to page 4 8 ...

Page 71: ...4 Performing a Scan to E Mail Operation 4 2 Scanner Mode 4 Touch Com Mode 5 Touch PC then E mail and then touch Enter 6 Type in the e mail address of the recipient ...

Page 72: ... the original glass then pressing the Start key G After all pages of the document to be sent are scanned touch Scan End and then press the Start key The transmission begins If the transmission could not be completed G The unit will automatically try again auto redial up to five more times at one minute intervals G The number of auto redials and the interval can be specified For details refer to Sp...

Page 73: ...ame recipient Touch Dest chng to change the recipient then send the document The Following document has not been transmitted Try to retransmit P 1 2003 APR 23 WED 11 32 CHICAGO ACCOUNT NAME SALES DESTINATION NEW YORK ADDRESS 123451234 xyz com F CODE PAGES 0 sheets RESULT EA0006 DOCUMENT 6514316 761 TIME STORED APR 23 11 10 TIME SENT APR 23 11 10 DURATION 2 min 28 sec MODE E mail IMAGE 1 2 3 4 1 Re...

Page 74: ...d as a one touch key in advance 1 Position the document s to be scanned 2 Press the Fax Scan key For a copier press the Scan key 3 Touch One Touch 4 Select an index and then select a recipient from the one touch key list that appears Note Touch an index tab or touch or Index List and then search for the one touch key of the desired recipient 5 Press the Start key ...

Page 75: ...recipient must have been registered as a one touch key in advance 1 Position the document s to be scanned 2 Press the Fax Scan key For a copier press the Scan key 3 Touch Search 4 Touch Search type in the search name for the recipient and then touch Enter Tip A recipient can also be selected by touching its one touch key ...

Page 76: ...Performing a Scan to E Mail Operation 4 Scanner Mode 4 7 5 Select the desired recipient and then press the Start key ...

Page 77: ... a one touch key the number between 000 an 539 of the one touch key can be entered in order to specify the recipient 1 Position the document s to be scanned 2 Press the Fax Scan key For a copier press the Scan key 3 Press the key 4 Type in the three digit number of the one touch key for the desired recipient The one touch key of the entered number is highlighted 5 Press the Start key Index 1 Index...

Page 78: ...eys can be searched through more easily if the indexes are used to classify the one touch keys There are 36 indexes and up to 15 one touch keys can be registered in each index The procedure for registering one touch keys from the copier s control panel is described below For details on registering one touch keys using PageScope Light refer to the PageScope Light User Manual Registering indexes 1 P...

Page 79: ...4 Performing a Scan to E Mail Operation 4 10 Scanner Mode 3 Touch Fax Input For a copier touch E mail Input 4 Touch Index 5 Touch a key where an index has not yet been registered ...

Page 80: ...Performing a Scan to E Mail Operation 4 Scanner Mode 4 11 6 Type in the name of the index 7 Touch Enter ...

Page 81: ...in the copier s touch panel Registering recipients where data is frequently sent is convenient since it no longer requires the recipient information to be entered each time data is sent Up to 540 one touch keys can be registered However the total number of one touch keys and fax programs maximum of 30 must not exceed 540 1 Press the Utility key 2 Touch User Set 3 Touch Fax Input For a copier touch...

Page 82: ...o E Mail Operation 4 Scanner Mode 4 13 4 Touch One Touch 5 Select an index and then touch a key where nothing has been registered yet 6 Type in the recipient name that will appear on the one touch key and then touch Next ...

Page 83: ...peration 4 14 Scanner Mode 7 Touch PC then E mail and then touch Next 8 Type in the e mail address of the recipient and then touch Next To change the file format or coding method touch Scan Mode and then specify the desired settings ...

Page 84: ...ress the Utility key 2 Touch User Set 3 Touch Fax Input For a copier touch E mail Input 4 Touch One Touch 5 Select an index and then touch the one touch key that you wish to delete or whose information you wish to change 6 To change the one touch key information change the information as desired and then touch Enter To delete the one touch key touch Delete ...

Page 85: ...4 Performing a Scan to E Mail Operation 4 16 Scanner Mode 4 7 Copying a One Touch Key 1 Press the Utility key 2 Touch User Set 3 Touch Fax Input For a copier touch E mai Input 4 Touch One Touch ...

Page 86: ...egistered 6 Touch One Touch and then touch One Touch Copy 7 Touch the one touch key where nothing has been registered yet and where you wish to copy the information to 8 Check that the one touch key is copied If so touch Enter 9 Continue touching Enter to return to the Utility screen and then touch Exit to return to the Basics screen ...

Page 87: ...00 dpi GSR 200 200 dpi Super GSR 400 400 dpi 600dpi Text 600 600 dpi 600dpi Photo 600 600 dpi or 600dpi Photo Text 600 600 dpi Contrast tab Touch Lighter Normal or Darker to select the desired scanning contrast Note If 600dpi Text or 600dpi Photo Text was selected on the Quality tab the contrast can only be set to one of three levels Lighter Normal and Darker The two Lighter settings and the two D...

Page 88: ...Performing a Scan to E Mail Operation 4 Scanner Mode 4 19 Reduction Area tab Scan Area Select the scanning size ...

Page 89: ...rk tab Tip Touch Cancel to cancel the setting Subject Subject text must have been registered in advance Refer to Scanner Settings screen on page 3 16 Select the subject of the e mail message If a subject is not specified the e mail message is sent with the default subject Default subject Image File One touch_key_name Device_name Automatic_numbering ...

Page 90: ...ly e mail address is not specified the e mail message is sent with the e mail address of this unit For details on specifying the e mail address of this unit refer to SMTP Settings screen on page 3 11 File Name Specify the name of the attached file If a file name is not specified the default file name is used Default file name Device_name Automatic_numbering_ date_and_time Extensi on ...

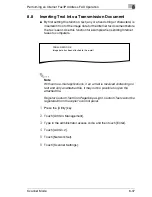
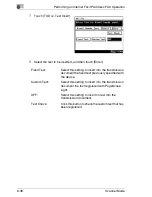
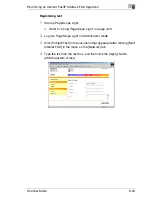
Page 91: ... functions can also be specified For details refer to FAX Menu Screen on page 8 19 4 9 Inserting Text Into a Transmission Document By first setting this function text any or a fixed string of characters is inserted in front of the image data for the Scan to E mail document before the E mail is sent For details on specifying the settings refer to Scanner Settings screen on page 3 16 FROM NEWYORK Im...

Page 92: ...t s to be scanned 2 Press the Fax Scan key For a copier press the Scan key 3 Select an index and then select a recipient from the list of one touch keys Specify the recipient in any of the following ways Select a recipient by searching for it by name Refer to page 4 6 Type in the number of the one touch key for the desired recipient Refer to page 4 8 ...

Page 93: ... on the original glass G When scanning multiple document pages continue scanning by placing each consecutive page on the original glass then pressing the Start key G After all pages of the document to be sent are scanned touch Scan End and then press the Start key The transmission begins Tip If the URL Report parameter was set to ON a notification of the URL where the image data is saved will be s...

Page 94: ...ner Mode 5 3 5 2 Registering a Recipient Note The FTP site must have been registered in advance Refer to Registering an FTP site on page 3 18 1 Press the Utility key 2 Touch User Set 3 Touch FAX Input For a copier touch E mail Input 4 Touch One Touch ...

Page 95: ...peration 5 4 Scanner Mode 5 Select an index and then touch a key where nothing has been registered yet 6 Type in the recipient name that will appear on the one touch key and then touch Next 7 Touch PC then FTP Server and then touch Next ...

Page 96: ...on 5 Scanner Mode 5 5 8 Touch the button for the FTP site where you wish to send the data and then touch Next 9 Touch the button for the directory where you wish to send the data and then touch Next 10 Check the information to be registered ...

Page 97: ...canner Mode 11 Touch Mode1 and then specify the file format and coding method In addition specify whether a URL Report will be sent If the URL Report parameter was set to ON type in the e mail address where the notification will be sent 12 Touch Enter ...

Page 98: ...ser Set 3 Touch FAX Input For a copier touch E mail Input 4 Touch One Touch 5 Select an index and then touch the one touch key that you wish to delete or whose information you wish to change 6 To change the one touch key information change the information as desired and then touch Enter To delete the one touch key touch Delete ...

Page 99: ...400 dpi GSR 200 200 dpi Super GSR 400 400 dpi 600dpi Text 600 600 dpi 600dpi Photo 600 600 dpi or 600dpi Photo Text 600 600 dpi Contrast tab Touch Lighter Normal or Darker to select the desired scanning contrast Note If 600dpi Text or 600dpi Photo Text was selected on the Quality tab the contrast can only be set to one of three levels Lighter Normal and Darker The two Lighter settings and the two ...

Page 100: ...Performing a Scan to Server FTP Operation 5 Scanner Mode 5 9 Reduction Area tab Scan Area Select the scanning size Select AutoDetect or specify a size ...

Page 101: ...extension tif or pdf is automatically added to file name Settings for the TX Report 2in1 2 Sided TX Priority TX Timer Set and TX Marker functions can also be specified For details refer to FAX Menu Screen on page 8 19 File Name Specify the name of the attached file If a file name is not specified the default file name is used Default file name Device_name Automatic_numbering_ date_and_time Extensi...

Page 102: ...Report e mail message clicks the URL in the text of the e mail message Note The URL Report e mail message is sent according to the Scan to E mail settings In order to use the URL Report function settings must be specified for the parameters on the SMTP Settings screen Refer to page 3 11 Notification information ftp IP_address _of_FTP_server Directory_name File_name Tip In order to access the FTP s...

Page 103: ...5 Performing a Scan to Server FTP Operation 5 12 Scanner Mode ...

Page 104: ...ollowing settings from the FTP server application on the computer at the receiving end Login anonymous Password E mail address of this machine 1 Position the document s to be scanned 2 Press the Fax Scan key For a copier press the Scan key 3 Select an index and then select a recipient from the list of one touch keys Specify the recipient in any of the following ways Select a recipient by searching...

Page 105: ...ying the Scanning Options on page 6 7 5 Press the Start key The transmission begins If the document is placed on the original glass G When scanning multiple document pages continue scanning by placing each consecutive page on the original glass then pressing the Start key G After all pages of the document to be sent are scanned touch Scan End and then press the Start key The transmission begins ...

Page 106: ...Performing a Scan to PC FTP Operation 6 Scanner Mode 6 3 6 2 Registering a Recipient 1 Press the Utility key 2 Touch User Set 3 Touch FAX Input For a copier touch E mail Input 4 Touch One Touch ...

Page 107: ...ration 6 4 Scanner Mode 5 Select an index and then touch a key where nothing has been registered yet 6 Type in the recipient name that will appear on the one touch key and then touch Next 7 Touch PC then FTP Client and then touch Next ...

Page 108: ...computer that the data will be sent to and then touch Next To change the port number touch Port and then specify the desired setting To change the file format or coding method touch Scan Mode and then specify the desired settings 9 Check the information to be registered and then touch Enter ...

Page 109: ...r Set 3 Touch FAX Input For a copier touch E mail Input 4 Touch One Touch 5 Select an index and then touch the one touch key that you wish to delete or whose information you wish to change 6 To change the one touch key information change the information as desired and then touch Enter To delete the one touch key touch Delete ...

Page 110: ...0 dpi GSR 200 200 dpi Super GSR 400 400 dpi 600dpi Text 600 600 dpi 600dpi Photo 600 600 dpi or 600dpi Photo Text 600 600 dpi Contrast tab Touch Lighter Normal or Darker to select the desired scanning contrast Note If 600dpi Text or 600dpi Photo Text was selected on the Quality tab the contrast can only be set to one of three levels Lighter Normal and Darker The two Lighter settings and the two Da...

Page 111: ...6 Performing a Scan to PC FTP Operation 6 8 Scanner Mode Reduction Area tab Scan Area Select the scanning size Select AutoDetect or specify a size ...

Page 112: ...n tif or pdf is automatically added to file name Settings for the TX Report 2in1 2 Sided TX Priority TX Timer Set and TX Marker functions can also be specified For details refer to FAX Menu Screen on page 8 19 File Name Specify the name of the attached file If a file name is not specified the default file name is used Default file name Device_name Automatic_numbering_ date_and_time Extensi on ...

Page 113: ...6 Performing a Scan to PC FTP Operation 6 10 Scanner Mode ...

Page 114: ...recipient by searching for it by name Refer to page 4 6 Type in the number of the one touch key for the desired recipient Refer to page 4 8 4 Touch Quality Reduction and then adjust the image quality density and zoom ratio according to the document to be scanned Refer to Specifying the Scanning Options on page 7 7 5 Press the Start key The transmission begins If the document is placed on the origi...

Page 115: ...e setting for the URL Report parameter when registering the recipient Refer to page 7 2 7 2 Registering a Recipient Note A mail box must have been created in advance using PageScope Light A maximum of 115 mail boxes can be created Creating a mail box PageScope Light The following parameters can be set from the Create Mail Box page of PageScope Light Mail Box Name Type in the name of the mail box 1...

Page 116: ...25 2 Click Mail Box in the menu on the File tab 3 Click the Create button 4 Type in the name of the mail box and the password and then click the Create button After using PageScope Light to create the mail box register the recipient 1 Press the Utility key 2 Touch User Set 3 Touch FAX Input For a copier touch E mail Input ...

Page 117: ...an to HDD Operation 7 4 Scanner Mode 4 Touch One Touch 5 Select an index and then touch a key where nothing has been registered yet 6 Type in the recipient name that will appear on the one touch key and then touch Next ...

Page 118: ...ect the user box where you wish to send the data and then touch Next 9 Touch Mode1 and then specify the file format and coding method In addition specify whether a URL Report will be sent If the URL Report parameter was set to ON type in the e mail address where the notification will be sent ...

Page 119: ...ss the Utility key 2 Touch User Set 3 Touch FAX Input For a copier touch E mail Input 4 Touch One Touch 5 Select an index and then touch the one touch key that you wish to delete or whose information you wish to change 6 To change the one touch key information change the information as desired and then touch Enter To delete the one touch key touch Delete ...

Page 120: ... dpi GSR 200 200 dpi Super GSR 400 400 dpi 600dpi Text 600 600 dpi 600dpi Photo 600 600 dpi or 600dpi Photo Text 600 600 dpi Contrast tab Touch Lighter Normal or Darker to select the desired scanning contrast Note If 600dpi Text or 600dpi Photo Text was selected on the Quality tab the contrast can only be set to one of three levels Lighter Normal and Darker The two Lighter settings and the two Dar...

Page 121: ...7 Performing a Scan to HDD Operation 7 8 Scanner Mode Reduction Area tab Scan Area Select the scanning size Auto Size or No Reduction ...

Page 122: ...sion tif or pdf is automatically added to the file name Settings for the TX Report 2in1 2 Sided TX Priority TX Timer Set and TX Marker functions can also be specified For details refer to FAX Menu Screen on page 8 19 File Name Specify the name of the attached file If a file name is not specified the default file name is used Default file name Device_name Automatic_numbering_ date_and_time Extensio...

Page 123: ...iles are saved on the hard disk can be specified 1 Start up PageScope Light Refer to Using PageScope Light on page 3 25 2 Log into PageScope Light in Administrator mode 3 Click File Storage Life in the menu on the File tab 4 Specify the length of time that files are saved on the hard disk and then click the Apply button ...

Page 124: ... hard disk can be retrieved using PageScope Light 1 Start up PageScope Light Refer to Using PageScope Light on page 3 25 2 Click Mail Box in the menu on the File tab 3 From the HDD Directories list click the mail box containing the file that you wish to retrieve 4 Type in the password for the mail box and then click the Apply button ...

Page 125: ...7 Performing a Scan to HDD Operation 7 12 Scanner Mode 5 Click the name of the file to download the file to the computer The dialog box for downloading files appears ...

Page 126: ...eiver of the URL Report e mail message clicks the URL in the text of the e mail message Note The URL Report e mail message is sent according to the Scan to E mail settings In order to use the URL Report function settings must be specified for the parameters on the SMTP Settings screen Refer to page 3 11 Notification information Controller_IP_address Mail_box_name File_name Tip The password is requ...

Page 127: ...7 Performing a Scan to HDD Operation 7 14 Scanner Mode ...

Page 128: ...ent in any of the following ways For a copier touch Addr Input Select a recipient from the list on the One Touch screen Refer to page 4 5 Select a recipient by searching for it by name Refer to page 4 6 Type in the number of the one touch key for the desired recipient Refer to page 4 8 Select a fax program Refer to page 8 4 Note An IP address cannot be specified from the 10 Key Dialing screen In o...

Page 129: ...8 Performing an Internet Fax IP Address FAX Operation 8 2 Scanner Mode 4 Touch Com Mode 5 Touch InternetFAX then E mail and then touch Enter 6 Type in the e mail address of the recipient ...

Page 130: ...om ratio according to the document to be scanned Refer to Specifying the Scanning Options on page 8 16 9 Press the Start key The transmission begins If the document is placed on the original glass G When scanning multiple document pages continue scanning by placing each consecutive page on the original glass then pressing the Start key G After all pages of the document to be sent are scanned touch...

Page 131: ... be transmitted to multiple recipients if they are all registered in the fax program or the data can be transmitted at a specific time if the transmission time is specified 1 Position the document s to be faxed 2 Press the Fax Scan key For a copier press the Scan key 3 Touch One Touch 4 Select an index and then select a fax program from the one touch key list that appears Tip The keys registered w...

Page 132: ... Mode 8 5 8 3 Registering a Recipient 8 3 1 Registering as a One Touch Key For an Internet fax 1 Press the Utility key 2 Touch User Set 3 Touch FAX Input For a copier touch E mail Input 4 Select an index and then touch a key where nothing has been registered yet ...

Page 133: ...t will appear on the one touch key and then touch Next 6 If the one touch key will be used with Internet fax transmissions touch InternetFAX then E mail and then touch Next 7 If the one touch key will be used with Internet fax transmissions type in the e mail address of the recipient and then touch Next ...

Page 134: ...8 Scanner Mode 8 7 To change the file format or coding method touch E mail Mode and then specify the desired settings To change the port number touch Port and then specify the desired setting 8 Check the information to be registered and then touch Enter ...

Page 135: ...IP Address FAX Operation 8 8 Scanner Mode For an IP address fax 1 Press the Utility key 2 Touch User Set 3 Touch FAX Input For a copier touch E mail Input 4 Select an index and then touch a key where nothing has been registered yet ...

Page 136: ...xt 6 If the one touch key will be used with IP address fax transmissions touch InternetFAX then IP TX and then touch Next 7 Type in the IP address and then touch Next To specify the recipient by its host name touch Host Name In order to specify the recipient by its host name the DNS setting must first be specified Refer to DNS Settings screen on page 3 9 ...

Page 137: ...n 8 10 Scanner Mode To change the file format or coding method touch E mail Mode and then specify the desired settings To change the port number touch Port and then specify the desired setting 8 Check the information to be registered and then touch Enter ...

Page 138: ...nsmission and TX marker optional subjcet reply and file name functions can be registered with the fax program G With an Internet fax feature the Real Time Password TX and Remote Copy functions cannot be used Even if settings are specified they will not be applied G With Internet faxing polling reception or batch transmission cannot be used G Since Internet faxing can operate with telephone fax fun...

Page 139: ...E mail Input 4 Touch Fax Program For a copier touch Mail Program 5 Select an index and then touch a key where nothing has been registered yet 6 Type in the recipient name that will appear on the fax program key and then touch Next 7 Type in the search name or abbreviation for the recipient and then touch Next ...

Page 140: ...nnot be specified 9 Specify the recipient and then touch Next To select a recipient from the list of one touch keys touch One Touch touch the one touch key for the recipient and then touch Enter To select a recipient by searching for it by name touch Search and specify the recipient and then touch Enter To register no recipient touch No Dest Note A maximum of 300 recipients can be registered ...

Page 141: ...eport Priority Transmission Timer Transmission TSI 2in1 Transmission Destination Insert 2 Sided Transmission TX Marker Optional and Rotation Transmission functions can be specified Menu 2 The subject reply address and file name can be specified Note If a 2in1 transmission was specified the Zoom parameter is set to Auto Size With an Internet fax the Real Time Password TX and Remote Copy functions c...

Page 142: ...r Set 3 Touch FAX Input For a copier touch E mail Input 4 Touch One Touch or Fax Program 5 Select an index and then touch the one touch key that you wish to delete or whose information you wish to change 6 To change the one touch key information change the information as desired and then touch Enter To delete the one touch key touch Delete ...

Page 143: ...o 400 400 dpi GSR 200 200 dpi Super GSR 400 400 dpi 600dpi Text 600 600 dpi 600dpi Photo 600 600 dpi or 600dpi Photo Text 600 600 dpi Contrast tab Touch Lighter Normal or Darker to select the desired scanning contrast Note If 600dpi Text or 600dpi Photo Text was selected on the Quality tab the contrast can only be set to one of three levels Lighter Normal and Darker The two Lighter settings and th...

Page 144: ...anner Mode 8 17 Reduction Area tab Reduction Specify the scanning zoom ratio Auto Size Sends the document automatically at the size of the recipient s paper No Reduction Cuts the document to the size of the recipient s paper and sends it at its original size ...

Page 145: ...8 Performing an Internet Fax IP Address FAX Operation 8 18 Scanner Mode Scan Area Select the scanning size Select AutoDetect or specify a size ...

Page 146: ...to Programming the Transmission Source Name on page 13 17 The specified transmission source information is used with normal faxing Internet faxing IP address faxing and Scan to E mail transmissions The TSI setting is reset after each transmission For details on specifying the default transmission source name refer to Programming the Transmission Source Name on page 13 17 Dest Insert The fax can be...

Page 147: ...ed your document to the reader as portrait so when you set the letter size document as landscape the reader handles it as ledger size document and it gets reduced at reception when the recipient facsimile paper is letter size If you setup Rotation TX you can send letter size documents as a letter size document whether its direction is landscape or portrait Rotation TX is valid only when you send l...

Page 148: ... of this User Manual Subject Previously registered text can be inserted as a subject when e mail messages are sent A maximum of 4 subject texts can be registered Refer to Network Settings on page 3 3 Reply When sending an e mail message the e mail address registered at a one touch key can be set as the recipient Reply to address where reply e mail messages sent by the recipient will be sent File N...

Page 149: ...rce name page 8 23 G Specifying whether the destination name is inserted page 8 24 G Specifying the setting for the TX Report parameter page 8 24 G Specifying the 2in1 transmission setting page 8 25 G Specifying double sided transmission settings page 8 26 G Specifying the rotation transmission setting page 8 27 G Specifying the priority transmission setting page 8 27 G Specifying the timer transm...

Page 150: ... setting touch Cancel Note The date and the name of the transmission source must be specified in advance For details on specifying the date refer to Specifying the Date and Time on page 13 12 For details on registering transmission source names refer to Programming the Transmission Source Name on page 13 17 For details on specifying the transmission source name refer to Specifying Transmission Set...

Page 151: ...Dest Insert Dest Insert is highlighted Note The destination name can be inserted only if the transmission source information is added The destination name must have been registered as a one touch key in advance Refer to Registering as a One Touch Key on page 8 5 Specifying the setting for the TX Report parameter 1 Touch Set 1 and then touch TX Report ...

Page 152: ...cified touch Default Refer to Specifying Report Output Settings on page 13 41 To output a transmission result report with every transmission touch On To output a transmission result report only if the transmission failed touch If TX Fail To stop the transmission result report from being outputted touch Off Specifying the 2in1 transmission setting Touch Set 1 and then touch 2in1 2in1 is highlighted...

Page 153: ... the recipient as a single sided document 2 Select the desired setting for the binding margin left or top According to the position of the binding margin touch Standard Book or Top Margin To specify that the binding margin is automatically determined by the scanning direction touch Auto To cancel the setting touch Cancel 3 Touch Document Direction 4 Select the orientation of the document and then ...

Page 154: ...s highlighted Specifying the priority transmission setting Touch Set 2 and then touch Priority TX Priority TX is highlighted Note Priority transmission cannot be used if multiple recipients are specified Priority transmission and timer transmission cannot be specified at the same time When a portrait document is loaded When a landscape document is loaded sideways When a landscape document is loade...

Page 155: ...ified at the same time 2 Type in the time that you wish to send the transmission andthen touch Enter Touch Hour or Minute and then use the keypad to type in the numbers To send the transmission at midnight type 00 for the hours and 00 for the minutes To erase the entered numbers press the C clear key To cancel the setting touch Cancel Note The time is set for a 24 hour period If the machine is not...

Page 156: ...ptional 1 Touch Set 2 and then touch TX Marker Note TX Marker appears only if the optional TX Marker is used 2 Specify the desired stamp setting and then touch Enter Touch Bottom Top Bottom or OFF to select the desired setting Specifying the Subject setting 1 Touch Net and then touch SubjectSet ...

Page 157: ...istered in advance Refer to Specifying Network Settings on page 3 6 Specifying the Reply setting 1 Touch Net and then touch Set Reply Email Addr 2 Select the one touch key of the recipient to be specified as the reply address and then touch Enter To cancel the setting touch Cancel Note A one touch key must have been registered in advance Refer to Registering as a One Touch Key on page 8 5 ...

Page 158: ...ner Mode 8 31 Specifying the file name setting 1 Touch Net and then touch SetFileName 2 Type in the file name to be given to the image data and then touch Enter To cancel the setting touch Cancel Tip An extension tif or pdf is automatically added to file name ...

Page 159: ...ent From the List on the One Touch Screen on page 4 5 1 Position the document s 2 Press the Fax Scan key For a copier press the Scan key 3 From the list of one touch keys select all recipients where the data is to be sent 4 Press the Start key Specifying using 10 key Dialing screen 1 Position the document s 2 Press the Fax Scan key For a copier press the Scan key 3 Touch Com Mode and then touch In...

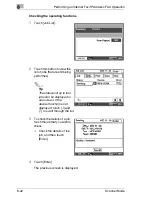
Page 160: ...osition the document s 2 Press the Fax Scan key For a copier press the Scan key 3 From the list of one touch keys select the fax program 4 Press the Start key Tip You can specify whether or not a screen asking for confirmation of the settings is displayed before a broadcast transmission Refer to page 13 47 ...

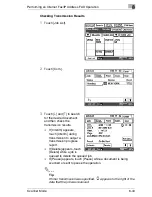
Page 161: ... RESULT OK OK DESTINATION AA DD FIN 7station No 000 003 RESULT EA0006 DESTINATION GG T B S 1station No 006 RESULT OK OK DESTINATION BB EE No 001 004 RESULT DESTINATION No RESULT OK F CODE 12345 DESTINATION 12345678 RESULT OK OK DESTINATION CC FF No 002 005 RESULT DESTINATION No 1 2 3 4 5 1 Report output date 2 Transmission source name 3 Recipients where the transmission was completed correctly 4 R...

Page 162: ...ble G When transmitting with chain dialing a maximum of 192 characters can be specified Up to 64 characters can be displayed in the message display of the copier s screen G A one touch key programmed with an IP address cannot be used Using the one touch keys For details refer to Selecting a Recipient From the List on the One Touch Screen on page 4 5 1 Position the document s 2 Press the Fax Scan k...

Page 163: ...en To enter another address touch the next one touch key that you wish to specify 6 Press the Start key The transmission begins By typing in the address 1 Position the document s to be faxed 2 Press the Fax Scan key For a copier press the Scan key 3 Touch Chain Dial 4 In the 10 Key Dialing screen touch Com Mode and then touch InternetFAX then E mail 5 Type in the e mail address Refer to Basic Tran...

Page 164: ...ending Internet faxes to computers Note With some e mail applications if an e mail is received containing no text and only an attached file it may not be possible to open the attached file Register Custom Text from PageScope Light Custom Text cannot be registered from the copier s control panel 1 Press the Utility key 2 Touch Admini Management 3 Type in the administrator access code and then touch...

Page 165: ... this setting to insert into the transmission document the fixed text previously specified with the device Custom Text Select this setting to insert into the transmission document the text registered with PageScope Light OFF Select this setting to insert no text into the transmission document Text Check Click this button to check the custom text that has been registered ...

Page 166: ...cope Light Refer to Using PageScope Light on page 3 25 2 Log into PageScope Light in Administrator mode 3 Click Subject Text in the sub menu that appeared after clicking Mail Internet FAX in the menu on the Network tab 4 Type the text into the text box and then click the Apply button 256 characters or less ...

Page 167: ... s control panel is described below For details on using PageScope Light refer to the PageScope Light User Manual 1 Touch Job List 2 Touch the button for the report that you wish to view Job Touch this button to view the list of jobs that are still being performed Print Order Touch this button to view the order for up to 8 documents such as copies received faxes reports and printouts being printed...

Page 168: ...th a regular received document Refer to Specifying the procedure for received documents Doc Manage function on page 13 33 G The format of the error e mail message differs depending on the mail server Documents being received or queued to be printed 200 Received documents 96 Doc Indicates documents saved in this unit Bulletin Board Indicates documents registered as bulletins Documents saved as bull...

Page 169: ... list of jobs that are still being performed Tip The statuses of up to four jobs can be displayed in one screen If the desired function is not displayed touch and to scroll through the list 3 To check the details of a job touch the job that you wish to check Check the details of the job and then touch Enter 4 Touch Enter The previous screen is displayed ...

Page 170: ...ck the transmission results If Interim appears touch Interim during transmission to output a transmission progress report If Delete appears touch Delete while a job is queued to delete the queued job If Pause appears touch Pause while a document is being scanned or sent to pause the operation Tip If timer transmission was specified appears to the right of the date that the job was received ...

Page 171: ...Scanner Mode 4 Touch Enter The previous screen is displayed Checking Reception Results 1 Touch Job List 2 Touch Com 3 Touch RX Doc 4 Touch and to search for the desired document and then check the reception results 5 Touch Enter The previous screen is displayed ...

Page 172: ...ed documents Doc Manage function on page 13 33 G If the Auto RX Check parameter is set to Check OFF or if you wish to immediately receive the fax the fax can be received manually G The setting for specifying the answering method for fax settings in the Administrator Management screen is available only when sending faxes on a common telephone line It is not available when receiving Internet faxes M...

Page 173: ...Scanner Mode Receiving an IP address fax G The network settings must be specified If the IP address of the machine has not been entered it cannot receive an IP address fax Refer to page 3 3 G If an IP address fax is sent it is automatically received and printed ...

Page 174: ... The result notification is sent back if reception result error code E6xxxx appeared Refer to Transmission Results Error Codes on page 15 3 Full mode compatibility G When sending an Internet fax the reception result at the recipient s side can be checked In addition the receiving performance of the recipient s machine can be detected when sending Internet faxes and the data can be sent using a tra...

Page 175: ...Header Print parameter refer to page 3 16 Received from xyz com 192 168 2 100 192 168 2 100 by beverly xyz com with SMTP Microsoft Exchange Internet Mail Service Version 5 5 2232 9 id xxxxxxxx Wed 23 Apr 2003 11 32 30 0900 message id 5500001042 001 20000308190403 to sales xyz com subject Fax Image Fail sales 042 from tokyo xyz com reply to tokyo xyz com date Wed 23 Apr 2003 11 20 30 0900 MIME Vers...

Page 176: ...r and then start it up Refer to page 10 21 Refer to Installing the Utilities on page 3 29 G The transmitted image is received with Image Receiver then saved by IP Scanner as an image file G When using IP Scanner check that Image Receiver is running Refer to IP Scanner on page 10 1 G The operations performed from the copier are described below For details on viewing the image file from the computer...

Page 177: ... page 4 8 4 Specify the image quality density and zoom ratio according to the document to be scanned Refer to Specifying the Scanning Options on page 9 6 5 Press the Start key The transmission begins If the document is placed on the original glass G When scanning multiple document pages continue scanning by placing each consecutive page on the original glass then pressing the Start key G After all...

Page 178: ...Performing a Scan to PC SMTP Operation 9 Scanner Mode 9 3 9 2 Registering a Recipient 1 Press the Utility key 2 Touch User Set 3 Touch FAX Input For a copier touch E mai Input 4 Touch One Touch ...

Page 179: ...peration 9 4 Scanner Mode 5 Select an index and then touch a key where nothing has been registered yet 6 Type in the recipient name that will appear on the one touch key and then touch Next 7 Touch PC then Scanner and then touch Next ...

Page 180: ...st Name In order to specify the recipient by its host name the DNS setting must first be specified Refer to DNS Settings screen on page 3 9 To change the file format or coding method touch Scan Mode and then specify the desired settings To change the port number touch Port and then specify the desired setting 9 Check the information to be registered and then touch Enter ...

Page 181: ... information you wish to change 6 To change the one touch key information change the information as desired and then touch Enter To delete the one touch key touch Delete 9 4 Specifying the Scanning Options 9 4 1 Quality Reduction Screen Quality tab Select the scanning resolution Standard 200 100 dpi Fine 200 200 dpi Super Fine 400 400 dpi Text Photo 400 400 dpi GSR 200 200 dpi Super GSR 400 400 dp...

Page 182: ...ker to select the desired scanning contrast Note If 600dpi Text or 600dpi Photo Text was selected on the Quality tab the contrast can only be set to one of three levels Lighter Normal and Darker The two Lighter settings and the two Darker settings are each the same contrast level Reduction Area tab ...

Page 183: ...9 Performing a Scan to PC SMTP Operation 9 8 Scanner Mode Scan Area Select the scanning size ...

Page 184: ...tension tif or pdf is automatically added to file name Settings for the TX Report 2in1 2 Sided TX Priority TX Timer Set and TX Marker functions can also be specified For details refer to FAX Menu Screen on page 8 19 File Name Specify the name of the attached file If a file name is not specified the default file name is used Default file name Device_name Automatic_numbering_ date_and_time Extensi o...

Page 185: ...9 Performing a Scan to PC SMTP Operation 9 10 Scanner Mode ...

Page 186: ...the image file is saved in that folder This setting is available only if the document is scanned with a scanner function For details on saving the data when the received fax document is transferred to IP Scanner refer to Sort Settings dialog box on page 10 11 G When using IP Scanner be sure that Image Receiver is running While Image Receiver is running its icon appears in the Windows taskbar Norma...

Page 187: ...f the computer the dial up router may be unnecessarily dialed up regardless of whether the correct IP address was specified Using a modem or terminal adapter G If a computer with a built in modem or a computer connected to terminal adapter is used they may be used to dial up If this occurs select either Never dial a connection or Dial whenever a network connection is not present in the Dial up set...

Page 188: ...ays the Scanner Settings dialog box Refer to Scanner Settings dialog box on page 10 8 3 Check RX now button Checks if scan data has arrived 4 Large Icons button Small Icons button List button Details button Allows the display of the icons to be changed 5 Thumbnails button Starts up View Window and displays a list of thumbnails for all TIFF and PDF files in the open folder Refer to ViewWindow on pa...

Page 189: ...ammed scanner button on the copier is erased 8 Save folder as a key check box If this check box is selected a folder with the same name as the button is automatically created when the scanner button is programmed 9 Delete the key after save check box If this check box is selected the scanner button is automatically erased as soon as the scanned image is saved in a folder 10 Delete the key on exit ...

Page 190: ...der Rename Allows the name of the selected file or folder to be changed Exit Quits IP Scanner 2 Edit Allows the selected image file to be viewed Cut Selects moves copies etc the file or folder Copy Paste Select All 3 View Large Icons Allows the display of the icons to be changed Small Icons List Details Thumbnails Starts up View Window and displays a list of thumbnails for all TIFF and PDF files i...

Page 191: ... Scanner Key Registration Programs a scanner button on the copier Scanner Key Delete Erases the scanner button registered in the main unit Reg same as previous Programs the button with the same settings as when it was previously programmed 6 Image Check Check now Checks if scan data has arrived Automatic Automatically checks if scan data has arrived Manual Manually checks if scan data has arrived ...

Page 192: ...tify Setting dialog box Refer to Notify Settings dialog box on page 10 17 Selected folder as saving location Specifies the displayed folder as the save destination Configure Arrival Notification Specifies the displayed folder as the notification folder for computer reception notifications Show dialogue after received Displays a dialog box to notify that the image was received Notify other PC after...

Page 193: ...lder as a key check box in the main window was selected a folder with the same name as the button is created on the computer 2 Scan Area box From the drop down menu select the size of the scanning area Auto A4P A4L A3P A5P A5L B4P B5P B5L FLS Letter P Letter L 11 17 P 5 1 2 8 1 2 P 5 1 2 8 1 2 L Legal P Exec P or Exec L If Auto detect is selected the scanning area is automatically determined accor...

Page 194: ... the image An amount of encoded data exists in image data however generally MMR has more than MH 6 Specify File Name parameter If Yes is selected a specified file name will be given to the image data when it is saved If No is selected the file will be saved with a name consisting of the device name and date that the image was scanned 7 File Name box Type in the name that the file will be saved wit...

Page 195: ...eters to their default settings 11 Save and Close button Saves the current settings and closes the Scanner Settings dialog box 12 Scanner Key Registration button Programs a button on the copier for specifying the location where the data is filed Num ber Item Name Description ...

Page 196: ...Num ber Item Name Description 1 Folder by key name check box If this check box is selected a folder with the same name as the button is automatically created when the scanner button is programmed This check box is connected to the Save folder as a key check box in the main window ...

Page 197: ...s automatically created when the scanner button is programmed This check box functions independently of the Save folder as a key check box in the main window Refer to Forwarding a Received Fax to IP Scanner on page 11 3 4 Create new folder by Date check box If this check box is selected a folder is created with a name that is the same as the date that the fax was received and the data is saved in ...

Page 198: ...s the items at the top of the list will be given priority when the data is classified 7 Create a new folder check box If this check box is selected and there is no folder created with transmission source information for the recipient s fax a folder is created with the transmission source information of a new fax and the document image data is saved in that folder Num ber Item Name Description ...

Page 199: ... box 1 2 3 4 5 Num ber Item Name Description 1 Divide doc to save check box If this check box is selected the scanned document is separated and saved as individual files This enables you to scan in a single operation a document that will be saved as separate files ...

Page 200: ...is available only if the Divide doc to save check box is selected Note Load the documents so that the left sides of the pages leading edges are aligned 1 Document 1 2 Document 2 3 Interleaf document with a different length 3 Files separator check box If this check box is selected the documents inserted as interleaves are also saved as image data This check box is available only if the Divie by sho...

Page 201: ... separate files This setting is available only if the Divide doc to save check box is selected Note Load the documents so that the top edges of the pages edges toward the rear of the machine are aligned 1 Document 1 2 Document 2 5 Divide document as single pages setting If this setting is selected each page of the scanned document is saved as a separate file Num ber Item Name Description 1 2 ...

Page 202: ...scription 1 Folder and Browse box Select the folder where image data will be saved 2 Notify List Displays information on the notification destination specified for the folder selected in the list A faint icon beside a folder indicates that the notification destination is set for the containing folder ...

Page 203: ...the notification Normally 25 4 Edit button The selected notification destination can be corrected or changed Folders faint icons where a notification destination is set for the containing folder cannot be edited 5 Delete button Deletes the selected notification destination Folders faint icons where a notification destination is set for the containing folder cannot be deleted 6 Apply to Sub Folders...

Page 204: ...llowing dialog box appears on the computer specified as the notification destination Image Receiver must be started up on the computer specified as the notification destination In addition a test notification cannot be sent to a notification destination faint icon specified as a containing folder Num ber Item Name Description ...

Page 205: ...d TIFF files cannot be displayed Images created with a device other than this copier for example with a computer may not be displayed Num ber Description 1 Click an image to view the file 2 Appears when the file contains multiple pages Click and to change the page 1 2 ...

Page 206: ...amming the scanner button from the computer 1 On the computer start up IP Scanner Start Programs IP Scanner IP Scanner 2 Type in the IP address of the main device and then click the OK button If the IP address of the main unit has been set this operation is not required ...

Page 207: ...at Image Receiver has started up Normally Image Receiver starts up automatically when Windows starts up If Image Receiver has not started up start it up as described below Start Programs IP Scanner Image Receiver 4 In the main window click the Scanner Key Registration button ...

Page 208: ...Scanner Key Name box on the Scanner Settings dialog box type in the name 6 Specify the settings for Scan Area Quality and Contrast and then click the Scanner Key Registration button 7 Click the OK button The scanner button on the copier is programmed ...

Page 209: ...P address A maximum of six scanner buttons on a copier can be programmed If the maximum number of scanner buttons is reached they can be deleted from the touch panel Select the scanner button that you wish to delete and then touch Del When a scanner button is deleted from the touch panel the message Ready remains displayed on the computer If this occurs click the Delete Scanner Key button from the...

Page 210: ...e file in the My Images folder If the Save folder as a key check box in the main window was selected a new folder with the same name as the button is created and the image file is saved in that folder Click the Thumbnails button to display a list of thumbnails for all TIFF and PDF files in the opened folder Click a thumbnail to display the file Refer to ViewWindow on page 10 20 If the Show dialogu...

Page 211: ...10 Using IP Scanner 10 26 Scanner Mode ...

Page 212: ... ITU T International Telecommunication Union F codes are specified using the keypad keys 0 through 9 and depending on use as described below Parameter Page Reference To manage documents F Code RX Doc Settings Forwarding Destination Refer to Specifying the procedure for received documents Doc Manage function on page 13 33 To register the e mail address of a distribution destination in a one touch k...

Page 213: ... Code Reception Port or Public Document By specifying a one touch key as a forwarding destination the received fax will be forwarded as TIFF or PDF image data F codes are used in various other ways such as a mailbox or a bulletin board When specifying F codes we recommend using control number for example to classify the data by function ...

Page 214: ... cannot be used in folder names or a folder is not created by using the recipient information In this case the image file is saved in a folder with the name of the button or the date If there are characters that cannot be used in the folder name created from the name of the button they are replaced with _ underline However if the Folder by key name check box or the Create new folder by Date check ...

Page 215: ...rmation type in and the name for identifying the recipient 11 3 Forwarding to IP Scanner 1 In a one touch key register the IP address of the computer where the data will be forwarded Refer to Registering a Recipient on page 9 3 2 Specify the document management settings Refer to Specifying the procedure for received documents Doc Manage function on page 13 33 3 In the Sort Settings dialog box in I...

Page 216: ...at specifies the user when sending the fax G Inform the sender of the F code SUB maximum 20 characters and F code password SID PWD maximum 20 characters For details on specifying the F code from the receiver s fax machine refer to the instruction manual for the sender s fax machine Note This function is not available with models that are not compatible with F codes ...

Page 217: ...11 Distribution of Fax Documents 11 6 Scanner Mode ...

Page 218: ...ollowing items in the same way as items for the network configuration of this device G The recipients are specifies as telephone fax numbers or e mail addresses G If both fax numbers and e mail addresses are specified as recipients broadcast transmission is possible G Specify an e mail address to send an e mail with TIFF image data attached 12 2 Operation G There are no operations that can be perf...

Page 219: ...12 Network Fax Transmission 12 2 Scanner Mode ...

Page 220: ...n The standby screen can be set to the copy screen the fax screen the scan screen or any screen according to the operation that is being performed Copy Screen The copy screen is recommended if the unit is mainly being used as a copier Fax Screen The fax screen is recommended if the unit is mainly being used for sending faxes and e mails In addition the fax screen that is given priority can be sele...

Page 221: ...rform the auto panel reset operation Refer to Changing Default Settings in the Advanced Operations volume of the copier s User Manual Scanner Screen The scan screen is recommended if the unit is mainly being used as a scanner Auto Mode Screen The screen that is used is displayed regardless of whether the unit is being used for faxing or copying ...

Page 222: ...fying Management Settings 13 Scanner Mode 13 3 Specifying the setting 1 Press the Utility key 2 Touch User Set 3 Touch User s Choice 4 Touch 6 6 and then touch Priority Screen 5 Touch Default Device Priority ...

Page 223: ...the standby screen initial screen 13 2 Specifying the Initial Recipient Selection Screen The initial screen that is displayed when the Fax Scan key is pressed can be set to the One Touch screen the Search screen the 10 Key Dialing screen or the Index screen according to the operation that is being performed One Touch The One Touch screen is displayed when the Fax Scan key is pressed For a copier p...

Page 224: ...ch The Search screen is displayed when the Fax Scan key is pressed For a copier press the Scan key 10 Key Dialing The 10 Key Dialing screen which allows the recipient to be entered is displayed when the Fax Scan key is pressed For a copier press the Scan key ...

Page 225: ... Default Settings of the copier s User Manual G If the Priority FAX Screen parameter is set to Index the Index screen is given priority when displaying screens for registering one touch keys and fax programs Specifying the setting 1 Press the Utility key 2 Touch User Set Index The screen containing the list of indexes is displayed when the Fax Scan key is pressed For a copier press the Scan key ...

Page 226: ...Specifying Management Settings 13 Scanner Mode 13 7 3 Touch User s Choice 4 Touch 6 6 and then touch Priority Screen 5 Touch Priority FAX Screen ...

Page 227: ...t Settings 13 8 Scanner Mode 6 Select the screen that you wish to have priority and then touch Enter 7 Continue touching Enter to return to the Utility screen and then touch Exit to return to the standby screen initial screen ...

Page 228: ...is counted should be set by the service representative Copier 2 Sided This counter shows the total number of double sided copies made Printer Total This counter shows the total number of printouts made Printer Size This counter shows the total number of printouts made on the specified paper size The paper size that is counted should be set by the service representative Printer 2 Sided This counter...

Page 229: ...uch Meter Count 3 Check the counters and then touch Exit Note There are two Meter Count screens To view the other screen touch Next To return to the previous screen touch Back 4 Continue touching Enter to return to the Utility screen and then touch Exit to return to the standby screen initial screen ...

Page 230: ...specified by the administrator is described below Displaying the Administrator Management screen 1 Press the Utility key 2 Touch Admin Management 3 Type in the administrator access code maximum 8 digits and then touch Enter Refer to Specifying Administrator Settings in the Advanced Operations volume of the copier s User Manual 4 Touch Admin 1 or Admin 2 and then select the operation that you wish ...

Page 231: ...he standby screen initial screen 13 5 Specifying the Date and Time Before using the copier be sure to specify the date and time This is required in order to send e mail messages at a specified time or to record the correct time in reports Setting the date and time 1 Touch Admin 1 and then touch Initial Settings Refer to Displaying the Administrator Management screen on page 13 11 2 Touch Date Time...

Page 232: ...lue To change the entered value Press the C clear key and then type in the new value 5 Continue touching Enter to return to the Utility screen and then touch Exit to return to the standby screen initial screen Setting the time zone Specify the time difference from Greenwich Mean Time which is added to the header of mails that are sent The time difference can be adjusted in 30 minute intervals 1 To...

Page 233: ...gs 13 14 Scanner Mode 3 Touch TimeZone 4 Touch L and M to select the desired time zone and then touch Enter 5 Continue touching Enter to return to the Utility screen and then touch Exit to return to the standby screen initial screen ...

Page 234: ...nner Mode 13 15 Setting the Daylight Saving Time 1 Touch Date Time Set 2 Touch D S T 3 Select Auto or OFF for Daylight Saving Time and then touch Enter 4 Touch Enter repeatedly until the screen returns to the stand by screen initial screen ...

Page 235: ...and for the reports can be specified Specifying the setting 1 Touch Admin 1 and then touch Initial Settings Refer to Displaying the Administrator Management screen on page 13 11 2 Touch Language Com 3 Select the desired language and then touch Enter 4 Continue touching Enter to return to the Utility screen and then touch Exit to return to the standby screen initial screen ...

Page 236: ...ent transmission source name can be used for different recipients or for different accounts Refer to FAX Menu Screen on page 8 19 G The transmission source name can contain a maximum of 40 characters G The transmission source name is printed at the top of sent documents G The registered transmission source name can be changed by following the same procedure used to register it Registering the tran...

Page 237: ...touch Enter 5 Check the information to be registered and then touch Enter Tip To correct the registered name touch the button for the desired number and then re register the name 6 Continue touching Enter to return to the Utility screen and then touch Exit to return to the standby screen initial screen ...

Page 238: ...ying account management settings refer to Account Management Operations in the Advanced Operations volume of the copier s User Manual In order to specify network setting certain software switch settings must be specified For details on specifying software switch settings refer to Specifying Report Output Settings on page 13 41 G To identify which account sent e mail messages are sent from software...

Page 239: ...e screen that appeared the following settings can be specified These settings are specified to prevent anonymous e mail from being sent From e mail address Type in the e mail address for the account POP3 User name Type in the POP3 user name for the account POP3 Password Type in the POP3 password for the account 5 Continue touching Enter to return to the Utility screen and then touch Exit to return...

Page 240: ...de Specify whether the transmission mode returns to memory transmission or immediate transmission when an operation is finished During the production of this unit the Memory TX setting was selected This parameter is available only when sending faxes on a common telephone line Attach TSI Specify whether the default transmission source name is selected when an operation is finished if multiple trans...

Page 241: ... then touch TX Settings Refer to Displaying the Administrator Management screen on page 13 11 2 Specify settings for the various transmission parameters Specify the default resolution 1 Touch Quality Mode 2 Touch Priority Quality 3 Select the resolution that you wish to specify as the default and then touch Enter ...

Page 242: ...y Mode 2 Touch Priority Contrast 3 Select the contrast that you wish to specify as the default and then touch Enter Specifying the default communication mode 1 Touch Quality Mode 2 Touch Communication Mode 3 Select the communication mode that you wish to specify as the default and then touch Enter ...

Page 243: ...cifying Management Settings 13 24 Scanner Mode Specifying the default transmission mode 1 Touch Com Menu 2 Touch TX 3 Select the transmission mode that you wish to specify as the default and then touch Enter ...

Page 244: ... 25 Specifying the default method for attaching the transmission source name 1 Touch Com Menu 2 Touch TSI 3 Touch TSI Position 4 Select the method for attaching the transmission source name that you wish to specify as the default and then touch Enter ...

Page 245: ... Settings 13 26 Scanner Mode Specifying the default transmission source name 1 Touch Com Menu 2 Touch TSI 3 Touch TSI Selection 4 Select the transmission source name that you wish to specify as the default and then touch Enter ...

Page 246: ...nagement Settings 13 Scanner Mode 13 27 Specifying the default rotation transmission setting 1 Touch Com Menu 2 Touch Rotation TX 3 Specify whether ON or not OFF to perform rotation transmission and then touch Enter ...

Page 247: ...anner Mode Specifying double sided transmission settings 1 Touch Com Menu 2 Touch 2 Sided TX 3 Specify whether ON or not OFF to allow double sided transmissions and then touch Enter If ON is selected specify the default binding margin settings ...

Page 248: ...opped for copies or computer printouts G The time period when faxes are not printed can be set by day G If a time period is specified all documents saved while printing was stopped are automatically printed once printing restarts G To manually print a document touch Print Management on the User Management screen and then perform the necessary operation to begin printing G If printing is restricted...

Page 249: ...begin 6 Touch Start Time and then use the keypad to type in the time for printing to stop Then touch Enter To cancel the setting touch Cancel Note When specifying the time be sure to select the days The time setting is common for all days Different time periods cannot be specified for different days 7 Continue touching Enter to return to the Utility screen and then touch Exit to return to the stan...

Page 250: ...ngs Refer to Displaying the Administrator Management screen on page 13 11 2 Touch Memory Lock 3 Touch Memory Lock Password 4 Use the keypad to type in the four digit password to allow printing and then touch Enter 5 Continue touching Enter to return to the Utility screen and then touch Exit to return to the standby screen initial screen ...

Page 251: ...ent 4 Use the keypad to type in the four digit password to allow printing and then touch Enter 5 Touch Lock Stop and then touch Enter Tip To stop printing touch Lock On and then touch Enter To restart printing touch Temp Print 6 Continue touching Enter to return to the Utility screen and then touch Exit to return to the standby screen initial screen ...

Page 252: ...Public Document F Code Specify the procedure that is performed when documents are received for each F code A document with an F code assigned is received according to the procedure previously specified for the F code Port Specify the procedure that is performed when documents are received at each port Public Document Specify the procedure that is performed when regular documents other than those m...

Page 253: ...oc Manage Refer to Displaying the Administrator Management screen on page 13 11 2 Touch Public document 3 Touch RX Doc Settings 4 Select the procedure that should be performed If Forward or Prt Forward was selected also select a forwarding destination To specify multiple recipients touch Add Dest and then select the next recipient ...

Page 254: ...r Mode 13 35 Tip To print a document saved in a box search a document and print out at Print in Doc menu in Job List 5 Continue touching Enter to return to the Utility screen and then touch Exit to return to the standby screen initial screen ...

Page 255: ...de For documents classified with F Code 1 Touch Admin 1 and then touch Doc Manage Refer to Displaying the Administrator Management screen on page 13 11 2 Touch F CODE 3 Touch the button to be registered 4 Touch F CODE To delete the F code touch Delete ...

Page 256: ...ge and then touch Delete to erase the number above the cursor To erase all numbers press the C clear key 7 Touch F CODE Password 8 Use the keypad to type in the F code password and then touch Enter Tip To change a number touch and to move the cursor to the number that you wish to change and then touch Delete to erase the number above the cursor To erase all numbers press the C clear key 9 Touch Re...

Page 257: ... Touch RX Doc Settings 13 Select the procedure that should be performed If Forward or Prt Forward was selected also select a forwarding destination To specify multiple recipients touch Add Dest and then select the next recipient 14 Continue touching Enter to return to the Utility screen and then touch Exit to return to the standby screen initial screen ...

Page 258: ...nagement screen on page 13 11 2 Touch Port 3 Select the port 4 Touch RX Doc Settings Yes Select this setting to apply the setting to each port To specify how received documents are handled select Yes In addition to change the way in which documents are handled or to change the forwarding destination select Yes No Select this setting to not apply the setting to each port ...

Page 259: ... performed If Forward or Prt Forward was selected also select a forwarding destination To specify multiple recipients touch Add Dest and then select the next recipient 6 Continue touching Enter to return to the Utility screen and then touch Exit to return to the standby screen initial screen ...

Page 260: ...port parameter 1 Touch Admin 1 and then touch Report Settings Refer to Displaying the Administrator Management screen on page 13 11 2 Touch TX Report TX Report Select how to output the report showing the transmission result The factory setting is Single destination If TX Fail Multiple destination If TX Fail Activity Report Specify whether or not to automatically output the activity report with eve...

Page 261: ...OFF Select this setting to stop the transmission result report from automatically being outputted 4 Continue touching Enter to return to the Utility screen and then touch Exit to return to the standby screen initial screen Specifying the setting for the Activity Report parameter 1 Touch Admin 1 and then touch Report Settings Refer to Displaying the Administrator Management screen on page 13 11 2 T...

Page 262: ...Bit Selection The bits are the eight numbers that construct the mode By specifying a binary number 0 or 1 for each of the bits 0 through 7 each function can be specified G HEX Selection Specify a setting for each mode as a hexadecimal number 0 through 9 and A through F For example to specify the bit setting 00110000 specify the hexadecimal setting 30 Reference Examples of Bit Selection binary numb...

Page 263: ...and then touch Soft SW Set Refer to Displaying the Administrator Management screen on page 13 11 14 0000 1110 0E 15 0000 1111 0F 16 0001 0000 10 17 0001 0001 11 18 0001 0010 12 19 0001 0011 13 20 0001 0100 14 252 1111 1100 FC 253 1111 1101 FD 254 1111 1110 FE 255 1111 1111 FF Decimal number Bit Selection binary numbers HEX Selection hexadecimal numbers ...

Page 264: ...nged 4 Use the keypad to specify either 0 or 1 for the bit and then touch Enter To change other modes repeat the procedure from step 2 5 Continue touching Enter to return to the Utility screen and then touch Exit to return to the standby screen initial screen Specifying functions with HEX Selection 1 Touch Admin 2 and then touch Soft SW Set Refer to Displaying the Administrator Management screen o...

Page 265: ... in the mode number 3 Touch HEX Selection 4 Use the keypad and A through F to specify the hexadecimal number and then touch Enter To change other modes repeat the procedure from step 2 5 Continue touching Enter to return to the Utility screen and then touch Exit to return to the standby screen initial screen ...

Page 266: ...ht side are page number with descriptions for the corresponding function Bit 7 6 5 4 3 2 1 0 Setting 0 0 0 0 0 0 0 0 HEX 01 Bit Function Setting Description Page referen ce 7 6 5 4 3 2 000000 Do not change these bits 1 0 Specifies whether or not a screen asking for confirmation of the settings is displayed before a broadcast transmission 00 The setting confirmation screen is not displayed p 8 32 0...

Page 267: ...on Bit 7 6 5 4 3 2 1 0 Setting 0 1 0 0 0 0 0 0 HEX 40 Bit Function Setting Description Page referen ce 7 0 Do not change these bits 6 Specifies whether or not a connected telephone is used 0 Not used 1 Used 5 Specifies whether or not a received date report is attached in E mail mode 0 Not attached 1 Attached 4 Specifies whether the received date report is attached outside or inside of the image in...

Page 268: ...ight side are page number with descriptions for the corresponding function Bit 7 6 5 4 3 2 1 0 Setting 1 0 1 0 1 0 0 0 HEX A8 Bit Function Setting Description Page referen ce 7 Specifies whether to return to standard or expanded after an operation with the Internet fax function is finished 0 Standard A4 200 dpi or less MH 1 Expanded Functions defined as options are recommended 6 Specifies whether ...

Page 269: ...ted The numbers on the right side are page number with descriptions for the corresponding function Bit 7 6 5 4 3 2 1 0 Setting 0 1 0 0 0 0 0 0 HEX 40 Bit Function Setting Description Page referen ce 7 6 5 4 Time until a connection with the SMTP server times out during an e mail transmission 0001 30 seconds 0010 60 seconds 0011 90 seconds 0100 120 seconds 0101 150 seconds 0110 180 seconds 0111 210 ...

Page 270: ...d The numbers on the right side are page number with descriptions for the corresponding function Bit 7 6 5 4 3 2 1 0 Setting 0 1 0 0 0 0 0 0 HEX 40 Bit Function Setting Description Page referen ce 7 6 5 4 Time until a connection with the SMTP server times out during an e mail reception 0001 30 seconds 0010 60 seconds 0011 90 seconds 0100 120 seconds 0101 150 seconds 0110 180 seconds 0111 210 secon...

Page 271: ... The numbers on the right side are page number with descriptions for the corresponding function Bit 7 6 5 4 3 2 1 0 Setting 0 0 1 0 0 0 0 0 HEX 20 Bit Function Setting Description Page referen ce 7 6 5 4 Time until a connection with the POP3 server times out during an e mail transmission 0001 30 seconds 0010 60 seconds 0011 90 seconds 0100 120 seconds 0101 150 seconds 0110 180 seconds 0111 210 sec...

Page 272: ...n the shaded cells were selected The numbers on the right side are page number with descriptions for the corresponding function Bit 7 6 5 4 3 2 1 0 Setting 0 0 0 0 1 0 0 0 HEX 08 Bit Function Setting Description Page referen ce 7 0 Do not change these bits 6 Specifies the default address input screen for Scan to PC SMTP transmissions 0 The IP address input has priority p 9 3 1 The host name input ...

Page 273: ... the shaded cells were selected The numbers on the right side are page number with descriptions for the corresponding function Bit 7 6 5 4 3 2 1 0 Setting 0 0 1 0 0 0 0 0 HEX 20 Bit Function Setting Description Page referen ce 7 6 5 4 3 Time until a connection with the DNS server times out 00001 30 seconds p 3 3 00010 40 seconds 00011 80 seconds 00100 160 seconds 00101 320 seconds 00110 640 second...

Page 274: ...orresponding function A setting between 0000 0001 HEX value 01 for 1 second to 1111 1111 HEX value FF for 255 seconds can be specified When specifying the setting refer to the HEX table Bit 7 6 5 4 3 2 1 0 Setting 0 0 0 0 1 1 1 1 HEX 0F Bit Function Setting Description Page referen ce 7 6 5 4 3 2 1 0 Specifies the time interval for transmitting divided e mail messages 00000101 5 seconds p 3 3 0000...

Page 275: ... production Specifying the setting During the production of this unit the settings in the shaded cells were selected The numbers on the right side are page number with descriptions for the corresponding function Bit 7 6 5 4 3 2 1 0 Setting 0 0 0 0 1 0 0 0 HEX 08 Bit Function Setting Description Page referen ce 7 Specifies whether or not there are Full mode functions 0 No p 8 47 1 Yes 6 5 4 3 2 1 0...

Page 276: ...t transmitted Precautions G The procedure for manually outputting a report is described below G During the production of this unit it was set to automatically output this report after every 50 transmissions Refer to Specifying Report Output Settings on page 13 41 Outputting the Transmission Activity Report 1 Press the Utility key 2 Touch Reports 3 Touch TX Act Report 4 Touch Enter The transmission...

Page 277: ...4316 764 6514316 765 6514316 766 6514316 767 6514316 768 2003 APR 23 WED 11 32 CHICAGO 1 2 8 3 4 5 6 7 1 TSI source name 2 Report output date 3 Com Mode ECM ECM mode G3 G3 mode BR Broadcast transmission RESULT Activity Report transmission PC M Scan to E mail PC S Scan to PC SMTP FTP S Scan to Server FTP FTP C Scan to PC FTP HDD Scan to HDD E mail Internet FAX IP TX IP Address FAX 4 Transmission fu...

Page 278: ...e User Manual INTERR The transmission was interrupted F MEM The memory is full NG The transmission failed PT DEL Part of the transmission failed F DATA The data exceeded the amount that can be transmitted IMG NG The transmission failed due to an image error Error Code Refer to Transmission Results Error Codes on page 15 3 7 Name of account used 8 Size Indicates the amount of data after data conver...

Page 279: ...ons G The procedure for manually outputting a report is described below G During the production of this unit it was set to automatically output this report after every 50 transmissions Refer to Specifying Report Output Settings on page 13 41 Outputting the Reception Activity Report 1 Press the Utility key 2 Touch Reports 3 Touch RX Act Report 4 Touch Enter The reception activity report is outputte...

Page 280: ...NG PAGES 2 1 1 2 2 1 TIME RCVED APR 21 20 32 APR 21 21 00 APR 22 9 18 APR 22 9 55 APR 22 10 03 APR 22 14 00 2003 APR 23 WED 11 32 CHICAGO 1 2 3 4 5 6 7 1 TSI source name 2 Report output date 3 Com Mode ECM ECM mode G3 G3 mode RESULT Activity Report reception NET Internet FAX IP Address FAX 4 RX Functions C Confidential communications B Batch transmission P Polling reception I Individual login F Fo...

Page 281: ... only when a fax is transmitted using a common telephone line Refer to Chapter 11 Checking the Transmission Status of the User Manual INTERR The transmission was interrupted F MEM The memory is full NG The transmission failed PT DEL Some communications were unsuccessful F DATA The data exceeded the amount that can be transmitted IMG NG The transmission failed due to an image error Error Code Refer...

Page 282: ...istered as one touch key can be outputted and checked Precautions G Unregistered one touch keys are not printed Outputting the one touch key list 1 Press the Utility key 2 Touch Reports 3 Touch One Touch List 4 Touch Enter The one touch key list is outputted Tip Even if Enter is not touched the report is automatically outputted ...

Page 283: ...PR 23 WED 11 32 CHICAGO 1 2 4 3 1 TSI source name 2 Report output date 3 Details registered in one touch keys 4 Com Mode G3 G3 fax transmission using a common telephone line G3 1 G3 fax transmission port 1 using a common telephone line G3 2 G3 fax transmission port 2 using a common telephone line PC E mail Scan to E mail PC SCANNER Scan to PC SMTP FTP SERVER Scan to Server FTP FTP CLIENT Scan to P...

Page 284: ...ogram List The details of transmission settings registered in one touch keys as fax programs can be outputted as a report Outputting a fax program list 1 Press the Utility key 2 Touch Reports 3 Touch Fax Program List 4 Touch the button for the fax program whose details you wish to output as a report ...

Page 285: ...X OFF PASSWORD TX OFF BATCH TIME OFF CONTRAST 2in1 OFF TIMER OFF TSI ON THE DOC REAL TIME OFF BATCH INTERVAL OFF TX MARKER OPTION SCAN AREA AUTO TX REPORT IF TX FAIL DEST INSERT ON REMOTE COPY OFF DESTINATION AAA EEE I I I No 000 004 008 DESTINATION BBB FFF J J J No 001 005 009 DESTINATION CCC GGG KKK No 002 006 010 DESTINATION DDD HHH No 003 007 2003 APR 23 WED 11 32 CHICAGO F AX P RO GR AM L IS ...

Page 286: ...list containing all registered account information Outputting an account list 1 Touch Admin 1 and then touch Rep Print Refer to Displaying the Administrator Management screen on page 13 11 Tip If this operation is performed after an account is selected the list of information for only the selected account is outputted 2 Touch Account List 3 Touch Enter The account list is outputted Tip Even if Ent...

Page 287: ...4 12 Scanner Mode AC CO UN T L IS T P 1 ACCOUNT NAME SALES MKTING ACCOUNT NUMBER 0001 0002 ACCESS NUMBER COPIES 999 777 MAX PRT 100000 100000 TX 120 55 2003 APR 23 WED 11 32 CHICAGO 1 2 1 TSI source name 2 Report output date ...

Page 288: ... checked Precautions G The account list security can be outputted only if you have logged in with the administrator access code Outputting an account list security 1 Touch Admin 1 and then touch Rep Print Refer to Displaying the Administrator Management screen on page 13 11 2 Touch Account List Security 3 Touch Enter The account list security is outputted Tip Even if Enter is not touched the repor...

Page 289: ... L IS T S E CU R IT Y P 1 ACCOUNT NAME SALES MKTING ACCOUNT NUMBER 0001 0002 ACCESS NUMBER SECURITY INFORMATION FROM E MAIL ADDR sales xyz com POP3 USER NAME pop3 POP3 PASSWORD 2003 APR 23 WED 11 32 CHICAGO 1 2 1 TSI source name 2 Report output date ...

Page 290: ...s G The settings list can be outputted only if you have logged in with the administrator access code Outputting the settings list 1 Touch Admin 1 and then touch Rep Print Refer to Displaying the Administrator Management screen on page 13 11 2 Touch Setting List 3 Touch Enter The settings list is outputted Tip Even if Enter is not touched the report is automatically outputted ...

Page 291: ...R CHOICE 1 MEMORY RECALL OFF MIXED ORIGINAL DETECTION OFF 2 ORIGINAL COPY DEFAULT 1SIDED 1SIDED AUTO PAPER AUTO SIZE AUTO PAPER TRAY PRIORITY 1 SPECIAL PAPER 1st CASSETTE NORMAL 2nd CASSETTE NORMAL 3rd CASSETTE NORMAL 4th CASSETTE NORMAL BYPASS TRAY OPTION AUTO SCALE ON 2003 APR 23 WED 11 32 CHICAGO 1 2 1 TSI source name 2 Report output date ...

Page 292: ...specified for forwarding can be checked Outputting the forwarding list 1 Touch Admin 1 and then touch Rep Print Refer to Displaying the Administrator Management screen on page 13 11 2 Touch Forward List 3 Touch Enter The forwarding list is outputted Tip Even if Enter is not touched the report is automatically outputted ...

Page 293: ...SSWD REMOTE CHECK ON PORT G3 1 PORT G3 2 PORT NETWORK PUBLIC DOC RX DOC SET FORWARD PRINT FORWARD PRT FORWARD SAVE TO BOX FORWARDING DEST 2stat 001 SALES 002 MKTING 1stat 001 SALES 0stat 2stat 002 MKTING 003 HQ 2stat 001 SALES 003 HQ 2003 APR 23 WED 11 32 CHICAGO 1 2 1 TSI source name 2 Report output date ...

Page 294: ...s G For details on the necessary measures that should be taken if an icon or screen other than those mentioned here appears refer to When Certain Displays Appear in the Basic Operations volume of this copier s User Manual 15 1 1 Icons POP reception Appears during POP3 reception when e mail messages are being received POP3 reception error If this icon appears at the bottom of the screen Possible ca...

Page 295: ...15 2 Scanner Mode 15 1 2 Administrator login While registering the network Possible cause The administrator is logging in from PageScope Light Remedy Wait until the administrator has finished the operations and logged out ...

Page 296: ...ng recipient Check that the LAN cable is correctly connected and check that the FTP server address and port number and the proxy server address and port number settings are correctly specified p 3 1 p 3 18 p 3 22 ED2503 Login could not be completed because the user name or the password is incorrect Check the user name and password settings p 3 18 ED2504 The specified folder is incorrect Check the ...

Page 297: ...d while forwarding data to the FTP server Check that the LAN cable is correctly connected and that transmission to the FTP server is possible p 3 1 ED2508 An error other than those listed above occurred with the FTP server Check that the FTP server can transmit EF2509 The memory has become full Change the resolution to Fine or Standard p 6 7 Error Code Cause Remedy Page referen ce EF2509 The memor...

Page 298: ...ess or e mail address of the recipient is not specified correctly transmission is not possible Check the settings and the e mail address of the recipient p 3 3 p 8 1 E6FXXX An attempt was made to send data that is too large to be sent Even though scanning may have finished it may not be possible to send some documents Change the resolution to Fine or Standard p 8 16 EAXXXX The LAN cable is not con...

Page 299: ...s incorrect reception is not possible Check the settings p 3 3 E60XXX E61XXX Data that cannot be printed was received through a POP3 reception An attached file other than a TIFF F file text with a line that exceeds 1000 character or an e mail with a large size was received Otherwise an e mail message containing no data was received Check with the sender ECXXXX The LAN cable is not connected or the...

Page 300: ...ied in Image Receiver and then quit and restart Image Receiver p 9 1 Image Receiver is not operating correctly Restart the computer Re install IP Scanner Check the TCP IP settings on the computer p 3 29 The LAN cable is not connected Check that the LAN cable is correctly connected p 2 12 The network settings on the computer are not specified correctly Check the TCP IP settings on the computer The ...

Page 301: ...network settings on the computer are not specified correctly Check the TCP IP settings on the computer The network load on the sender s computer is too high Check that large e mail messages are not being sent from the sender s computer and that large files are not being downloaded from the Web Too much data is being sent If a high scanning resolution has been specified reduce the pages and scan ag...

Page 302: ...n on the Job List screen to check the details of the transmission error and then refer to the table of error codes p 8 40 p 15 3 Transmission is possible but the image cannot be outputted at the recipient s terminal or computer The recipient s terminal is not able to handle the sent image Change the size resolution and coding method so that they are supported by the recipient s terminal and then t...

Page 303: ...r causes Touch Com on the Job List screen to check the details of the transmission error and then refer to the table of error codes p 8 40 p 15 3 Problem Cause Remedy Page referen ce Reception is not possible The connections are incorrect Check the LED indicator on the hub and check the connections The setting to not automatically check for new e mail messages has been specified Specify a time int...

Page 304: ...d as is as text This is not a malfunction of the device Ask the sender to send the data as MIME The same document is received many times Since the size of the mail is too large the connection with the server times out while the data is being received Specify that the data be kept on the computer and delete the corresponding e mail messages from the server Ask the sender to try sending e mail messa...

Page 305: ...k the e mail address in the one touch key specified as the forwarding location p 11 1 Other causes An error e mail message may be received at the e mail address of the account that is setting mail distribution Check the contents of the e mail message p 11 1 Problem Cause Remedy Page referen ce Transmission is not possible Refer to the transmission error codes Touch the Com button on the Job List s...

Page 306: ... terminal or reception to a computer cannot be interrupted It takes some time to interrupt the operation Wait until the operation is interrupted To interrupt the operation quickly close Image Receiver However data already received at the computer but not yet processed with IP Scanner will be deleted Problem Cause Remedy Page referen ce Problem Cause Remedy Page referen ce Transmission is not possi...

Page 307: ...It takes some time to interrupt the operation Wait until the operation is interrupted To interrupt the operation quickly close Image Receiver However data already received at the computer but not yet processed with IP Scanner will be deleted The message Failed to connect to machine appears The copier has not been turned on Turn on the copier The IP address for the device that inputs into IP Scanne...

Page 308: ...t up again perform the scan transmission again When Image Receiver is closed received data that has not yet been processed with IP Scanner will be deleted A high load was temporarily placed on the computer While receiving the scan transmission image complicated processes cannot be performed by the computer The file size of the received data is large The received data may have exceeded the amount t...

Page 309: ...ment again p 10 24 IP Scanner cannot be started up TCP IP is not ready Open Network and Dial up Connections in Windows add the Microsoft TCP IP protocol and then restart the computer IP Scanner is already started up Multiple copies of the application cannot run at the same time Image Receiver cannot start up TCP IP is not ready Open Network and Dial up Connections in Windows add the Microsoft TCP ...

Page 310: ...em with the drive of the save destination Change the save destination The message Image folder not found appears The specified folder does not exist Check the name of the storage folder Change the name of the storage folder p 10 5 Problem Cause Remedy Page referen ce Problem Cause Remedy Page referen ce Data does not arrive at the copier The settings for Network FAX are incorrect Check the setting...

Page 311: ... server will not use The LAN cable is damaged Replace the LAN cable Login failed Before logging in this time a different user name and password had been entered to log in Once login is successful that user name and password is saved in the browser until the browser is closed Close the browser and then start it up again The text in the window is disorganized The browser is too small Increase the si...

Page 312: ...f words may be removed Entered data was erased when an error occurred while specifying settings Depending on the browser settings that appear as such as passwords may be erased Problem Cause Remedy Page referen ce Problem Cause Remedy Page referen ce Even though the network application is installed Network Settings does not appear on the Administrator Management screen The device is not operating ...

Page 313: ...15 Troubleshooting 15 20 Scanner Mode ...
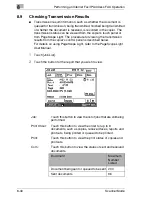
Page 314: ...ed in this manual is subject to change without notice to incorporate improvements made on the product or products the manual covers MINOLTA CO LTD 3 13 2 chome Azuchi Machi Chuo ku Osaka 541 8556 Japan Copyright 2003 MINOLTA CO LTD ...

Reviews: