Performing a Scan to E-Mail Operation
4
Scanner Mode
4-3
7
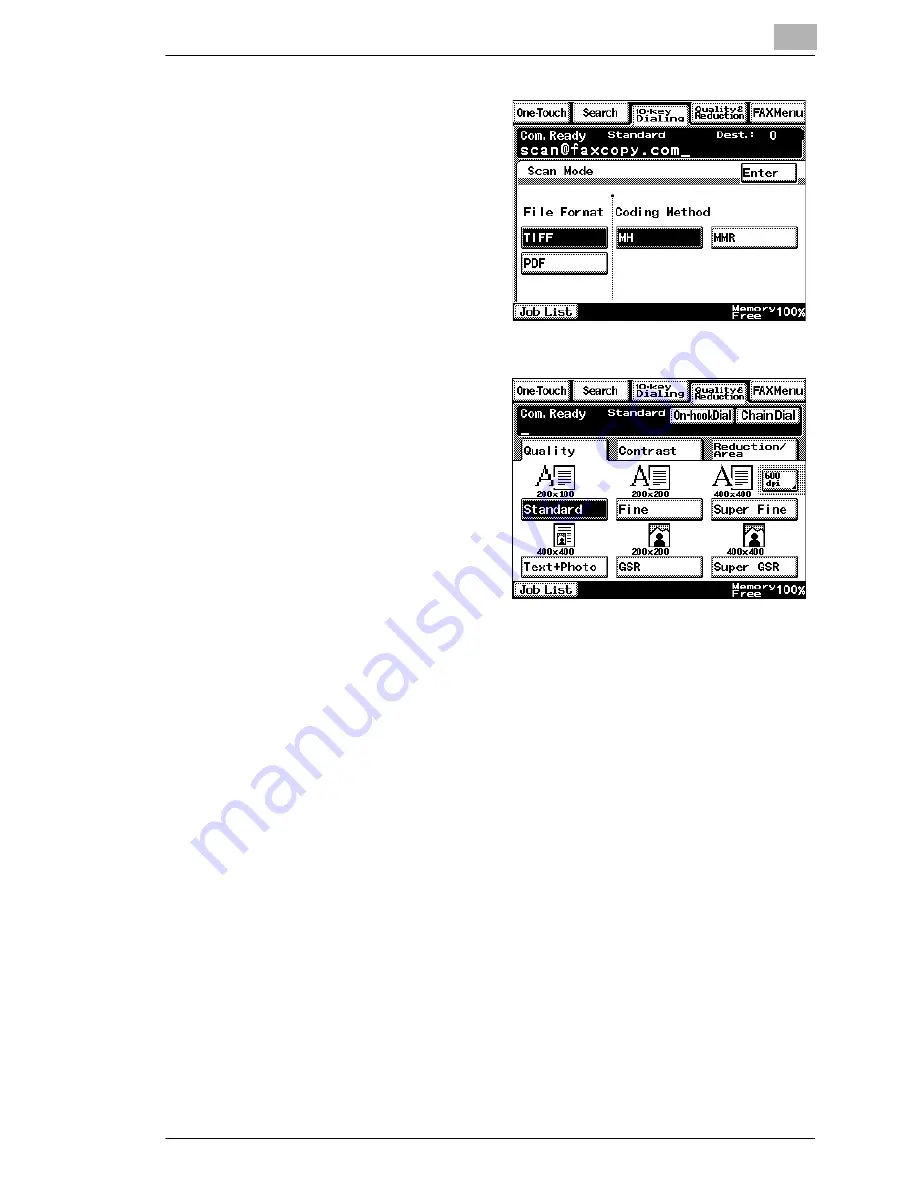
To change the file format or
coding method, touch [Scan
Mode], and then specify the
desired settings.
8
Specify the image quality,
density and zoom ratio
according to the document
to be scanned.
❍
Refer to
“Specifying the
Scanning Options” on
page 4-18
.
9
Press the [Start] key.
The transmission begins.
If the document is placed on the original glass:
G
When scanning multiple document pages, continue scanning by
placing each consecutive page on the original glass, then pressing the
[Start] key.
G
After all pages of the document to be sent are scanned, touch [Scan
End], and then press the [Start] key. The transmission begins.
If the transmission could not be completed
G
The unit will automatically try again (auto redial) up to five more times
at one-minute intervals.
G
The number of auto redials and the interval can be specified. For
details, refer to
“Specifying Transmission Settings” on page 13-21
.
G
If the transmission could not be completed after auto redialing, a
transmission report is outputted.
Part of the first page of sent document is copied onto this report.
If it is not necessary to output the transmission report, change the
settings.
Summary of Contents for Scanner Mode
Page 1: ...User Manual 4514 7706 01 Scanner Mode ...
Page 19: ...1 Introduction 1 8 Scanner Mode ...
Page 33: ...2 Overview 2 14 Scanner Mode ...
Page 103: ...5 Performing a Scan to Server FTP Operation 5 12 Scanner Mode ...
Page 113: ...6 Performing a Scan to PC FTP Operation 6 10 Scanner Mode ...
Page 127: ...7 Performing a Scan to HDD Operation 7 14 Scanner Mode ...
Page 183: ...9 Performing a Scan to PC SMTP Operation 9 8 Scanner Mode Scan Area Select the scanning size ...
Page 185: ...9 Performing a Scan to PC SMTP Operation 9 10 Scanner Mode ...
Page 211: ...10 Using IP Scanner 10 26 Scanner Mode ...
Page 217: ...11 Distribution of Fax Documents 11 6 Scanner Mode ...
Page 219: ...12 Network Fax Transmission 12 2 Scanner Mode ...

