background image

41

40

REWINDING THE FILM - MANUAL

Use manual rewind when you want to switch to a different
type or speed of film before the current roll is finished.

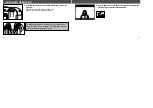
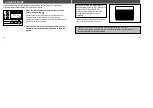
1. Press the manual-rewind button.

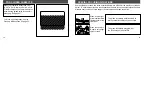
2. Follow steps 1- 3 from automatic rewind.

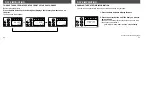
• The film's VEI indicator will be 

.

Mid Roll Change (MRC)

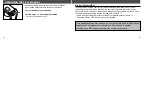
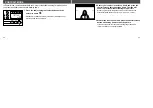
In cameras with the MRC feature, film can be rewound in the middle of the roll and
reloaded at a later time. When reloaded, the camera will advance the film to the first
unexposed frame. Film can be rewound and reloaded until the last frame is taken, when
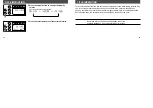
the camera automatically rewinds the film and sets the VEI to 

• Cameras without the MRC feature set the VEI for partially-exposed rolls to 

.  

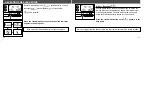
Cassettes with the 

VEI current can not be reloaded.

Only partially-exposed film rewound in a Minolta camera with Mid Roll Change
capability can be reloaded into this camera. Film rewound in another
manufacturer’s MRC capable camera may not function properly.

Summary of Contents for VECTIS 40

Page 1: ...e viewfinder frame changes to match each format selection Date and Title Imprinting Before taking the picture you can choose to have date information printed on the front and or one of three preselect...

Page 2: ...88 Technical Details 90 TABLE OF CONTENTS FOR PROPER AND SAFE USE 4 NAMES OF PARTS 14 GETTING STARTED Attaching the Strap 19 Installing the Battery 20 Checking the Battery Power 21 Diopter Adjustment...

Page 3: ...es what act is prohibited The example at left means do not disassemble FOR PROPER AND SAFE USE Various symbols are used throughout this instruction manual and the product itself for the proper and saf...

Page 4: ...sed immediately remove the batteries and discontinue use Do not disassemble Take your camera to a Minolta Service Facility when repairs are required Electric shock may occur if a high voltage circuit...

Page 5: ...or others may occur Flash fired near the eye Strap wound around the neck SAFETY CAUTIONS CONT BATTERIES MAY EXPLODE DUE TO IMPROPER USE Read and follow all warnings supplied with the batteries Do not...

Page 6: ...s camera is not sandproof do not place the camera directly on the ground 5 Remove moisture from the camera especially salt water and spilled liquids containing sugar 6 If the rubber seals appear crack...

Page 7: ...d for use from 10 to 40 C 14 to 104 F Never leave your camera where it may be subjected to extreme temperatures such as the glove compartment of a car At colder temperatures the data panel response ti...

Page 8: ...ocus window Viewfinder window Remote control receiver Lens Format switch Flash Main switch Zoom lever Viewfinder Diopter adjustment dial Flash mode button Self timer Remote control button Subject prog...

Page 9: ...k 7 Focal length mark 8 Title Date Time Focal length Film speed Print quantity indicator 9 Frame counter 10 Film transport signals 11 Battery condition indicator 12 Film cassette mark 13 Remote contro...

Page 10: ...19 18 ATTACHING THE STRAP Attach the strap as shown GETTING STARTED...

Page 11: ...dicates that power is sufficient for all camera operations To save power your camera will automatically shut off if it is not operated for more than three minutes INSTALLING THE BATTERY Your camera us...

Page 12: ...eyesight The diopter adjustment range is 2 0 diopters Do not adjust the viewfinder s diopter when close up mode is selected To adjust 1 Point the camera at a brightly lit subject or a white wall 2 Wh...

Page 13: ...nces the film after each exposure Once loaded the Film Chamber Lock feature prevents the film chamber from being opened until the film is rewound into the cassette There is no need to worry about doub...

Page 14: ...the exposure number and the film s ISO in the data panel If a partially exposed roll of film VEI is loaded into this camera the film will be advanced to the first unexposed frame LOADING FILM 26 3 Op...

Page 15: ...NG FILM 28 If the film transport signals and 0 blink in the data panel press the film chamber release and remove the film If the film s current VEI is or insert a new roll of film If a processed roll...

Page 16: ...om lever to zoom out Press T on the zoom lever to zoom in 4 Center your subject in the focus frame then press the shutter release button partway down Hold the camera steady making sure your fingers do...

Page 17: ...shutter with a slow steady squeeze never a quick jab The frame counter in your camera displays the number of frames remaining not the number of frames taken 33 FOR CLOSER SUBJECTS The green focus lam...

Page 18: ...w contrast area fills the center of the viewfinder The green focus lamp will blink slowly to warn you that focus may not be accurate When your subject is near a very bright object or area The green fo...

Page 19: ...he previous page 1 Center your subject in the focus frame SPECIAL FOCUSING SITUATIONS When two subjects overlap in the focus frame The green focus lamp will glow and the closer of the two subjects wil...

Page 20: ...wn then press the film chamber release to open the film chamber door Before opening the film chamber door wipe any dirt or moisture off of the camera FOCUS HOLD 2 Press and hold the shutter release bu...

Page 21: ...oaded at a later time When reloaded the camera will advance the film to the first unexposed frame Film can be rewound and reloaded until the last frame is taken when the camera automatically rewinds t...

Page 22: ...e MRC feature may not work properly Within 1 0m 3 3 ft of an operating magnetic or electromagnetic field generator TV CRT Personal computer speakers microwave oven telephone etc Within 1 0m 3 3 ft of...

Page 23: ...e range of the built in flash depends on the film speed and the focal length you are using To ensure proper exposure make sure your subject is positioned within the flash range Focal Length Flash Rang...

Page 24: ...e red eye effect Warn your subject that the flash will fire a few short bursts just before the picture is taken SELECTING THE FLASH MODE Besides autoflash mode autoflash with red eye reduction manual...

Page 25: ...e flash is canceled Use of a tripod is recommended SELECTING THE FLASH MODE The flash will fire when the shutter is released regardless of lighting Use manual fill flash to illuminate a backlit subjec...

Page 26: ...tailor the camera s fully automatic operation to suit the subject It provides optimal camera settings for close ups portraits portraits at night landscapes and night views AUTO Full Auto Mode The came...

Page 27: ...fication of 1 6 life size on the film 1 Press the subject program select button until the pointer blinks below 2 Place the subject in the focus frame and press the shutter release button all the way d...

Page 28: ...e lens to zoom and press the shutter release button all the way down to take the picture If you manually zoom the lens after selecting the portrait mode return to autozoom is no longer possible PORTRA...

Page 29: ...of a tripod is recommended NIGHT PORTRAIT MODE In Night Portrait mode the camera balances the flash and existing light exposure so you can take beautiful pictures of people at sunset or at night The...

Page 30: ...d will most likely be slow Use of a tripod is recommended 2 Align your subject in the focus frame and press the shutter release button all the way down to take the picture In this mode focus is set to...

Page 31: ...after the picture is taken Setting the Print Quantity Before taking the picture 1 Press the print button to enter the desired number of prints The quantity will be displayed on the data panel Press th...

Page 32: ...D DISPLAY PRINT FRONT Y M D Hr Min 24 Hr No imprinting PRINT BACK Y M D Hr Min 24 Hr Y M D H M PRINT QUANTITY SELECTION 62 Setting the Print Quantity to Zero After taking the picture and before taking...

Page 33: ...ks Each press of the select button causes the next item to blink The sequence is as follows year month date hour minute stops blinking This camera has a quartz clock and automatic calendar through the...

Page 34: ...ntil all items in the date display blink DATE IMPRINTING 66 3 Press the adjust button to change the blinking item Press and hold the adjust button to change the value rapidly 4 Repeat steps 2 and 3 un...

Page 35: ...n chosen the title will be recorded on the film s magnetic data strip At certified Advanced Photo System labs the selected title will be printed on the back of the print Some labs may not be able to p...

Page 36: ...le you want from the title list Three title codes have been set into memory You can change one or all three title codes at any time TITLE IMPRINTING 70 TITLE PRINT DATE SEL ADJ Title Code Titles are d...

Page 37: ...k 5 Press the select button to make the next digit blink change the number using the adjust button TITLE IMPRINTING 72 4 Press the adjust button to change the value of the blinking number Press and ho...

Page 38: ...t Each press of the title button changes the title code to the next selection 2 Take the picture The magnetic data is written and the selection is canceled for the next frame TO HAVE THE TITLE IMPRINT...

Page 39: ...d the film cassette mark is blinking 1 Press title to select the desired title Each press of the title button changes the title code to the next selection SETTING A FILMSTRIP TITLE 2 Set the title by...

Page 40: ...lowly during the self timer countdown To cancel the self timer operation press the self timer drive mode button or turn the camera off The self timer is automatically canceled after the shutter releas...

Page 41: ...the remote control is not operated for more than eight minutes CONTINUOUS DRIVE MODE In this mode the camera continuously takes pictures and advances the film as long as the shutter release button is...

Page 42: ...ONTROL MODE 3 Point the remote control toward the front of the camera and press or 2s If you press the release button marked with the lamp on the front of the camera will blink once and the picture wi...

Page 43: ...k into the remote control CHANGING THE BATTERY The remote control uses a 3V lithium battery CR2032 When pressing the remote control buttons does not release the shutter the battery must be replaced Th...

Page 44: ...s required for certification see your photofinisher for a full list of available services Reprints Images are always captured in the H format You can select any of the three formats when ordering repr...

Page 45: ...aning fluid and gently wipe the lens in a circular motion starting from the center Never place lens fluid directly on the lens Never touch the lens surface with your fingers Never use alcohol or solve...

Page 46: ...YPE IX240 Lens Shutter LENS 30 120mm f 3 5 9 9 power zoom lens equivalent to approx 38 to 150mm in the 135 system 6 elements 6 groups construction including 2 two sided aspheric elements Maximum Magni...

Page 47: ...vide reasonable protection against harmful interference in a residential installation This equipment generates uses and can radiate radio frequency energy and if not installed and used in accordance w...

Page 48: ...109 Solna Sweden Finland Branch Niittykatu 6 PL 37 SF 02201 Espoo Finland Minolta Portugal Limitada Rua Afonso Lopes Vieira 55 B P 1700 Lisboa Portugal Minolta Corporation Head Office 101 Williams Dri...

Reviews: