•
After using your Weathermatic-A underwater, especially that which contains
chlorine or salt, rinse the camera in fresh water for a minute or two to wash off any salt,
chemicals or debris that might be on the camera. Then wipe the camera completely dry
with a soft clean cloth before opening the back cover.
•
At depths greater than 5m (15 ft.), water pressure will push the shutter release in
making the camera inoperable. Flooding may also result.
ACCESSORIES
Sportsfinder (optional)
The Sportsfinder allows you, in those situations where it is not possible or practical to
use your camera's viewfinder, to compose your subject or scene correctly.
It is ideally suited for the underwater use of your Minolta Weathermatic-A.
To properly frame your subject in the Sportsfinder, your eye should be positioned
approx. 80mm (3 in.) behind the center of the sportsfinder's grid. If the eye is correctly
positioned, the hole in the center of the grid should appear perfectly round and you
should not be able to see the slopping sides of the sportsfinder. The grid lines and
frame should all appear as thin black lines.
Underwater, the area of the scene covered by the sportsfinder will correspond to that
covered by the camera viewfindeer.
The sportsfinder will give approx. 85% coverage of the scene.
Use of the Sportsfinder above water is the same as underwater, but the coverage of the
finder will be only 64% of what will actually appear on the film.
78 MAINTENANCE OF O-RING
Your Weathermatic-A's ability to resist the elements and stay watertight depends on the
condition of the back cover's 0-ring. With proper care, it should be serviceable for
approximately one year. Be sure to inspect the 0-ring for cuts, tears, abrasion and fit
each time the back cover is opened. If there is any sand or dirt on the inside of the back
cover or 0-ring, remove the 0-ring as described below and wash both throughly in fresh
running water. Then blot off excess moisture and allow them to air dry in subdued
light, never in direct sunlight. If the 0-ring is worn or stretched so that the back cover
will not seat properly, the 0-ring should be replaced.
Removing the 0-ring
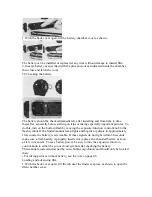
Insert the tip of a ball point pen or similar blunt object into the knotched end of the
black retainer and carefully lift the
0-ring out of the groove. Then being careful not to stretch the 0-ring, remove it from the
back cover.

