background image

31

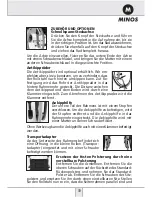
Seriennummer

Jeder Rollstuhl hat ein Typenschild
mit der Seriennummer auf dem
Karton und auf dem Seitenrahmen.
Das Typenschild identifiziert den Produktionszeitraum, die Chargen-
nummer und den Hersteller oder Importeur.

Entfalten des Rollstuhls

Drücken Sie auf die Rohre, auf denen das Sitz-
polster angebracht ist. ACHTUNG: Achten Sie
darauf, dass Sie sich nicht die Finger zwischen
den Rohren und dem Rahmen einklemmen. Die
Rohre müssen auf den Aufnahmen aufliegen.

Hilfsscheren

Die Hilfsscheren an der Kreuzschere sorgen
dafür, dass die Seitenrahmen beim Falten und
Entfalten immer in einer parallelen Position
bleiben und dass der Rollstuhl in einer gefal-
teten Position stabil bleibt.

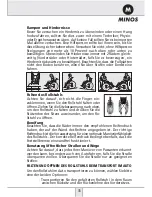
Anbringen und Abnehmen der Beinstützen

Setzen Sie jede Beinstütze nach außen abgewinkelt
in die dafür vorgesehene Öffnung ein (siehe Foto).
Anschließend drehen Sie die Beinstütze um 90

°

 bis

sie einrastet. Um die Beinstütze abzunehmen, drücken
Sie auf den Hebel, drehen die Beinstütze um 90

°

nach außen und ziehen sie heraus.

Reifendruck (Luftbereifung)

Vergewissern Sie sich, dass die Reifen den richtigen
Druck haben. Der empfohlene Reifendruck ist auf
der Wand des Reifens angegeben.
Überprüfen Sie die korrekte Funktionsweise der
Bremse.
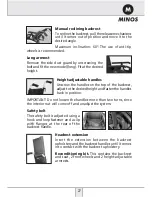
Um die Bremse festzustellen, drücken Sie die Bremshebel nach vorne;
um sie zu lösen, ziehen Sie die Bremshebel nach hinten. Eine Feder
sorgt dafür, dass die gelöste Bremse nicht mit dem Reifen in Berührung
kommt.
Wir empfehlen, die Bremse festzustellen, wenn Sie in den Rollstuhl
einsteigen oder aus dem Rollstuhl aussteigen.
WICHTIG: Die Bremsen dürfen nicht benutzt werden, um den Rollstuhl
abzubremsen. Sie dürfen nicht eingesetzt werden, solange der Rollstuhl
in Bewegung ist.

Summary of Contents for PLENA

Page 1: ...MINOS PLENA MANUAL DE USUARIO USER S MANUAL BEDIENUNGSANTLEITUNG ...

Page 2: ...lena 4 Transferencias a y desde la silla 4 Apoyabrazos 5 Advertencias seguridad y funcionamiento 5 Plegado y desmontaje para transporte en el coche 7 Controles y mantenimiento 8 Reparaciones y sustitución de piezas 8 Reciclaje y embalaje 8 Minos Plena 8 Accesorios y opciones 11 Medidas y datos generales 14 ...

Page 3: ...ativa ISO 7176 8 MINOS Pol Industrial Sangroniz Iberre Kalea 7 48150 Sondika Vizcaya España Tfno 34 94 453 32 30 Fax 34 94 453 30 01 Email pedidos minos97 com www minos es Garantía de por Vida Las Sillas Minos Irati tienen garantía de por vida en chasis y cruceta INFORMACIÓN IMPORTANTE ANTES DE USAR LA SILLA DE RUEDAS Como desembalar la silla de ruedas Minos Las sillas de ruedas Minos vienen embal...

Page 4: ...n el orificio señalado en la foto Una vez colocados gire 90º grados hasta que quede anclado Para desmontarlos hay que presionar la palanca girar 90º cada reposapiés hacia el exterior y extraerlos Presión de los neumáticos Asegúrese que los neumáticos conservan la presión recomendada en los laterales de la cubierta Está señalada en el mismo neumático de la rueda La presión recomendada es aproximada...

Page 5: ...abrazos abatible desmontable y regulable en altura Espuma del apoyabrazos regulable en altura Eje desmontable rápido de la rueda Rueda trasera Aro de propulsión de aluminio Cruceta plegable Reposapiés abatibles y desmontables Paleta del reposapiés Talonera Horquilla de la rueda delantera Rueda delantera Asiento acolchado con bolsillo Freno de estacionamiento 15 14 13 12 11 10 9 8 7 6 5 4 3 2 1 COM...

Page 6: ...otros estándares que se puedan encontrar en el mercado El uso de algún componente ajeno a Minos anularía inmediatamente la garantía de la silla Consulte a su distribuidor antes de realizar el cambio de cualquier componente Apoyabrazos y reposapiés Asegúrese que el apoyabrazos y el reposapiés están bien anclados No debe Usted nunca levantar la silla por los apoyabrazos o reposapiés ya que el usuari...

Page 7: ...a silla y evita que la silla vuelque Ruedas antivuelco opcional La función de este dispositivo de seguridad es evitar que la silla de ruedas vuelque hacia atrás Se le reco mienda el uso en todo momento de las ruedas anti vuelco Inclinarse hacia delante o hacia atrás Estas maniobras podrían causar el vuelco de la silla por lo tanto se recomienda que en ningún caso realice movimientos bruscos Si nec...

Page 8: ...legar y desplegar la silla Tire hacia arriba longitudinalmente de la tapicería del asiento para plegarla y empuje los tubos sobre los que descansa el asiento para desplegarla Neumáticos Asegúrese que los neumáticos conservan la presión recomendada en los laterales de la cubierta El correcto inflado de los neumáticos es fundamental para la maniobrabilidad de la silla Además el correcto inflado afec...

Page 9: ...apretar los tornillos Las dos posiciones de la horquilla delantera Sirven para colocar las ruedas de 8 6 y 5 pulgadas y poderlas colocar en ambas posiciones GENERAL La silla se cierra y se abre fácilmente La silla rueda correctamente en línea recta FRENOS No interfieren con los neumáticos al rodar Se accionan fácilmente Cumplen su función de freno de estacionamiento No presentan holguras CRUCETA C...

Page 10: ...ortazapatas y ajusta el kit que se suministra Ajusta la nueva rueda trasera en el tambor En la parte superior de asa coloque el prolongador del puño y en la parte delantera coloque la maneta del freno Ajusta el cable y la funda Minos Plena con freno tambor Como se acciona y suelta el freno La silla tiene dos manetas una en cada una de las asas del respaldo Para accionar el freno apriete ligerament...

Page 11: ...10 MANUAL DE USUARIO PLENA ...

Page 12: ...or trasera de la silla existe un tapón Para colocar el pisador quita el tapón e introduzca el eje del pisador Para fijar la posición del pisador una vez alineados los orificios del chasis y del eje del pisador se unen con una tuerca y un tornillo Otra opción es colocar el pisador con pinza bloqueo que no necesita ningún tipo de herramienta Ruedas ascensor En la parte inferior trasera del chasis ha...

Page 13: ... extremo superior y empuje hacia abajo El apoyagemelos es basculante y se regula con la maneta lateral Para ajustar en altura el reposapies suelte la maneta lateral y ajuste a la altura deseada Soporte amputado Tiene dos tornillos y cuatro tuercas en la parte inferior de la plataforma que permiten variar la posición del soporte según se desee Se puede regular en altura y en inclinación Respaldo re...

Page 14: ...oje las manetas de las asas situadas en la parte superior del respaldo ajuste a la altura deseada y vuelve a apretar NOTA IMPORTANTE Nunca aflojar mas de dos vueltas la maneta ya que se caerá la tuerca interior y desajusta el sistema Cinturón de seguridad Se ajusta mediante un belcro y un clip con unas bridas en la parte trasera del asa respaldo Extensión cabecero Introduzca la extensión entre el ...

Page 15: ...m Profundidad 42 cm Altura respaldo 47 cm Altura reposabrazos Ajust 20 27 cm Anchura total 51 55 59 63 66 cm Altura total 94 cm Longitud total 89 cm 65 cm Anchura plegado 31 cm Peso Peso 15 Kg Peso máximo del usuario 125 Kg Sin reposapies Puede sufrir variaciones en función de sus componentes Minos Plena 51 Max 140 Kg PLENA ...

Page 16: ......

Page 17: ...parts 18 Getting in and out of the chair 18 Armrest 19 Safety and operation 19 Folding and unfolding for the car transport 21 Controls and maintenance 22 Repairs and spares 22 Recycling and packaging 21 Minos Plena Wheelchair models 22 Accessories and options 25 Dimensions and general information 28 ...

Page 18: ...ard MINOS Pol Industrial Sangroniz Iberre Kalea 7 48150 Sondika Vizcaya Spain Tel 34 94 453 32 30 Fax 34 94 453 30 01 E mail pedidos minos97 com www minos es Lifetime Guarantee Minos Irati wheelchairs have a lifelong guarantee for the sideframe and crossbar IMPORTANT INFORMATION BEFORE USING THE WHEELCHAIR Como desembalar la silla de ruedas Minos How to unpackage your Minos wheelchair Minos wheelc...

Page 19: ...ootplates Fit each footplate perpendicular to the sideframe in the hole shown in the photo Once fitted turn it 90 until it is fastened in position To remove the footplates press the lever turn each footplate 90 outwards and pull them out Tyre pressure Make sure that the tyres have the pressure recom mended on the tyre walls It is marked on the tyre itself The recommended pressure is approximately ...

Page 20: ...ndle Backrest Armrest release mechanism for folding removing and adjusting the height of the armrest Height adjustable padded armrest Quick release wheel axle Rear wheel Aluminium handrim Folding crossbar Folding removable footrests Footplate Heel strap Front wheel fork Front wheel Padded seat with pocket Parking brake 15 14 13 12 11 10 9 8 7 6 5 4 3 2 1 WHEELCHAIR PARTS Side approach Front approa...

Page 21: ...not be replaced by other standard parts available on the market The use of any part that is not an original Minos part renders the chair guarantee null and void Please consult your distributor before changing a part Armrest and footrest Make sure that the armrest and footrest are securely fastened in position Do not lift the chair by the armrest or footrest under any circumstances since this could...

Page 22: ...it from tipping over Anti tip wheels optional The function of this safety device is to prevent the wheelchair from tipping over backwards We recom mend the use of anti tip wheels at all times Leaning forwards or backwards These movements could tip the chair over Conse quently we recommend you make no sharp move ments under any circumstances If you need to lean backwards keep your back against the ...

Page 23: ...wheelchair Take care not to trap your fingers when folding and unfolding the chair Pull upwards along the length of the seat upholstery to fold it and push the tubes on which the seat rests to unfold it Tyres Make sure that the tyres have the pressure recommended on the tyre wall Correct tyre pressure is essential for the manoeuvrability of the chair The correct pressure also affects the hold of t...

Page 24: ...brake shoe to work on the tyre and tighten the bolts GENERAL The chair can be folded and unfolded easily The chair travels correctly in a straight line BRAKES They do not interfere with the tyres during movement They can be applied easily They fulfil their parking brake function They have no play CROSSBAR Check for alignment The four wheels are on the ground ARMRESTS They are fitted correctly and ...

Page 25: ...e po sition unscrew the nut and bolt and change the position of the bearing to the new hole Converting an Minos Plena in a Minos Plena with Drum Brake Remove the rear wheel remove the wheel axle fit into the wheel axle the drum brake support and fix the drum brake kit Fit the new rear wheel on the drum At the top of the handle fit the grip extension and mount the brake handle on the front Adjust t...

Page 26: ...24 USER MANUAL PLENA ...

Page 27: ...p Stepping pad The lower part of the rear of the chair has a stopper To fit the tread remove the stopper and insert the tread in the tread axle To fasten the position of the tread once the holes in the frame and in the tread axle are in line attach these parts together using a nut and bolt The tread can also be fitted using a clamp with no need for tools Small wheels for lifts At the bottom of the...

Page 28: ...n at different heights To lower the footrest press the lever on the upper end and push down The calf support tilts and is adjusted with the handle on the side To adjust the height of the footrest release the side handle and adjust to the desired height Stump support It has two bolts and four nuts at the bottom of the platform so that the support position can be varied as required Both the height a...

Page 29: ... the backrest adjust to the desired height and fasten the handles back in position IMPORTANT Do not loosen the handles more than two turns since the interior nut will come off and unadjust the system Safety belt The safety belt is adjusted using a hook and loop fastener and a clip with flanges at the rear of the backrest handle Headrest extension Insert the extension between the backrest upholster...

Page 30: ...ht 50 cm Depth 42 cm Backrest height 47 cm Armrest height Adjustable from 20 27 cm Total width 51 55 59 63 66 cm Total height 94 cm Total length 89 cm 65 cm Width in folded position 31 cm Weight Weight 15 Kg Maximum user weight 125 Kg Without footplates May vary according to parts Minos Plena 51 Max 140 kg PLENA ...

Page 31: ......

Page 32: ...lstuhls 32 Einsteigen in den Rollstuhl und Verlassen 32 des Rollstuhls Armlehnen 33 Sicherheit und Bedienung 33 Falten und Öffnen des Rollstuhls beim 35 Transport im Auto Kontrolle und Wartung 36 Reparaturen und Ersatzteile 36 Recycling der Verpackung 36 Minos Trendy Modelle 36 Zubehör und Optionen 39 Allgemeine Informationen 42 ...

Page 33: ...di zinprodukte 1998 welche die Zertifizierung nach DIN EN ISO 7176 8 erfordert MINOS Pol Industrial Sangroniz Iberre Kalea 7 48150 Sondika Bizcaya Spain Tel 34 94 453 32 30 Fax 34 94 453 30 01 Email pedidos minos97 com www minos es Lebenslange Garantie Wir gewähren für Minos Alu Rollstühle eine lebenslange Garantie auf den Rahmen und die Kreuzstrebe WICHTIGE INFORMATION BITTE VOR DER BENUTZUNG DES...

Page 34: ...Beinstütze nach außen abgewinkelt in die dafür vorgesehene Öffnung ein siehe Foto Anschließend drehen Sie die Beinstütze um 90 bis sie einrastet Um die Beinstütze abzunehmen drücken Sie auf den Hebel drehen die Beinstütze um 90 nach außen und ziehen sie heraus Reifendruck Luftbereifung Vergewissern Sie sich dass die Reifen den richtigen Druck haben Der empfohlene Reifendruck ist auf der Wand des R...

Page 35: ...tperson beim Einsteigen in den Rollstuhl oder beim Verlassen des Rollstuhls haben bis Sie diese Übung sicher beherrschen Schiebegriffe Rückenlehne Seitenteil rückschwingbar und abnehmbar Gepolsterte Armauflage höhenverstellbar Herausnehmbare Schnellspannsteckachse des Rades Hinterrad Aluminium Greifreifen Kreuzschere faltbar Beinstützen abschwenkbar und abnehmbar Fußplatte hochklappbar Fersenband ...

Page 36: ...d Elemente sind Originalteile und dürfen nicht durch Ersatzteile von anderen Marken die erhältlich sind ersetzt werden Sollte irgendein anderes Ersatzteil als ein Original Minos Ersatzteil verwendet werden erlischt die Garantie für den Stuhl Bitte beraten Sie sich mit Ihrem Händler bevor Sie ein Ersatzteil auswechseln Arm und Beinstützen Stellen Sie sicher dass Arm und Beinstützen fest am Stuhl an...

Page 37: ...mzukippen Antikippräder optional Die Funktion dieses Zubehörs dient dazu den Rollstuhl davor zu bewahren rückwärts umzukippen Wir em pfehlen daher den Rollstuhl immer mit Antikipprädern zu bestellen Vor oder Zurücklehnen im Rollstuhl Diese Bewegungen könnten zu einem Umkippen des Rollstuhls führen Daher empfehlen wir ruck artige Bewegungen zu vermeiden Sollten Sie sich nach hinten lehnen müssen le...

Page 38: ...falten oder öffnen Ziehen Sie die Sitzbespannung nach oben um den Rollstuhl zu falten und drücken Sie die Stützrohre des Sitzes auseinander um den Ro llstuhl zu öffnen Bereifung Beachten Sie dass die Räder immer den empfohlenen Reifendruck haben der auf der Wand des Reifens angegeben ist Der richtige Reifendruck ist die Voraussetzung für eine optimale Manövrierfähigkeit des Rollstuhls Der korrekte...

Page 39: ...auf dem Reifen anliegt Dann wird der Bremsschuh wieder befestigt ALLGEMEIN Der Rollstuhl kann einfach gefaltet und geöffnet werden Der Rollstuhl fährt immer geradeaus BREMSEN Die gelösten Bremsen haben keinen Kontakt zu den Reifen Die Bremsen können leicht festgestellt werden Die Bremsen erfüllen ihren Zweck als Feststellbremsen Die Bremsen haben kein Spiel KREUZSCHERE Die Seitenrahmen sind parall...

Page 40: ...rommelbremse Montieren Sie die Verlängerung der Schiebegriffe und die Bremshebel Stellen Sie die richtige Länge des Bowdenzuges ein Das Nachrüsten des Minos Trendy mit einer Trommelbremse darf nur von einem Fachhändler durchgeführt werden Feststellen und Lösen der Bremse Der Rollstuhl hat an jedem der beiden Schiebegriffe einen Bremshebel Der Bremshebel wird nach oben gezogen bis der Rollstuhl ver...

Page 41: ...38 BEDIENUNGSANLEITUNG TRENDY ...

Page 42: ...rch eine Klammer eingestellt Zum Abnehmen des Antikipprades wird die Klammer entfernt Ankipphilfe Der untere Teil des Rahmens ist mit einem Stopfen verschlossen Um die Ankipphilfe zu befestigen wird der Stopfen entfernt und die Ankipphilfe in das Rahmenrohr eingesteckt Die Ankipphilfe wird mit einer Mutter und einer Schraube fixiert Ohne Werkzeug kann die Ankipphilfe auch mit einer Klammer befesti...

Page 43: ...können geklappt und mit dem seitlichen Griff verstellt werden Um die Höhe der Fußstützen zu verstellen lösen Sie den seitlichen Griff und stellen Sie die gewünschte Höhe ein Amputationsbeinstütze Die Amputationsbeinstütze hat 2 Schrauben und 4 Muttern an der Unterseite so dass die Beinstütze wie gewünscht eingestellt werden kann Sowohl die Höhe als auch der Winkel können eingestellt werden Rückenv...

Page 44: ...Stellschrauben oben am Rücken stellen Sie die gewünschte Höhe ein und ziehen Sie die Stellschrauben wieder an WICHTIG Lockern Sie die Griffe nicht mehr als 2 Umdrehungen da sonst die innere Mutter herausgedreht wird und damit der Rollstuhl instabil wird Sicherheitsgurt Der Sicherheitsgurt wird mit einer Schlaufe am Rückenrohr befestigt Rückenverlängerung Führen Sie die Verlängerung zwischen dem Rü...

Page 45: ...zhöhe 50 cm Sitztiefe 42 cm Rückenlehne 47 cm Armstütze Verstellbar von 20 27 cm Gesamtbreite 51 55 59 63 66 cm Gesamthöhe 94 cm Gesamtlänge 89 cm 65 cm Gesamtbreite gefaltet 31 cm Gewicht Gewicht des Rollstuhls 15 Kg Maximal zulässiges Gesamtge wicht 125 Kg des Benutzers Ohne Armlehnen Minos Trendy 51 Max 140 Kg TRENDY ...

Page 46: ......

Page 47: ...POLIGONO INDUSTRIAL SANGRONIZ IBERRE KALEA 7 48150 SONDIKA BIZKAIA ESPAÑA TEL 34 94 453 32 30 FAX 34 94 453 30 01 E mail pedidos minos97 com http www minos97 com ...

Reviews: